

If you've ever seen those otherworldly gradient miniatures and wondered what the secret is, the answer is almost always the same: an airbrush for miniatures. It's the tool that unlocks ultra-thin, even paint layers and smooth color transitions that, let's be honest, are a nightmare to pull off with a brush. And on top of that, it saves you a ridiculous amount of time! ⏱️
Why you need an airbrush for painting your miniatures
A lot of people think airbrushing is only for professional painters with years of experience. Not at all! 🙅♂️ The truth is, it's one of the best upgrades you can make to your hobby setup, especially if you want to take your figures to the next level. Don't think of it as a luxury — think of it as an investment that will completely transform the way you paint, particularly if you work with 3D printed resin miniatures.
Save time and get a better finish
Think about how long it takes to brush-prime an entire squad or lay down base coats on a tank. It can take hours if you want perfect, brushstroke-free coverage. With an airbrush, you can knock out that same job in minutes, with a smooth, professional finish. And all that time you save lets you focus on what's actually fun: the details that bring your minis to life! 🥳
An airbrush doesn't just take the grunt work out of priming and base coating — it gives you a perfectly smooth surface that makes details, washes, and edge highlights look so much better.
The secret behind it all: atomization
So what makes this tool so special? The magic comes down to one word: atomization. An airbrush mixes pressurized air with thinned paint and sprays it as millions of microscopic droplets. This fine "mist" of paint settles onto your figure far more evenly and consistently than any brush ever could. 💨
This process is what lets you achieve those jaw-dropping results you see everywhere:
- Smooth gradients: Create perfect color transitions for OSL, shading, or blending effects.
- Flawless base coats: Say goodbye to brushstrokes and uneven texture forever.
- Subtle glazes: Apply near-transparent layers of color to shift tones with incredible precision.
- Professional varnishing: Seal your figures with a perfectly smooth, even protective coat — no weird sheen.
Bottom line: an airbrush gives you a level of paint control that's in a completely different league. It's what separates a good paint job from one that looks like it came out of a studio. Ready to make the leap? ✨
Anatomy of your future airbrush
To get the most out of your miniature airbrush, the first step is understanding what you're actually working with. Don't think of it as just a paint gun — think of it as a precision instrument, almost like a brush made of air. Knowing its key parts gives you the control to make it do exactly what you want. 🛠️
Every component has its role, and when they all work together, that's when the magic happens. Don't worry — you don't need to be an engineer. Once you see how each part works, it all clicks into place.

The heart of the airbrush: the needle and nozzle
The dynamic duo, the perfect dance partners of any airbrush, are the needle and the nozzle. These are the real stars of the show, and their coordination is what controls your paint flow. 💃
- The needle: This is the long, ultra-fine metal rod that runs through the entire body of the airbrush. Its tip acts like a stopper, sealing the nozzle opening.
- The nozzle: This is the small front piece where atomised paint exits. Its diameter, measured in millimetres (0.2 mm, 0.3 mm or 0.5 mm), determines the minimum and maximum line width you can achieve.
The mechanism is straightforward: when you pull the trigger back, the needle retracts. This opens a gap in the nozzle and allows paint to flow through. The further back you pull the needle, the more paint comes out and the wider the spray cone becomes. Simple as that!
The brain: the trigger and its action
The trigger is your command centre — the steering wheel from which you control everything. 🧠 And this is where you'll find the most important difference when choosing an airbrush: whether it's single-action or dual-action.
A single-action airbrush works like a light switch: press it and you get a fixed mix of air and paint. They're straightforward to use and great for laying down even base coats or applying varnish, but they offer very little control on the fly.
The dual-action airbrush, on the other hand, is the king of control. It's what nearly 90% of miniature painters use because it gives you complete freedom. Think of it like the accelerator and clutch of a car.
With a dual-action airbrush, pressing the trigger down releases only air. Pulling it back starts releasing paint. This lets you adjust paint flow instantly, without ever having to stop.
This mechanism opens up a whole world of possibilities: from painting ultra-fine detail lines to wide priming passes, all in one smooth, continuous motion.
The stomach: the paint cup
The cup or reservoir is, naturally, where your paint goes. There are two main feed systems for loading an airbrush: gravity feed and siphon feed.
- Siphon feed: On these models, paint sits in a bottle that attaches underneath the airbrush. The airflow creates a vacuum that draws paint upward. They work well for painting large surfaces in a single colour, but are less common for miniature work.
- Gravity feed: The cup sits on top. Paint flows down into the nozzle under its own weight. This is by far the preferred system for miniature painting. It requires less air pressure, lets you work with tiny amounts of paint, and is far more precise for detail work.
This concept map perfectly sums up how an airbrush delivers speed, control and quality across all your painting projects.
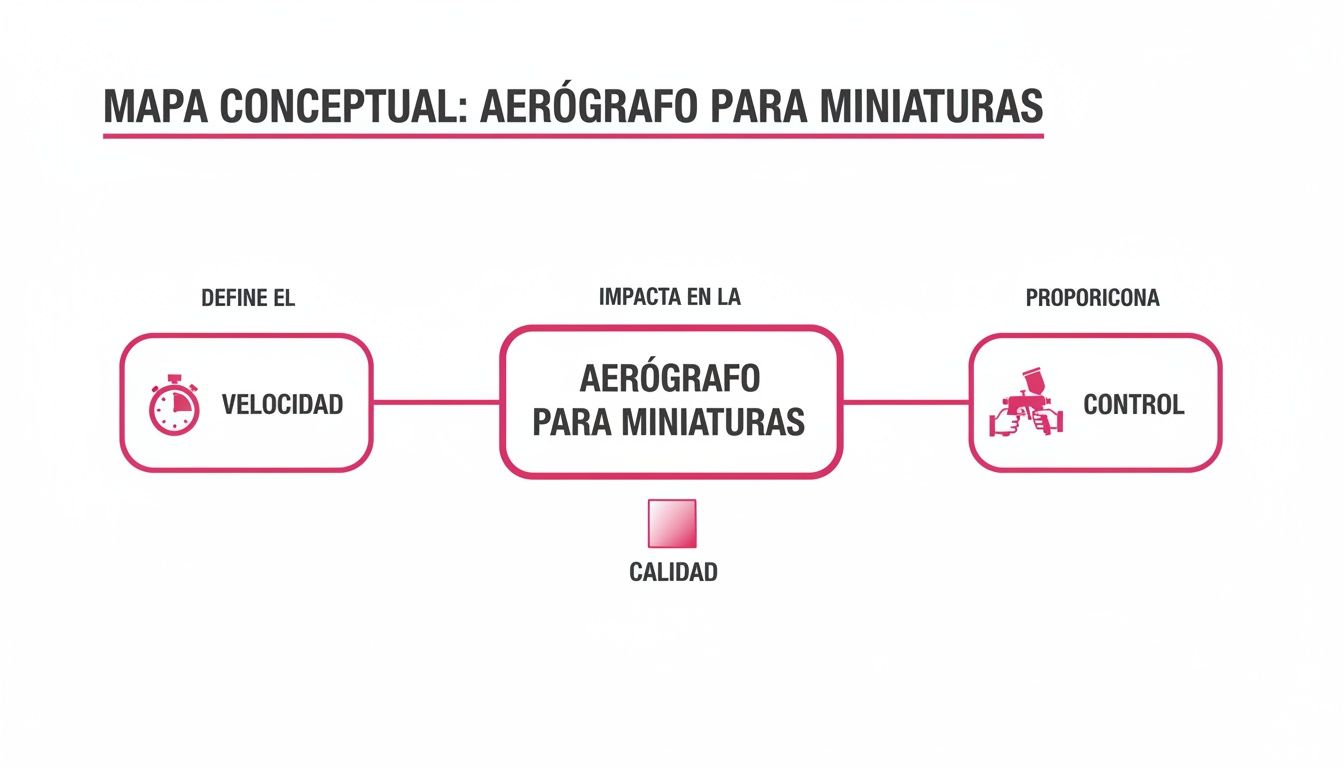
As you can see, these three advantages are all closely connected. Mastering the airbrush isn't just about painting faster — it's about painting better and with greater control, which translates into far more professional results.
How to Choose Your First Airbrush Setup Without Making Costly Mistakes
Diving into the world of airbrushing can feel overwhelming with so many options out there. 😵💫 But don't worry — this section is your buying guide to help you spend your money wisely and walk away with a setup that'll last you for years.
The key is to start with a balanced kit that's versatile and easy to get to grips with. You don't need the most expensive gear — just the most practical setup for painting miniatures. Let's break down the two essential pieces: the airbrush and the compressor.
The Best Airbrush for Beginners

If you could only take one piece of advice away from this guide, make it this: go for a gravity-fed, dual-action airbrush with a 0.3 mm nozzle. This combination is the gold standard among miniature painters, and for a very good reason — it strikes the perfect balance between fine detail and solid coverage. 🥇
- Dual-action: Gives you complete control. As we covered earlier, you press down to release air and pull back to feed paint. This is essential for creating smooth gradients and subtle blending effects.
- Gravity-fed: The top-mounted cup is far more efficient — it requires less air pressure and lets you work with very small amounts of paint. Perfect for not wasting a single drop!
- 0.3 mm nozzle: The most versatile size available. With it, you can prime an entire figure, lay down base coats, and — with a bit of practice — pull off fairly fine lines. It's the all-rounder you need when you're just starting out.
Think of the 0.3 mm nozzle like a 50 mm lens in photography: it's not the best for every single job, but it's incredibly versatile and lets you tackle 90% of your work with excellent results.
The Essential Partner: Your Compressor
Even the best airbrush for miniatures is only as good as the compressor feeding it. What matters most here isn't raw power — it's stability and quiet operation.
The feature you absolutely cannot overlook is the air tank. A compressor with a tank stores air and releases it in a smooth, continuous flow with no pulsing. This prevents the dreaded spitting that can ruin your paintwork. On top of that, the motor only kicks in when it needs to refill the tank, which reduces noise and extends the unit's lifespan.
Understanding Pressure and Noise Levels
Air pressure is measured in PSI (Pounds per Square Inch). When painting minis, you'll rarely need more than 15–25 PSI. A compressor rated at 40–50 PSI gives you plenty of headroom to work comfortably.
As for noise, look for models that operate below 50 decibels (dB). That's roughly the same sound level as a fridge humming in the background — quiet enough to paint late at night without declaring war on your neighbours or your household. 😅
Your Essential Starter Kit
To get off to the best possible start, you'll need a few accessories beyond the airbrush and compressor that will make your life a whole lot easier.

- Hose: Make sure the fittings are compatible with your setup. Braided hose options are more durable and handle tugging much better.
- Cleaning station: This is a handy unit with an airbrush holder that lets you flush paint and cleaner without making a total mess. A genuine lifesaver, trust me.
- Respirator mask: Non-negotiable! Safety first. 😷 Always use a proper respirator mask to protect your lungs from paint particles.
Airbrushing has taken the miniature painting hobby by storm. Around 65% of hobbyists are already using it to achieve professional-quality finishes. In fact, 55% of our customers combine our resins, Vallejo paints, and airbrushes with 0.3mm nozzles to paint their armies — and have cut their painting time by up to 40%. If you want to see what tools the community is reaching for most, check out the latest airbrush hobby trends for more insight.
Getting Started with Your Airbrush
Alright, you've got everything laid out. The compressor is gleaming, the airbrush feels just right in your hand… so what now? Don't panic! 😱 This section is here to help you shake off any nerves and start spraying paint like you've been doing it for years. Let's turn that "where do I even begin?" feeling into pure confidence.
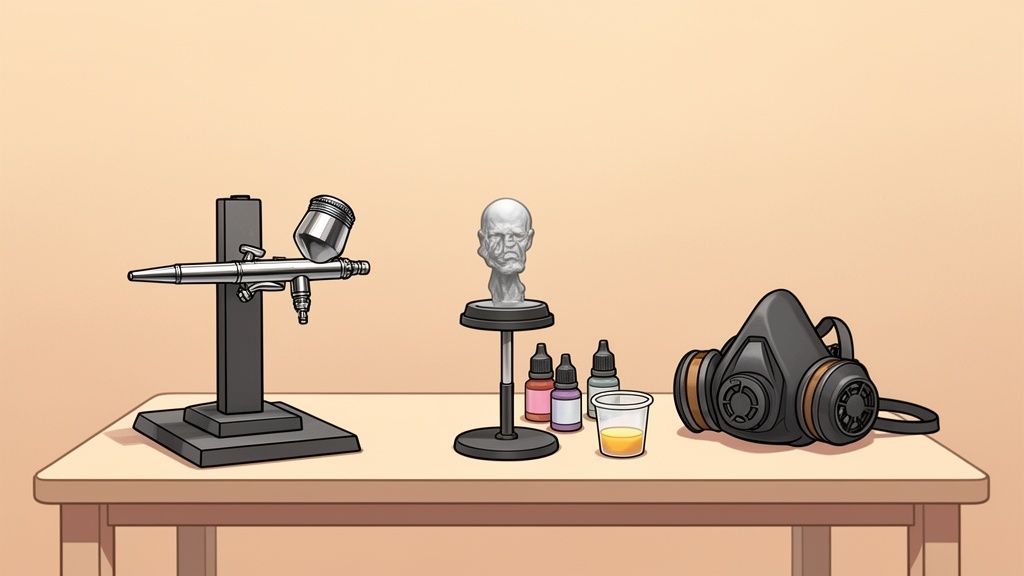
First things first: set up your workspace. You don't need a NASA lab, but you do need a well-ventilated area. Opening a window is the bare minimum — but if you can manage it, a spray booth with an extractor fan is a game changer. Cover your desk with old newspaper or a cutting mat, and keep paper towels, cotton swabs, and a jar of water or cleaner within reach. And please — your respirator mask is your best friend. Never spray without it!
Getting the Consistency Right: Thinning Your Paint
This is, without a doubt, the step where almost every beginner gets stuck. Paint that's too thick will clog your nozzle within seconds. Paint that's too thin will run straight off your miniature and cover nothing. What we're after is the classic "skim milk consistency". 🥛
Picture how skim milk flows down the inside of a glass — it's fluid, but leaves a thin, translucent layer behind. That's the texture you're aiming for. Every paint brand has its quirks, but a solid starting point for acrylics like Vallejo Game Air (which come pre-thinned) is one or two drops of thinner for every ten drops of paint. For thicker paints, like those in the Game Color range, you might need closer to a 1:1 ratio (equal parts paint and thinner).
Pro tip: Always mix outside the airbrush, or carefully in the cup itself. Add your thinner drop by drop and stir as you go. It's far easier to add one more drop of thinner than to fix a mix that's already too watery.
To check if you've got it right, test it on a piece of paper. The paint should come out in a fine, even cone — no spitting, no interruptions. If the line looks dotted or you're getting "spider legs" (spidering), it's too thin. If nothing comes out or it sputters, the paint is too thick.
Mastering the trigger: basic exercises
With your paint dialed in, it's time to tame the beast. On a dual-action airbrush, remember the mantra: press down = air. Pull back = paint. The trick is to start and end every stroke with air only. It's the golden rule: "air ON -> paint ON -> paint OFF -> air OFF".
Grab a sheet of paper and let's warm up. Set your compressor to around 15–20 PSI to start — a comfortable working pressure.
- Dots: Hold the airbrush still a few centimetres from the paper. Press down for air, then pull the trigger back briefly — just a little. Dot! Play with distance and timing to vary the size.
- Lines: Start with air only. Begin moving your hand at a steady pace, and only then pull the trigger to release paint. Before you stop moving, release the trigger to cut the paint, then let go of the air at the end. Practice thin lines (closer to the paper, less paint) and thick ones (further away, more paint).
- Gradients: Draw a square. Start filling it in with more paint on one side, then gradually ease off the trigger as you move toward the other end. You'll be amazed at how smooth the transition looks.
These exercises might seem basic, but they're the key to getting a feel for your airbrush for miniatures. Spend 15 minutes on them before painting and your muscle memory will thank you. 🧠💪 And if you're looking to upgrade your setup, check out our airbrush and accessories range, where you'll find everything for every skill level.
Your first application: priming and varnishing

Ready to paint your first mini? Let's go! Priming is the perfect opportunity to put everything you've learned into practice. Airbrushing your primer coat leaves an incredibly thin finish that preserves every last detail on your figures — especially important with 3D resin prints.
A brilliant technique for beginners is zenithal priming:
- Step 1: Prime the entire figure with a dark colour, such as black or dark grey. This establishes the deepest shadows on the miniature.
- Step 2: Now load your airbrush with a light primer (light grey or white). Position it above the mini at roughly a 45-degree angle and apply a very thin coat. The paint will fall "from above", highlighting the areas that would catch natural light while leaving the lower surfaces in shadow.
With just these two steps, you already have a light and shadow map before you've applied a single colour. It's a fantastic trick for giving your figures depth and volume right from the start!
Finally, once you've finished painting your masterpiece, the airbrush is the ultimate tool for applying varnish. Thin it slightly according to the manufacturer's instructions and apply it in quick, light passes over the entire miniature. The result is a perfectly even protective coat — no brushstrokes, no weird sheen. ✨
Advanced techniques for stunning results
Alright, you've got the basics down. You can lay down smooth base coats and keep things tidy. Now comes the fun part: it's time to unlock the true potential of your airbrush for miniatures. This is where we stop "painting" and start "creating effects" — the kind that take your figures from decent to jaw-dropping. 🌟
These techniques will help you achieve finishes that would take forever with a brush — if you could pull them off at all. We're not just talking about better-looking minis; we're talking about opening up a whole new world of creative possibilities.
The subtlety of glazes
A glaze is simply an ultra-thin, transparent layer of paint applied over a base colour to shift its tone, add depth, or smooth out transitions. With an airbrush, the process is an absolute joy — fast, clean, and controlled. The trick is to thin the paint down so much it looks almost like tinted water.
With this mix and at very low pressure (around 10–15 PSI), you can modulate the colour across large surfaces like tank armour, add more realistic skin tones to a face, or refine a gradient you've already laid down. The key is patience: apply very thin layers, let them dry, and repeat until you achieve the desired effect.
The striking OSL or Object Source Lighting effect

Object Source Lighting (OSL) is a technique that simulates something on the miniature — an energy sword, a torch, a robot's glowing eyes — emitting light and illuminating the surrounding area. And yes, the airbrush is the perfect tool to make it look convincing. 🤩
- Define the light source: Paint the origin of the light with the brightest colour — typically pure white or an almost-white yellow.
- Build the glow: Load the airbrush with the light colour (for example, electric blue for a plasma weapon). With careful control, apply a very soft, misty haze over the source and the nearby areas that should be catching the light.
- Intensify the centre: As you work closer to the centre of the light source, apply successive layers using progressively lighter, more concentrated colour. The result is a glow that looks like it's radiating from the miniature itself.
The secret to great OSL is restraint. It's very easy to overdo it and end up with what just looks like a random colour blob. Always think about how light behaves in real life: it's strongest close to the source and fades out quickly as it moves away.
Surgical precision with masks and stencils
Want to paint sharp-edged camo patterns, heraldic symbols, or crisp geometric designs? Masks are your best friend. You can use masking tape made for scale modelling, adhesive putty (the classic Blu-Tack), or purpose-made stencils.
The process is incredibly straightforward: mask off the areas you don't want to paint, apply your color with the airbrush, and once dry, carefully remove the masking. For crisp, hard edges, tape is your go-to. For more organic patterns or slightly soft edges, masking putty works brilliantly — because it doesn't seal completely, it lets a tiny amount of paint creep underneath, creating a beautifully natural effect.
Weathering and aging for jaw-dropping realism

The airbrush is also an incredible tool for weathering and aging effects. You can build up dust accumulation in the recesses of a vehicle or simulate rust and chipped paint with stunning realism. 💥
One hugely popular chipping technique uses "chipping fluid." You lay down a base coat in a rust color, seal it with the chipping fluid, then paint your final color on top. Then, using a damp brush, you "reactivate" the fluid and lift away flakes of the top layer, revealing the rust underneath in an incredibly realistic way. The airbrush lets you apply all these layers quickly and evenly.
For the detail-obsessed, airbrush technology has reached near science-fiction levels. The world's smallest airbrush, the Iwata-Medea Micron SB, features nozzles as fine as 0.03 mm. This allows you to paint detail on 1:72 scale minis with precision that outperforms a brush by 80%. Pair a tool like that with high-definition 14K resins, and the quality of your prototypes and miniatures skyrockets — reducing defects by as much as 50%.
As impressive as the airbrush is, it's not the whole story. The real magic comes from knowing when to reach for it and when to pick up traditional brushes instead. If you want to master that combination, check out our guide to the best brushes for miniatures and learn how to get the most out of both.
Keep your airbrush in peak condition
Your airbrush is an extension of your hand — a precision instrument that turns your ideas into art. But like any delicate tool, it needs care to perform at its best. Proper maintenance not only extends its lifespan, it will save you countless headaches and frustrating painting sessions. 🧼
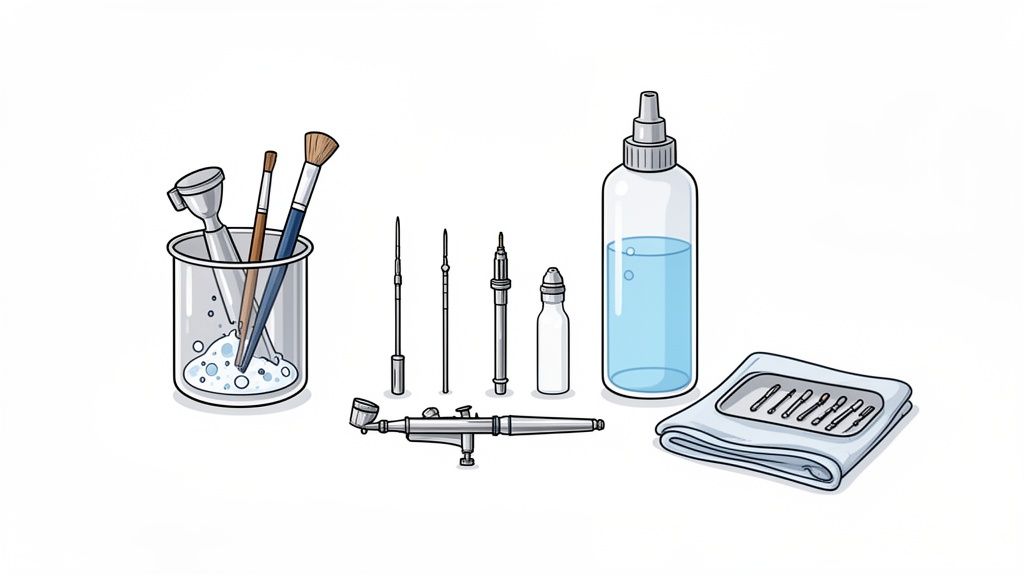
Think of cleaning not as a chore, but as part of your painting ritual. A clean airbrush for miniatures means predictable lines, pure colors, and zero unexpected interruptions. Here's how to keep yours in perfect working order.
Quick cleaning between colors
Switching colors should be seamless — a quick process that doesn't break your creative flow. This rapid clean, which takes no more than a minute, is essential for preventing color contamination and keeping your mixes vibrant.
- Empty the cup: Dispose of any remaining paint. You can do this into a cleaning jar or onto a piece of paper towel.
- Add cleaner: Pour a few drops of a dedicated airbrush cleaner into the cup. Using a quality product really makes a difference here. If you're looking for a recommendation, Vallejo Airbrush Cleaner is a rock-solid choice that dissolves acrylic residue like magic.
- Backflush: Cover the tip of the airbrush with a finger or a cloth and press the trigger very gently. The air will push back into the cup, creating a bubbling action that loosens paint from the internal walls. Just be careful not to splash yourself!
- Purge the cleaner: Now spray the cleaner onto some paper until it runs completely clear. Ready for the next colour! 🎨
Deep clean at the end of your session
When you're done painting for the day, a thorough clean is non-negotiable. This is the step that stops paint from drying inside your airbrush, especially in the most critical areas like the needle and nozzle.
Start by repeating the quick-clean steps to remove the bulk of the paint. Then, carefully disassemble the main parts: the needle cap, the nozzle cap, and the nozzle itself. Loosen the needle chucking nut at the back and pull the needle out with a slow, perfectly straight motion.
Using a small brush dampened with cleaner, work over each part individually. Pay special attention to the needle tip and the inside of the nozzle, as these are where the most stubborn blockages tend to build up. Once everything is spotless, reassemble the airbrush by following the steps in reverse.
A well-maintained airbrush can last a lifetime. Spending five minutes on it at the end of every session is the best investment you can make in your hobby.
Troubleshooting the most common problems
Even with great maintenance habits, things can sometimes go wrong. Don't worry — most issues have a pretty straightforward fix. We've put together a quick reference guide to help you identify and resolve the most typical problems you're likely to run into.
Airbrush Troubleshooting Quick Guide
Here's a handy reference to help you quickly diagnose and fix the most common issues you might encounter when painting with your airbrush.
| Common Problem | Likely Cause | Practical Solution |
|---|---|---|
| Paint Spitting Spit | Dried paint on the needle or nozzle. Incorrect air pressure. | Clean the needle tip with a brush and cleaner. Increase your air pressure (PSI) slightly. |
| Uneven Spray Pattern 〰️ | Paint thinned incorrectly. Bent or damaged needle. | Add a little more thinner to your mix. Check the needle tip — if it's bent, it needs replacing. |
| No Paint Flow 🚫 | Completely blocked nozzle. Airbrush assembled incorrectly. | Give it a thorough deep clean, paying close attention to the nozzle. Disassemble and reassemble the airbrush. |
| Bubbles in the Cup 🫧 | Air leak at the nozzle. Nozzle not tightened properly. | Make sure the nozzle is screwed in snugly (don't overtighten). Check whether the nozzle seal is damaged. |
With this table as a reference, you should be able to fix 90% of the issues you run into. Remember: most of the time, the answer is a good clean or a small adjustment. Now get painting!
Conclusion:
We've covered everything you need to master airbrushing miniatures — from choosing your first setup to applying advanced techniques. You now have the knowledge to take your figures to a whole new level of detail and finish. Remember, the key is practice and patience. Don't be afraid to experiment!
We invite you to visit our online store MrResin.es and browse our range of airbrushes and accessories to kick off your airbrushing journey or upgrade your current setup. And if you want to share your progress, get your questions answered, and be part of an amazing community, don't wait!
Join our Telegram group here for exclusive community discounts and deals, plus coupons, news, and special events.
And don't forget to subscribe to our Newsletter so you never miss a thing — get the best promos delivered straight to your inbox. We'd love to have you! 💌
✨ Happy Printing! 🚀