

Think about it for a second: what if you could fabricate a custom dental splint, a precision surgical guide, or a study model in just a few hours — all without leaving your clinic or lab? 😮 That's not science fiction anymore. That's dental 3D printing — the technology that's leaving plaster molds behind and building three-dimensional objects layer by layer from a simple digital design.
The new standard in digital dentistry
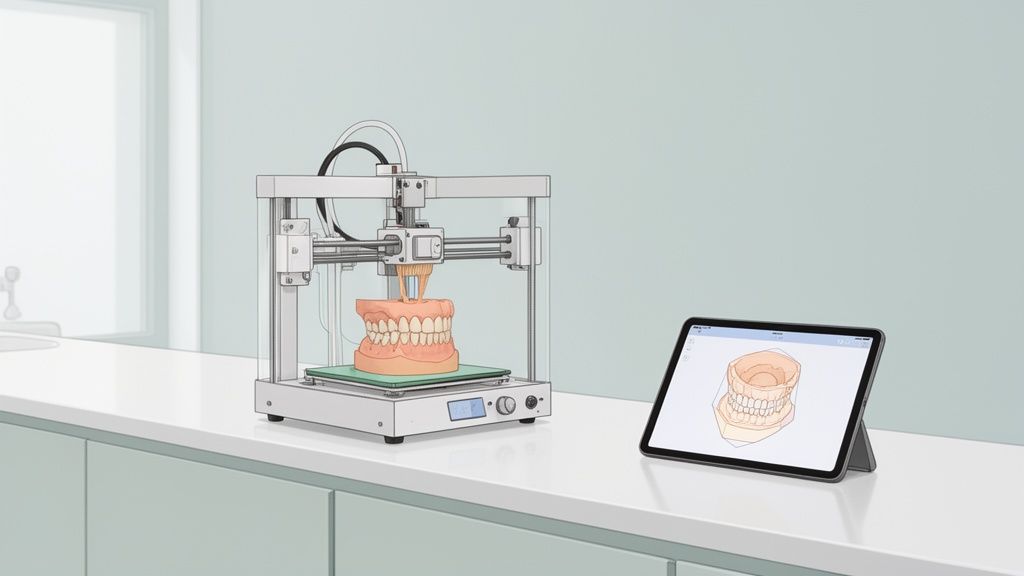
Dental 3D printing — or additive manufacturing if we're being technical — is the process of bringing physical objects to life from a digital file. Think of it like building something with microscopic LEGO bricks: a printer, guided by a computer, deposits material with an accuracy that would be impossible to achieve by hand. 🤖
This technological leap is completely rewriting the rules in the dental industry. Where it once took weeks to receive a prosthesis or a splint, turnaround times are now down to hours. That doesn't just streamline workflows like never before — it dramatically improves the patient experience too.
Beyond speed: precision and customization
But the real power of dental 3D printing isn't just in how fast it works — it's in its ability to create fully customized parts with micrometer-level accuracy.
Everything from an aligner to a temporary crown starts with an intraoral scan of the patient. The result? A perfect fit that virtually eliminates the need for manual adjustments and unnecessary follow-up appointments. ✅
That precision has a direct impact on treatment quality. Surgical guides printed in 3D, for example, allow implants to be placed with millimeter-level reliability — reducing procedural risk and time in the chair.
Additive manufacturing lets us create complex geometries and customized internal structures that were previously impossible or prohibitively expensive to produce using traditional methods like milling.
This shift doesn't just benefit labs. It also empowers clinics to bring production in-house, giving them complete control over quality and turnaround times. ⏰ Digitizing your workflow is a competitive advantage from start to finish:
- Through-the-roof efficiency: ☁️ Processes that used to be manual, slow, and error-prone are now automated.
- Lower costs: 💰 Over time, the savings on materials, shipping, and labor really add up.
- A patient experience worth raving about: 🥰 Offering same-day or 24-hour solutions is a genuine differentiator that drives satisfaction and loyalty.
- Total flexibility: ✨ The ability to test designs and make on-the-fly adjustments at no extra cost is, quite simply, a game changer.
Bottom line: dental 3D printing isn't just another tool. It's the engine driving a more precise, agile, and patient-centered approach to dentistry. The question is no longer whether you should adopt this technology — it's when you're going to start integrating it to take your practice to the next level. 🚀
Practical Applications That Are Transforming Every Dental Treatment
3D dental printing is no longer a thing of the future. It's a well-established reality in clinics and labs that is changing the rules of the game. Its true power lies not in the machine itself, but in how it transforms everyday treatments — delivering a level of precision, speed, and customization that was simply out of reach before. 🦷✨
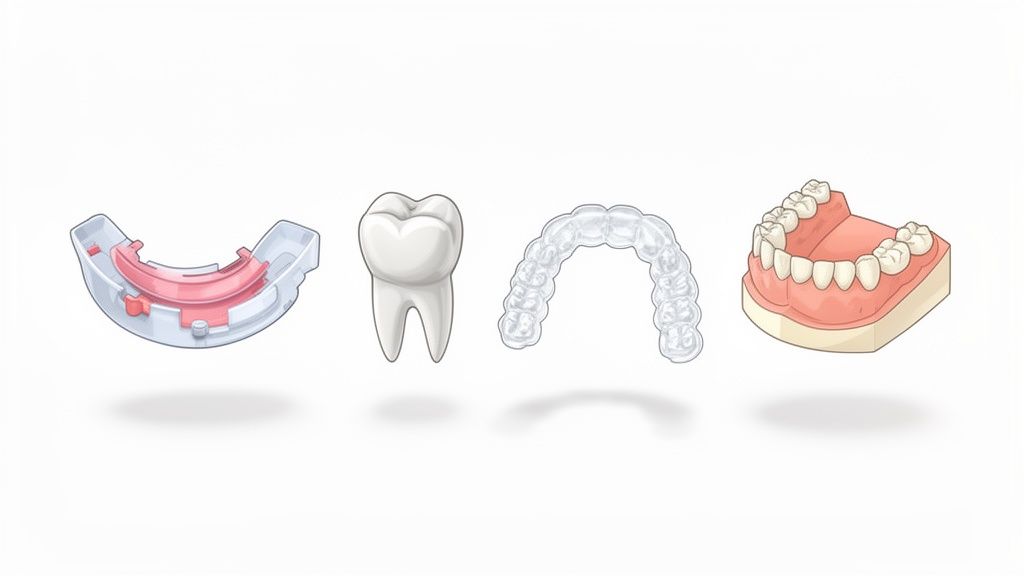
The impact is so significant that it has become a go-to tool for the majority of modern dental laboratories. In fact, the dental 3D printing market is growing at a rate that exceeds 20% annually — a figure that speaks for itself when it comes to adoption. Producing splints, temporaries, aligners, and dental models is now an everyday task, all thanks to the enormous advantages this technology offers. To explore further, take a look at the trends shaping the dental industry in this comprehensive report.
Surgical Guides With Surgeon-Level Precision
One of the most impressive applications is, without a doubt, the fabrication of custom surgical guides. Starting from a 3D scan and a cone beam CT (CBCT) of the patient, a guide is designed to fit perfectly over their anatomy. This piece directs the surgeon's drill with millimeter-level accuracy during implant placement.
What does this mean in practice? It virtually eliminates surprises in the operating room. 😷 The benefits are clear:
- Faster, less invasive procedures, resulting in a much more comfortable recovery for the patient.
- Dramatically reduced risk of damaging delicate structures such as nerves or the maxillary sinus.
- Perfect implant placement, ensuring the final prosthetic delivers optimal long-term results.
Printers like the Anycubic Photon Mono M5s make it possible to create these guides with remarkable resolution.
Crowns and Bridges — Temporaries Ready at the Same Appointment
Picture this: a patient comes into the clinic needing a crown. The traditional method meant taking alginate impressions, fitting a generic temporary that didn't always sit right, and then waiting weeks for the lab to send back the final piece. Well, 3D dental printing has blown that process wide open. ⚡
It's now possible to scan the patient's mouth, design, and print a temporary crown or bridge within a matter of hours — often at the same appointment. These temporaries don't just fit perfectly; they also offer excellent aesthetics and function. The patient walks out of the clinic with a complete smile and confidence to match, no frustrating wait required.
This ability to deliver an immediate solution doesn't just boost patient satisfaction — it also streamlines the clinic's workflow, freeing up time and resources that are genuinely invaluable.
Orthodontics and Splints: The New Era of Custom-Made
If there's one field that has come out on top, it's orthodontics. The production of clear aligners, for example, relies almost entirely on 3D printing. Sequential models of the patient's dentition are printed, and aligners are thermoformed over them to gradually move the teeth into their ideal position.
But that's not all. The fabrication of other appliances has become incredibly efficient:
- Occlusal splints (Michigan-type): Custom-fit splints for bruxism treatment can be created with a perfect fit, improving patient comfort from day one.
- Study models and orthodontic models: These provide exact replicas of the patient's dentition for planning complex treatments with perfect visualization.
- Custom impression trays: These increase accuracy when taking final impressions, as they conform precisely to each patient's unique anatomy.
Each of these applications proves that dental 3D printing is not just a minor upgrade. It's a tool that allows us to deliver dentistry that is more precise, more efficient, and above all, far more personalized and patient-centered.
Understanding SLA, DLP, and LCD 3D Printing Technologies
Not all 3D printers are created equal, and in the demanding world of dental 3D printing, the differences are critical. To achieve the millimeter-level precision required for splints, surgical guides, and dental models, we'll focus on technologies that work with liquid resin. Forget standard FDM filament printers — this is a completely different league.
In digital dentistry, there are three undisputed leaders: SLA, DLP, and LCD. 👑
While the end result is the same — a solid part built layer by layer — the way each technology cures the resin is completely different. Understanding how each one works is the key to choosing the right equipment for your clinic or lab's needs and budget. Let's break them down with simple analogies so there's no confusion.
SLA: The Laser Precision Drafting Tool
SLA (Stereolithography) was the pioneer — the technology that started it all. Picture an incredibly precise laser pointer ✒️ that traces the outline of each layer of your part across the surface of the resin. Wherever the laser passes, the resin hardens. Simple and effective.
This point-by-point method delivers exceptional precision, perfect for the ultra-fine details that make all the difference. The trade-off? Speed depends directly on how complex each layer is. The more lines the laser has to "draw," the longer it takes.
DLP: The Full-Layer Projector
DLP (Digital Light Processing) took the process a step further. Instead of a laser that draws point by point, it uses a digital projector — similar to what you'd find in a movie theater. 🎬 This projector flashes the complete image of an entire layer all at once, curing the full surface simultaneously.
This translates to consistent print speeds, regardless of how many parts you're printing at the same time. Whether you place one model or ten on the build platform, the time per layer stays the same. This efficiency has made it the go-to choice for production environments.
LCD: The Power of Pixels
LCD technology (also known as MSLA or Masked Stereolithography) is the newest of the three, and the one that has brought high-resolution 3D printing within reach of everyone. It works in a way very similar to your smartphone screen. 📱 An LCD panel acts as a mask, allowing UV light to pass through only the pixels that make up the layer being printed.
This technology combines high speed (very similar to DLP, as it cures entire layers at once) with a much lower equipment cost. The resolution of the final part depends directly on the pixel density of the LCD screen. Thanks to these advantages, printers like the Anycubic Photon Mono M5s have become a fantastic option for labs and clinics looking for the perfect balance between quality, speed, and cost.
If you'd like to dive deeper, you can read about SLA printing and its variants on our blog.
Choosing between SLA, DLP, or LCD isn't a matter of "better or worse" — it's about finding the right tool for the job. The key is deciding what matters most to you: maximum precision, production speed, or upfront equipment cost?
To help you see the differences at a glance, we've put together a comparison table.
Dental 3D Printing Technology Comparison (Resin)
This table summarizes the key differences between SLA, DLP, and LCD technologies to help professionals choose the best fit for their lab or clinic.
| Feature | SLA (Stereolithography) | DLP (Digital Light Processing) | LCD (Masked LCD) |
|---|---|---|---|
| Light Source | Single laser point | Digital projector (full image) | UV LED array with LCD screen |
| Speed | 🐢 Slower (depends on complexity) | 🚀 Fast (consistent per layer) | ⚡ Very fast (consistent per layer) |
| Precision | ✅ Very high and uniform | ✅ High, may vary at edges | ✅ Very high, defined by pixel density |
| Equipment Cost | 💰💰💰 Generally higher | 💰💰 Mid to high cost | 💰 Most affordable |
| Best for... | Prototypes with ultra-fine detail | High-volume production and speed | Clinics and labs on a tighter budget |
As you can see, each technology has its strengths. Your final choice will come down to whether you prioritize extreme detail (SLA), high-volume output (DLP), or an unbeatable balance of cost and performance (LCD).
The critical role of specialized dental resins
Even the best 3D printer is only half the equation. The real star of dental 3D printing is the material itself: the resin. In a field like dentistry — where patient safety, functionality, and aesthetics are non-negotiable — choosing the right resin is, quite simply, essential. 🧪
Think of it this way: resins are like the ingredients in a fine dining recipe. Each one has unique properties and is formulated for a very specific purpose. Using the wrong resin is like baking a dessert with salt instead of sugar — at best, the result will be useless, and at worst, it could be dangerous.
So let's dive into the fascinating world of dental resins. Not all resins are created equal, and understanding what sets them apart is the key to achieving results that meet the most demanding clinical standards.
Biocompatible resins: the highest level of patient safety
When a printed part will be in contact with a patient — even briefly — biocompatibility is the number one requirement. These resins are engineered to cause no irritation, allergic reactions, or any other adverse response in the body. Under medical device regulations, they fall into two main classes:
- Class I: 🛡️ Designed for short-term contact. These are the ideal material for manufacturing surgical guides, custom impression trays, and certain splints.
- Class IIa: ❤️ Suitable for longer-term contact. Used to produce temporary crowns and bridges, or occlusal splints that patients will wear for months at a time.
eSun Dental Cast Biocompatible Resin is a perfect example of a certified material for safe clinical applications.
But safety alone isn't enough. These resins must also be exceptionally strong and stable — capable of withstanding the forces of chewing without fracturing or breaking down in saliva. If you're looking for materials that meet these standards, browse our full range of biocompatible 3D resins to find the right fit for your practice.
Materials for every specific clinical need
Beyond biocompatibility, the dental resin catalogue is remarkably diverse. Each clinical application demands very specific mechanical and aesthetic properties, driving the development of highly specialized materials.
High-precision model resins
These are the cornerstone of digital dentistry. Used to print accurate replicas of a patient's dentition, their key strengths are dimensional stability and an ultra-smooth surface finish that ensures a perfect prosthetic fit. They typically feature an opaque, stone-like color that makes fine detail easy to read.
Provisional and temporary resins
These resins are a true feat of materials engineering. They need to be hard enough to withstand chewing forces for weeks or months (high fracture resistance), while delivering flawless aesthetics — with a color and translucency that closely mimics natural tooth structure. 🦷
Castable materials
Used in the lost-wax casting process to produce metal frameworks, such as the skeletons of removable partial dentures or copings for crowns. What makes these resins exceptional is that they burn out completely in the furnace without leaving any ash residue, ensuring a clean, precise metal casting every time. 🔥
Flexible resins for artificial gingiva
When planning complex implant cases, models are often printed with a simulated gum tissue component. These flexible resins replicate the texture and color of gingival tissue, allowing clinicians to test prosthetic fit on a far more lifelike model.
Choosing the right material is not a minor detail — it is the foundation on which the quality, safety, and longevity of any dental 3D printing work depends. Investing in the correct resin is investing directly in patient satisfaction and in your practice's reputation.
As you can see, the world of dental resins is as broad as the clinical applications themselves. From a simple study model to a temporary crown, there is always a material engineered to deliver optimal performance. At Mr. Resin, we're proud to be your trusted supplier — offering not just the materials, but the expertise to help you make the right choice every time.
The digital dentistry workflow, step by step
If you're thinking about integrating dental 3D printing into your practice or lab, you'll be glad to know the process is far more straightforward than it looks. The key is following a well-defined workflow that transforms a simple intraoral scan into a precision physical component accurate to the millimetre. This isn't just a to-do list — it's your roadmap to consistent, high-quality results. 🗺️
This approach is exactly why adoption of the technology has skyrocketed. To put it in perspective, the dental 3D printing market in Spain was valued at $3.1 million in 2022 and is projected to grow at an annual rate of 20.1% through to 2030. Forecasts suggest it will reach $13.42 million — proof that this is no passing trend, but a solid investment with a bright future. You can find more details on the growth of the dental 3D market in Spain.
Let's break this process down into five stages so you can master it from start to finish.
1. Intraoral scanning: your digital starting point
Everything begins here. Say goodbye forever to the uncomfortable and often imprecise alginate impressions. With an intraoral scanner — a compact wand passed around the patient's mouth — you can capture a full-colour, three-dimensional digital image in just a few minutes. 😮
The result is a digital file, typically in STL (Standard Tessellation Language) format, that is an exact replica of the patient's anatomy. It's the foundation on which everything else is built, ensuring the final piece fits perfectly from the very first time.
2. CAD design: where the magic takes shape
With the scan in hand, we move to the brain of the operation: computer-aided design (CAD) software. Specialist tools such as exocad and 3Shape Dental System allow dental technicians to take that digital file and turn it into a production-ready 3D model.
This is the stage where surgical guides are designed, occlusal splints are modelled, and temporary crowns are planned out. The software offers complete customisation, enabling every detail to be adjusted with micrometric precision that would be impossible to achieve by hand. ✍️
3. Slicing and printing: bringing the design to life
Once the design is approved, the file is exported to slicing software — also known as a slicer — such as ChiTuBox or Lychee Slicer. This programme acts as the translator between your 3D model and the printer. Its job is to:
- Orient the part to optimise print time and surface quality.
- Add supports to prevent the piece from warping or detaching during fabrication.
- "Slice" the model into hundreds or thousands of ultra-thin layers that the printer will build up one by one.
Once everything is set, the file is sent to the printer, which begins materialising the design layer by layer. If you'd like to go deeper on this step, we recommend our complete guide to resin 3D printing.
4. Post-processing: the final clean-up
When the printer finishes, the part still isn't ready to use. It's covered in a thin layer of uncured liquid resin that must be removed completely. This wash is carried out using isopropyl alcohol (IPA) or dedicated cleaning solutions designed specifically for the purpose.
To make this step quick and efficient, there are washing and curing machines like the Anycubic Wash & Cure 3.0. These devices automate the cleaning process and guarantee a perfect, safe finish with minimal effort. 🧼
5. UV Curing: The Step That Unlocks Maximum Strength
The final step is UV curing. The cleaned part is placed inside a curing chamber that bathes it in ultraviolet light. This light exposure completes the polymerization of the resin, giving the part its final mechanical properties, such as hardness and durability.
This final curing stage is absolutely critical. It not only hardens the part, but it's also an essential step for ensuring biocompatibility, especially for applications that will be in direct contact with the patient.
By following these five steps, any clinic or dental lab can successfully integrate dental 3D printing and unlock a whole new level of precision, speed, and efficiency.
The Future Is Now: Take the Next Step in Your Practice
By this point, one thing is clear: dental 3D printing is no longer a technology of the future — it's the driving force behind modern dentistry. 🦷 Integrating it into your clinic or lab isn't just an upgrade; it's a giant leap toward faster, more precise, and more personalized treatments that your patients will notice from day one. Simply put, going digital means going efficient.
If you've made it this far, it's because you know this is the right path forward. Now it's time to take action. 📈 We invite you to explore our curated selection of dental 3D printers and specialized dental resins at the Mr. Resin store. Every product has been hand-picked so you can focus on the one thing that matters: delivering flawless results.
Don't get left behind. Subscribe to our newsletter and we'll send the best deals and the latest industry news straight to your inbox. And if you want even more, join our community on Telegram. There you'll find exclusive discounts, direct support, and a space to share questions and wins with fellow professionals. Growing together is always easier! 👇
Conclusion:
Dental 3D printing has transformed the industry, delivering unprecedented levels of precision, speed, and customization. From surgical guides to night guards and occlusal splints, this technology empowers clinics and dental labs to streamline their workflows, reduce costs, and — most importantly — dramatically improve the patient experience. Embracing this digital shift is no longer optional; it's essential for staying ahead of the curve.
Ready to take your practice to the next level? Visit our store at Mr. Resin and discover the equipment and materials you need to get started.
And don't forget — we have an incredible community waiting for you! Join our Telegram group for exclusive discounts, news, and special offers.
✨ Happy Printing! 🚀
Your Dental 3D Printing Questions, Answered
Thinking about making the leap into digital dentistry but still have a few questions? Completely understandable! 🤔 Let's tackle the most common questions we hear about dental 3D printing, with clear, straightforward answers so you can get started with total confidence.
What Level of Precision Can You Achieve?
This is where the magic happens. Precision in dental 3D printing is truly remarkable, and it's measured in microns (μm). A professional-grade resin printer can achieve tolerances of just 25 to 50 microns.
To put this in perspective, a human hair is around 70 microns thick. We're talking about a level of accuracy that ensures surgical guides, temporary crowns, and splints fit perfectly — with no time-consuming manual adjustments needed. 🎯
Are biocompatible resins safe?
Absolutely, but with one key caveat: only when you use certified resins and follow the workflow exactly as specified. Patient safety is non-negotiable. That's why biocompatible resins must meet strict regulatory standards, including Class I or Class IIa certification.
These certifications confirm that the material is non-toxic, non-irritating, and completely safe for patient contact. UV post-curing isn't optional — it's the essential final step to ensure the part reaches its full biocompatibility and is ready for clinical use.
What does the initial investment look like?
Equipping your clinic or lab with dental 3D printing is far more affordable than most people expect. Breaking down the upfront costs, you're looking at roughly:
- 3D printer (LCD/DLP): You can get started with a capable entry-level machine from around €400, or step up to higher-output equipment for €3,000 or more.
- Wash and cure station: An all-in-one unit — the most practical option — typically runs €150–300. It's an essential piece of kit for clean, safe, and efficient results.
- Initial consumables: To get up and running, you'll need specific resins, isopropyl alcohol (IPA), and a few other materials, which can add up to around €200–400.
When you do the math, with a starting investment of as little as €750, you could already be producing your own parts at an excellent level of quality. 💰
How long does it take to print a splint?
The exact time depends on your printer's technology (DLP/LCD machines are the fastest) and the height of the part. That said, print times are remarkably short compared to traditional methods.
As a general guide, printing a night guard or a surgical guide typically takes between 1 and 3 hours. And here's the real advantage: with most printers, you can print multiple parts at once with barely any increase in print time. ⏳ Pure efficiency.