
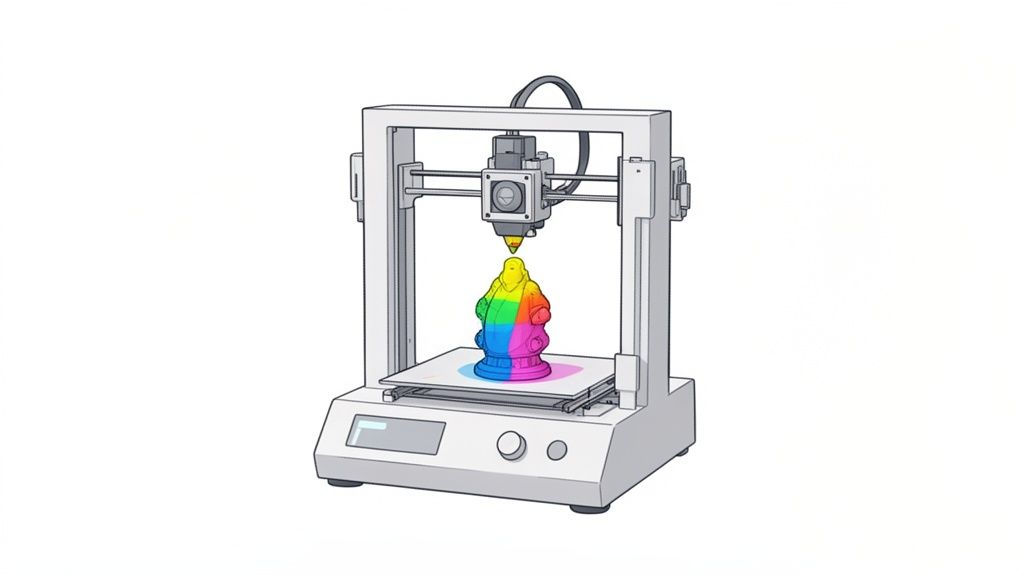
Multicolor 3D printing is a true game-changer — and it's not just about looks. This is a real evolution that saves countless hours of post-processing, letting you pull vibrant, ready-to-use parts straight off the printer. In this guide, we'll walk you through how to master this technique and take your projects to the next level. 🚀
Why color 3D printing is the next step you need to take 🤔
Gone are the days of printing single-color parts only to spend hours sanding, priming, and hand-painting. Multicolor 3D printing gives you the power to produce prototypes that look like finished products, incredibly detailed miniatures, and functional objects with different material properties — all in a single print run.
This isn't just a massive time-saver ⏰ — it also opens up an enormous range of creative possibilities, whether you're printing as a hobby or working professionally. The 3D printing market is feeling this shift, with growth projections expected to surpass €10.125 billion by 2027, driven largely by demand for personalized manufacturing. If you want to dig into the data, you can read the full study here.
Whether you're using an FDM printer or working with resin, there are methods available to bring color into your prints from the very start:
- More realistic prototypes: Show clients a product that looks almost identical to the final version. ✅
- Complex functional parts: Combine materials with different properties (such as rigid and flexible) within a single object. 💪
- Unlimited creativity: Create figures and models with integrated color detail — no paintbrush required. 🎨
If you're just getting started, we recommend first getting comfortable with the basics of FDM in our guide to filament 3D printing. Once you've got that down, get ready to make the leap into color! ✨
The art of color in FDM filament printers 🧵
Achieving multicolor 3D prints with your filament printer is more accessible than you might think. There are several techniques to choose from, each with its own pros and cons. The right choice will depend on your budget, the complexity of your designs, and — most importantly — how much you want to automate the process. 🎨
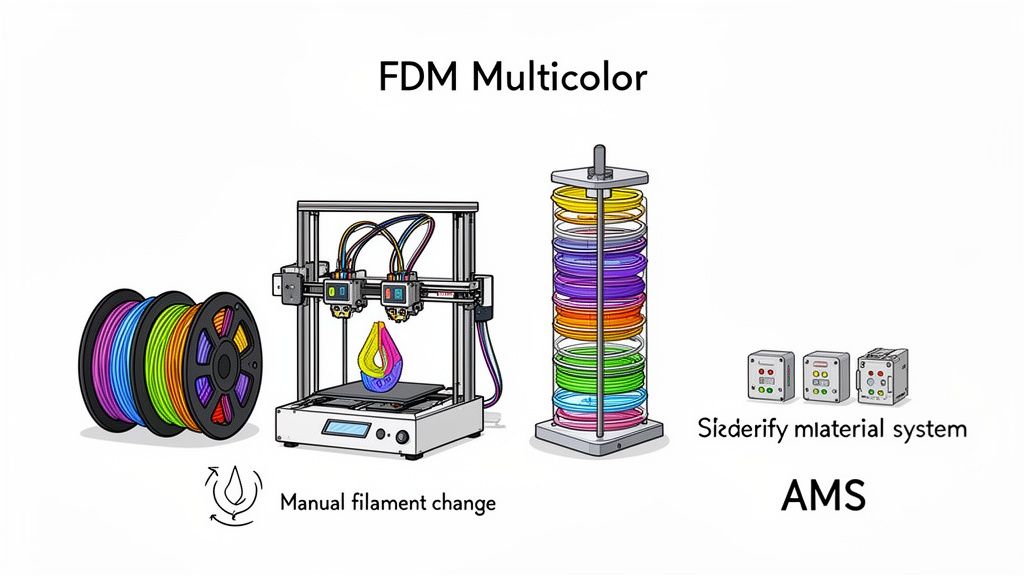
The simplest way to get started is manual filament swapping. It's ideal for designs where colors are separated by layer height — think a keychain with raised text, or a two-tone object with a base in one color and a top section in another. You simply pause the print at the desired layer height in your slicer, swap the filament spool, and resume. It's a basic technique, but surprisingly effective for a wide range of parts.
Automation: taking your prints to the next level 🤖
If your goal is to create models with multiple colors within the same layer, you'll need a more advanced setup. This is where things get really interesting — and there are two main paths to explore:
- Printers with multiple extruders (IDEX): These machines have two independent print heads. Each one handles a different color, allowing you to create complex geometries with clean transitions — and even print two identical objects at the same time.
- Material management units (AMS/MMU): These are the well-known "automatic filament changers." They're devices that connect to your single-extruder printer and manage multiple spools. The system feeds the right color to the nozzle and handles purging the previous one. Brands like Bambu Lab have popularized this technology, enabling prints with up to 16 colors.
The big downside of automated systems is waste. 🗑️ To ensure pure colors, the printer creates a "purge tower" next to your print — basically a block of plastic used to flush the nozzle between each color change.
To give you an idea, printing a small 8 cm part with an AMS system can generate up to 63 grams of waste. That said, there are ways to minimize it. Filling the print bed with multiple parts at once dramatically reduces the cost per unit, since the purge material gets shared across all of them.
For a deeper look at the waste challenge and how manufacturers are tackling it, check out this analysis from Xataka.
To help you visualize the differences, here's a comparison table:
FDM multicolor printing methods compared
| Method | Complexity | Upfront cost | Color quality | Waste level |
|---|---|---|---|---|
| Manual filament swap | Low 👍 | None 💰 | Good (layer-by-layer) | Very low |
| Dual extruder (IDEX) | Medium 🤔 | High 💸 | Excellent | Low |
| AMS/MMU | Medium 🤔 | Moderate–High 💵 | Excellent | High (optimizable) |
As you can see, there's no perfect method — just the right one for each project. The key is weighing whether the investment and waste are worth the quality and convenience you're after.
To master these techniques, it's essential to have a solid understanding of the materials you're working with. If you want to dive deeper, take a look at our complete guide to choosing the right filament for your 3D printer and make sure you're always getting the best results.
Color techniques for resin 3D printing 💧
Adding color to resin printing opens up a world of stunning finishes — especially if you're into miniatures or highly detailed parts. Unlike FDM, where you simply swap out a spool, with resin the process is far more hands-on. And honestly, that gives you a level of creative control that's hard to beat. 🎨
Let's dive into the most effective techniques for bringing multicolor 3D printing to your resin projects. There are no complex automated systems here — it's all about getting your hands dirty and working directly with the material.
Custom colours: tinting and mixing resins 🧪
The most straightforward way to achieve unique colours is, without question, tinting your resins. You start with a neutral base — such as a clear or white resin — and add specialist 3D printing pigments until you hit the exact shade you had in mind. Want to replicate a specific Pantone colour for a prototype? You absolutely can.
Another hugely popular technique is blending different coloured resins directly. Say you want a subtle gradient on a figure. You start printing in one colour, pause the print, carefully add another colour to the vat and stir very gently before continuing. The result is an incredibly organic colour transition that's completely unique to every single piece.
Pro tip: 💡 To keep your experiment from turning into a disaster, always mix resins from the same brand and type. This ensures the chemical properties and cure times are compatible, helping you avoid print failures.
The finishing touch: post-processing and hand painting 🖌️
While the techniques above add colour during the print itself, the real level of detail and realism is achieved afterwards, in post-processing. Hand painting your resin figures is what transforms them from simple plastic parts into genuine works of art.
And here, quality tools make an enormous difference. Using specialist acrylic paints like the Vallejo Game Color range lets you apply vibrant, incredibly precise layers of colour. Pair that with high-definition brushes from Artis Opus, and you can achieve detail that would simply be impossible straight off the printer.
If you really want to nail this final stage, don't miss our complete guide on how to use Vallejo Game Color to paint your resin prints. It's the finishing touch your creations truly deserve. 🏆
Your workflow for a perfect result ⚙️
Achieving a high-quality multicolour 3D print comes down to following an organised process that takes you from digital model all the way to the finished piece. It all starts in your preferred design software, where you prepare the 3D model by splitting it out by colour. Don't worry — it's simpler than it sounds. Programs like Blender or Fusion 360 let you assign different bodies or meshes to each colour you plan to use.
With your model ready, the next step is importing it into your slicer. In programs like PrusaSlicer or Bambu Studio, you'll assign each part of the model to a specific filament or resin. This is where you fine-tune critical settings like temperature and retraction to prevent colours from bleeding into one another and ruining the finish. ✅
Key settings and materials
One small tip that makes a real difference: keep your nozzles (on FDM printers) spotlessly clean between every colour change to achieve sharp, clean transitions. Material choice is equally important. A quality PLA filament or a 14K resin for fine detail work can completely transform the outcome of your print.
The sector keeps evolving, with projected annual growth of 25%. Tools like Autodesk Netfabb already help save up to 15% on material costs, making multicolor 3D printing increasingly efficient and affordable. If you want to dig into the technical details, you can explore the full analysis here.
Final Thoughts:
And that brings us to the end of our deep dive into the world of multicolor 3D printing. As you've seen, bringing your prints to life with multiple colors is far more achievable than it might seem. No more excuses for printing in a single color! 🌈
Whether you prefer the versatility of FDM filament or the incredible detail of resin, you now have a whole toolkit of techniques ready to experiment with. The key — as it almost always is in this hobby — is finding the method that best fits your project, your patience, and your budget.
From swapping filament by hand for a simple logo to spending hours hand-painting a miniature, the creative possibilities are endless. Now it's your turn to give it a go! Browse the range of filaments, resins, and paints at Mr Resin to kick off your next project with the best materials around.
Don't miss out on the latest news — subscribe to our Newsletter. 💌 You'll get the best deals, guides, and exclusive coupons delivered straight to your inbox that we don't share anywhere else.
We'd also love for you to join the conversation in our Telegram group at https://t.me/MrResin3D. It's the perfect place to show off your creations, ask for advice, and access exclusive community discounts, coupons, news, and events. We'd love to see you there! 🤝
✨ Happy Printing! 🚀
Frequently Asked Questions About Multicolor 3D Printing
Before you dive headfirst into multicolor 3D printing, it's completely normal to have a few questions. Here are answers to the most common ones so you can get started on the right foot. 🤔
Do I need to buy a new, specialized 3D printer?
Not at all. The good news is that you can get started right now with any standard FDM printer. You'll simply need to swap filaments by hand when your slicing software prompts you to.
That said, if you're looking to automate the process or print parts with lots of colors without babysitting the machine, then a printer with multiple extruders or an AMS system might be worth looking into.
For printing miniatures, is multicolor FDM or hand-painted resin better?
It really depends on what you're after. If your goal is the highest level of detail, resin is unbeatable. You print the part, cure it, and then hand-paint it like a true artist. 🎨
On the other hand, if you want figures or functional parts that come off the printer already colored and ready to use, multicolor FDM is far more practical and straightforward.
Is printing in full color much more expensive?
If you decide to invest in specific hardware — like an AMS system — there is an upfront cost. It's also true that color changes produce a bit more material waste during purging.
However, think of it this way: all the time you save on sanding, priming, and painting layer by layer adds up to enormous savings. For many people, that saving in time and effort more than makes up for the initial investment. 🤑