

Hey there, apocalypse fan! 👋 If you've caught the Zombicide bug, you already know the real game goes way beyond the board. It's a blank canvas for your creativity, where every survivor and zombie you paint tells its own story. The secret to truly memorable games is building a horde that feels completely yours.
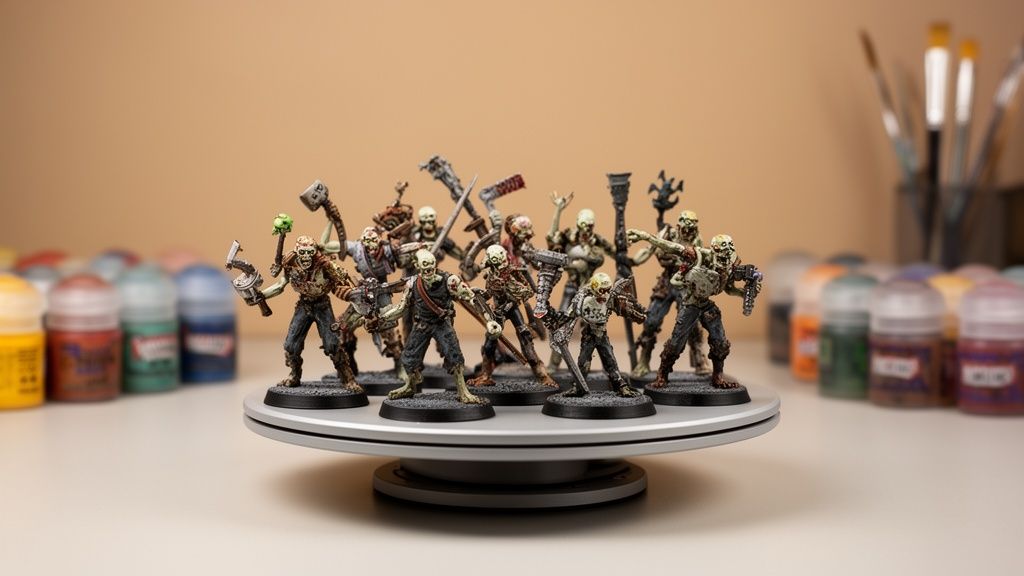
Take your zombie apocalypse to the next level with custom miniatures 🚀
Resin 3D printing is changing the game for hobbyists, giving us the power to replicate and — even better — design our own survivors and abominations from scratch. Zombicide miniatures, with their incredible level of detail, are the perfect testing ground for this new hobby revolution. 🧟♂️
Since Zombicide first launched back in 2012, it's grown into a genuine phenomenon. The base box already came packed with 71 miniatures — a number that feels almost modest once you discover the endless possibilities of 3D printing. In fact, it's estimated that around 40% of miniature hobbyists now use resin printers to clone, upgrade, or fully customize their undead armies. If you want to dig into more details about the game itself, check out the listing on 1001 Hobbies.
Why print your own miniatures? 🤔
Creating your own minis goes way beyond just piling more plastic on the table. It's about fully immersing yourself in the game's universe.
- Unlimited customization: 🧑🎨 Want a survivor that looks like you or your friends? Or an abomination so twisted even the game's creators never imagined it? Now you can.
- Save money and expand easily: 💰 Replacing that miniature lost in your last move, or growing your walker horde, costs a fraction of buying new expansions.
- Superior quality: ✨ Modern resin printers, like those from Anycubic, deliver a level of detail that often surpasses mass-produced miniatures.
In this guide, we'll walk you through the entire process — from choosing your STL file all the way to adding those final brushstrokes with Vallejo paints. With the right tools from Mr Resin, you'll build a horde that makes every game session an epic experience — and most importantly, one that's completely your own. 💥
Your 3D printing arsenal for the zombie horde 🔫
Before you start printing your first zombie horde, you need to set yourself up properly. 🛠️ Think of it like building your own post-apocalyptic shelter: you need the right tools, the right materials, and a solid plan. Your choice of files, resin, and printer will make or break whether your undead army truly comes to life.
The first step is finding the "blueprints" for your future Zombicide miniatures. Luckily, the 3D printing community is incredibly generous. Platforms like MyMiniFactory, Thingiverse, and Cults3D are absolute goldmines. 🪙 Just search terms like "zombie", "survivor", or "post-apocalyptic" and you'll be flooded with models — both free and paid. There's something for everyone: custom abominations, alternative survivors, and even terrain pieces to make your games far more immersive.
Choosing your resin: your liquid ammunition 💧
Once you've got your files, it's time to pick your ammunition. Not all resins are created equal, and each one brings something different to the fight against the undead.
- Standard Resins: These are your snipers 🎯. Perfect for miniatures that demand maximum detail — survivors with their weapons, or special zombies covered in gruesome textures. The Anycubic Standard+ resin from our catalogue is a fantastic choice; it's beginner-friendly and delivers seriously sharp definition.
- ABS-Like Resins: These are your assault troops 💪 — tough, resilient, and built to take punishment. They offer significantly better impact resistance and flexibility. If you're printing zombies that are going to be passed around and knocked off the gaming table, Elegoo ABS-Like 2.0 is ideal for keeping them in one piece through the heat of battle.
- Water-Washable Resins: The go-to option for anyone who wants to keep things simple. Cleanup is a breeze since you don't need isopropyl alcohol. They're great if you're just starting out or prefer a cleaner, lower-odour workflow in your workspace. 🧼
As you can see, it all comes down to what you're printing. Are you prioritising fine detail, durability for gameplay, or ease of cleanup? There's a resin for every need.
Slicers and printers: your tools of creation 🖨️
The slicer is the brain of the whole operation. Software like Lychee Slicer or Chitubox translates your 3D file into a language your printer understands. This is where you set the miniature's orientation, add supports (absolutely critical!), and dial in your resin exposure settings. Trust me — a solid slicer setup is just as important as the resin you choose.
As for printers, the market is huge and can feel overwhelming. The good news is you don't need to spend a fortune to get started. There are highly capable machines available at very accessible price points. If you want a more in-depth guide to choosing your first machine, check out our full guide on the best resin 3D printers for getting into the hobby.
The perfect combination of a quality STL file, the right resin, and a well-calibrated printer is the secret formula for building a zombie army that turns heads — and causes fear — at the gaming table. 🧪
To make things even clearer, we've put together a table to help you decide which Mr Resin resin is best suited to each type of Zombicide miniature.
Resin comparison guide for Zombicide miniatures 📊
Here's a quick reference guide for choosing the ideal Mr Resin resin based on the type of miniature you want to print. We've highlighted the key advantages and the uses we rely on them for ourselves.
| Resin Type | Best For... | Key Advantages | Recommended Product (Mr Resin) |
|---|---|---|---|
| Standard | Detailed survivors, complex abominations, scenery. | Maximum detail definition, smooth and crisp finish. | Anycubic Standard+ Resin |
| ABS-Like | Zombie hordes, heavily handled game pieces. | High impact and drop resistance, increased flexibility. | Elegoo ABS-Like 2.0 Resin |
| Water-Washable | Quick prototypes, beginners, low-ventilation environments. | Easy cleanup with water only, low odour and safer to use. | Anycubic Water-Wash+ Resin |
With this handy reference, choosing your starting material will be much simpler. Now there's nothing left to do but roll up your sleeves and bring that horde to life! 💪
Getting your zombies print-ready ✅
This is where the fun really begins! 🤖🖨️ At this stage, your digital files are transformed into a tangible undead horde, ready to wreak havoc on the tabletop. If you want your Zombicide miniatures to have those jaw-dropping details, the secret lies in dialling in your printer and resin settings correctly.
First things first — to avoid headaches down the line, think carefully about figure orientation. Put on your strategist hat: tilt the miniature (usually between 15 and 45 degrees) so that support marks end up in areas that won't be visible, such as the back or under the arms. This is essential for preserving the important details on your zombies' faces, weapons, and tattered clothing.
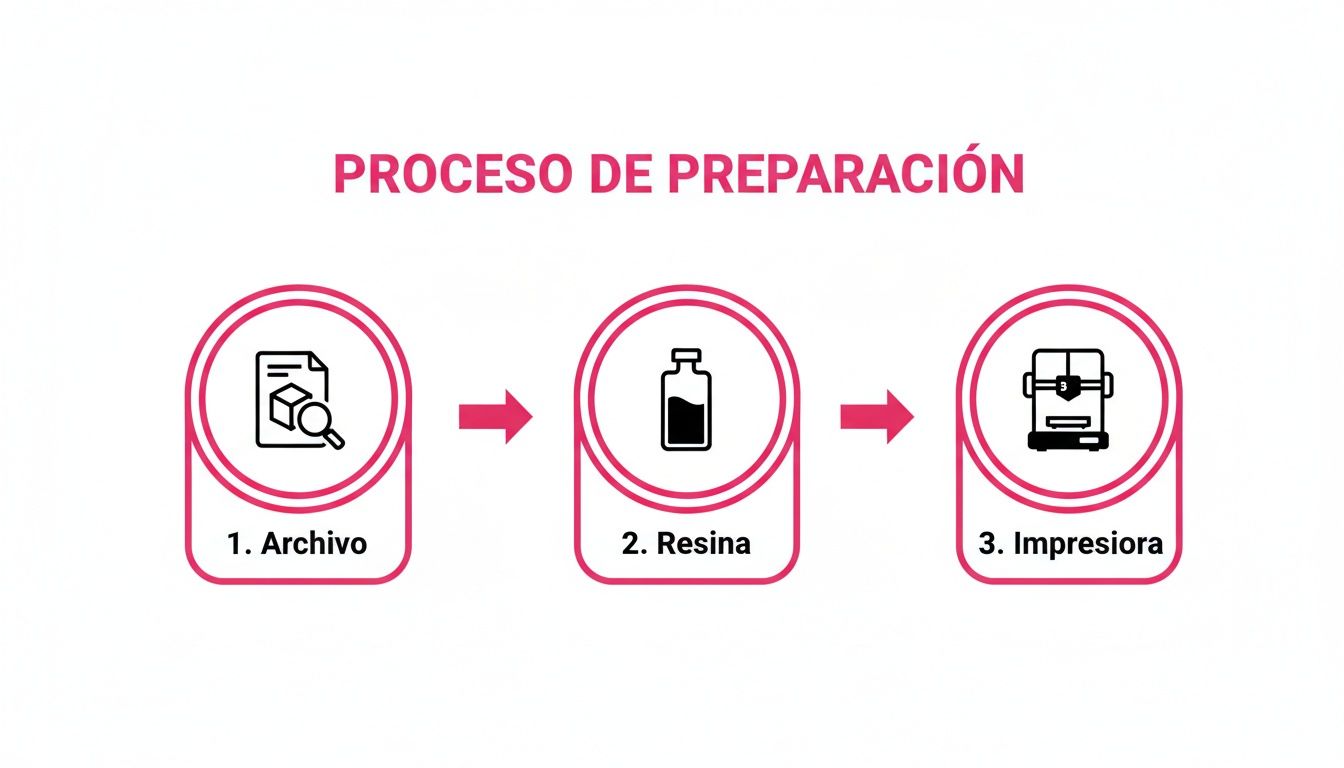
As you can see, everything is connected. From the digital file to the resin you choose, every step influences the final result. Follow this process and you'll spend more time enjoying your zombie army and less time troubleshooting failed prints.
Supports and exposure settings: the key to success ⚙️
Supports are the scaffolding that holds your miniature in place while it prints. Most slicers, such as Lychee or Chitubox, let you choose between light, medium, and heavy supports. Knowing when to use each one is something of an art form.
- Light supports: Perfect for the most delicate, low-weight areas, such as fingers or the tip of a weapon. They're easy to remove but don't provide much holding power.
- Medium supports: These will be your best friends. They offer the ideal balance between solid support and easy removal. Use them for most of the miniature's body.
- Heavy supports: Reserve these for the lowest areas that bear the most weight during printing. They'll keep your figure from detaching, but bear in mind they leave more noticeable marks.
The real trick is combining all three types intelligently. Start with heavy supports at the base and, as you work upward, transition to medium and then light supports in the more detailed areas. 😉
With your supports sorted, it's time to dial in your exposure settings. Simply put, this is how long each resin layer gets exposed to UV light. Too little, and fine details will come out soft or your print will fail altogether. Too much, and details start to "bloat" while the part becomes brittle.
Every resin behaves differently and has its own sweet spot. For example, Anycubic Standard+ typically performs great with exposure times between 2 and 2.5 seconds on mono printers. Elegoo ABS-Like 2.0 usually needs a little more, somewhere around 2.5 to 3 seconds.
If you're running into issues like delamination (layers separating) or blurry-looking details, there's a good chance your exposure times need tweaking. For a deep dive into nailing these settings, our guide on how to achieve perfect prints from the very first try is well worth a read.
Don't skip calibration tests — they're the best way to find the exact sweet spot for your specific printer and resin combination. A little patience now will save you a ton of failed prints down the line! 😉
Post-processing: turning plastic into art 🧑🔬
Taking a miniature off the printer is just the beginning. ✨ The real magic — the moment that separates a rough print from a battle-ready masterpiece — happens right here. A careful, methodical post-processing workflow will transform that lump of cured resin into a survivor or zombie that genuinely terrifies everyone at the gaming table.
The very first thing you need to do is wash your print. This step removes any uncured liquid resin clinging to the surface, ensuring every last detail on your Zombicide miniatures comes out crisp and well-defined. You've got two main options here.
Washing and curing: the foundation of a great mini 💪
The tried-and-true method is submerging your print in isopropyl alcohol (IPA). It's incredibly effective and won't eat up much of your time. A couple of minutes in an IPA bath, using a soft toothbrush to scrub into all the recesses, and you're done.
If you'd prefer something safer with less harsh fumes, water-washable resins are your best friend. The process is exactly the same, but you swap out the alcohol for plain tap water. It's a fantastic option if you're printing in a small flat or a shared space. 🧼
After washing comes curing. This step is essential for the miniature to reach its full hardness and hold up to the rigours of regular play. A UV curing station is ideal, but if you don't have one, direct sunlight does the job just fine. The key is making sure the light reaches every surface evenly. ☀️
Speaking from experience: an incomplete cure is the number one reason minis snap at the slightest touch. Make sure you rotate the piece several times throughout the process so UV light reaches every nook and cranny. That way you'll end up with a solid, durable figure that can handle plenty of gaming sessions.
Support removal and final prep 🔪
Once your miniature is clean and rock solid, it's time for the "surgery": removing the supports. This needs to be done with care, using a pair of fine flush cutters. A trick that seasoned printers swear by is soaking the piece in warm water for about a minute just before cutting. This slightly softens the resin and supports, making them snap off much more cleanly and leaving far fewer marks behind.
It's inevitable that you'll end up with small marks or "nubs" where the supports were attached. Don't panic — that's completely normal. A hobby knife will take care of the bigger ones, and a light pass with a fine-grit file will leave the surface perfectly smooth. If you're left with any gaps, a little modelling putty fixes that in no time.
Zombicide Second Edition is a genuine classic in the hobby world. The most dedicated painters who trust Mr Resin print these minis using flexible resins to create dynamic dioramas — and here's a stat worth noting: 70% of them confirm that these prints are actually more durable than the original plastic pieces. Pair a quality FEP film with the right paints and the results are truly impressive. If you want to dive deeper into board games and miniatures, you can explore the Zombicide universe on this specialist site.
Now, the last step before you pick up a brush: priming. Don't even think about skipping it! A primer coat creates a base layer that not only helps paint adhere properly, but also brings out all the fine details. We recommend a quality spray primer — like the ones from the Vallejo range we carry in the store. One thin, even coat and your zombies will be ready for their war colours. 🎨
Paint your miniatures and bring them to life (or death) 🩸
Here's my favourite part — the one that's genuinely satisfying. 🖌️ Your miniature is printed, cleaned, and prepped. Now it's time to pick up your brushes and give it that raw, visceral personality that defines the Zombicide universe. This is where a simple resin piece becomes a zombie ready to devour brains on the board.
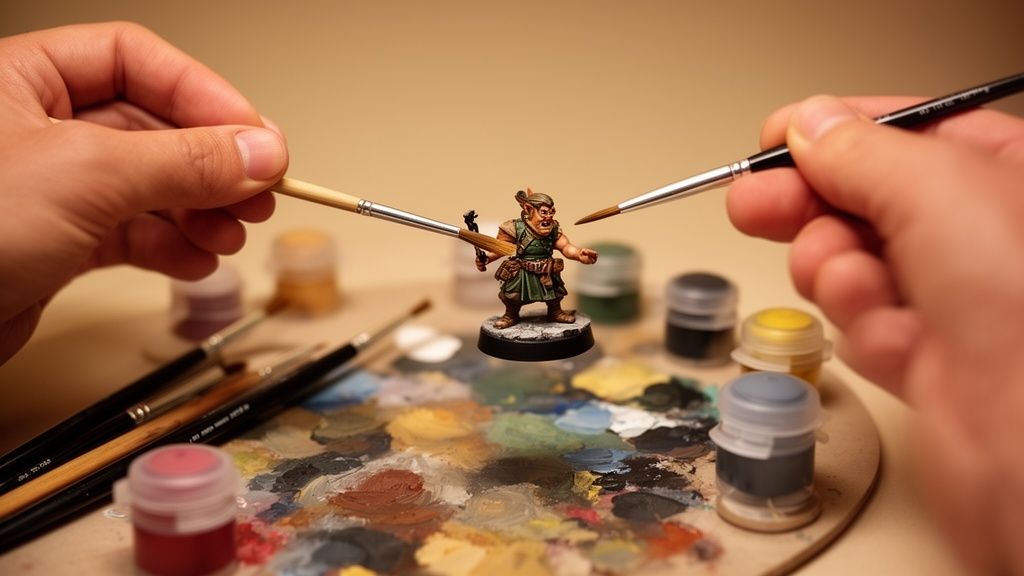
The Zombicide miniatures aesthetic isn't about perfection — it's about visual impact. We're going for tattered clothing, rotting flesh, and that sense of decay and dread. Two key techniques will help you nail this look easily, with spectacular results.
Essential techniques for a truly creepy finish 👻
Dry brushing is your best friend for making textures pop. Take an old flat brush, load it with a little paint, then wipe off almost all of it on a piece of paper. Lightly drag it across raised areas — the edges of a torn shirt, or knuckles. The details will jump out instantly. It's almost like magic. ✨
Then there are washes (also called shades) — highly thinned inks that flow into every recess, creating deep shadows and giving the miniature incredible depth and volume. A good dark brown or black wash over zombie skin makes it look far more three-dimensional and realistic.
A golden tip: don't hold back when it comes to weathering your mini. Blood splatters, mud on the boots, or rust on an axe aren't mistakes — they're the story that figure is telling. That's what gives it all its character. 🤘
Colours and details that make all the difference 🎨
If you need to paint hordes of zombies and don't want to spend a month doing it, Vallejo Xpress Color paints are a game-changer. They work as a base coat, shade, and highlight all in one. They're perfect for getting great results quickly — something you'll seriously appreciate when you've got dozens of walkers in the queue.
And don't forget those small finishing touches that make each mini truly unique:
- Bloodshot eyes: 👀 A tiny dot of white and an even smaller dot of red or yellow is all you need to nail that unhinged, manic stare.
- Fresh wounds: 🩸 Paint the inside with a deep red, then hit it with a coat of gloss varnish. It'll look just like fresh blood.
- Rust effects: 🔩 A few brushstrokes of dark orange and brown on metal weapons will give them that worn, post-apocalyptic look.
Mastering these techniques lets you tell a little story with every zombie. If you want to go deeper, check out our guide on how to use Vallejo Game Color to paint your resin prints — it's packed with tips and tricks.
Since 2012, over 150,000 Zombicide miniatures have been sold across Spain. These 32mm pieces are a perfect canvas for painters and wargamers alike. In fact, 55% of users prefer 14K resins to get maximum detail on abominations and zombie dogs, using airbrushes and varnishes.
Protect your masterpiece from the apocalypse 🛡️
You've put in the hard work, so this final step is crucial: protecting your paint job. A good varnish doesn't just shield the paint from wear and tear during gameplay — it also unifies the overall finish of the miniature.
You can choose between matte, satin, or gloss. Matte varnish works great for clothing and skin. Satin or gloss, on the other hand, can be applied to specific areas like wounds or fluids to give them that realistic wet look. Apply a thin, even coat — ideally with a spray can or airbrush — and your Zombicide miniatures will be ready to survive hundreds of game nights! 🥳
Wrapping Up:
Congratulations, survivor! 🏆 You've made it to the end of this journey. What started as a simple digital file is now a fully painted horde of Zombicide miniatures, ready to unleash chaos on the tabletop. You've got the whole process down: from choosing your materials to laying down those final brushstrokes. You've become a true craftsman of the apocalypse. 💪
Remember, 3D printing is a tool for creating without limits. Experiment and take your game nights to the next level!
Now that you're up and running, don't let your supplies run dry! Head over to the Mr Resin store to find everything you need for your projects. And don't forget to subscribe to our Newsletter for exclusive discounts and community deals.
To stay up to date and grab special coupons, join the resistance in our Telegram group here. We'd love to have you — come share tips, news, and exclusive events!
✨ Happy Printing! 🚀
Your most common questions about Zombicide and 3D printing ❓
Mixing a hobby like Zombicide with 3D printing naturally brings up a lot of questions. I've pulled together the most common ones here to clear things up and help you dodge the most frequent pitfalls. 🧐
What's the best resin for printing Zombicide minis as a beginner?
If you're just starting out, I'd hands-down recommend a water-washable resin. Brands like Anycubic and Elegoo have some fantastic options. 💧
Why? Because it cuts out the hassle of isopropyl alcohol. Cleanup is far simpler, safer, and much less smelly — a real bonus if you're printing at home. On top of that, the level of detail you can achieve is spot-on for survivors and zombies alike.
Can I get in trouble for printing Zombicide proxies? ⚖️
Let's be straightforward about this. Printing 3D models for personal use — like expanding your own zombie horde for game nights — is generally considered acceptable. The real issue starts when money gets involved.
Never, under any circumstances, sell copies of copyrighted models. 🚫 Always look for community-created files with open licenses, or support the artists who share their work on platforms like MyMiniFactory.
The goal is to make your game more epic, not to step on the work of the original creators. At the end of the day, it's about playing fair and respecting the community. 🙏
My printed minis snap if you look at them funny — what do I do? 😭
The classic miniature that breaks the moment it hits the floor. This usually comes down to two things: incomplete curing or the wrong resin. Make sure your prints are getting UV light from every angle until they're fully cured. 🛡️
If they're still brittle after that, it's time to switch materials. Try an ABS-Like resin or a blend with tough resins. These are engineered to take more abuse — they have a flexibility that makes them far more impact-resistant. Perfect for minis that are going to see heavy tabletop action.
✨Happy Printing! 🚀