
Imagine achieving resin prints so clean and glossy they look professionally made — with the Anycubic Wash and Cure, that's now completely within reach! 🧲
In this complete 2025 guide, you'll discover how to master every step of post-processing, from washing to curing, so your models look flawless right at home. We'll walk you through how the machine works, step by step, with expert tips, maintenance tricks, common mistakes to avoid, and product recommendations.
Get ready for spotless prints and professional-level results. If you want to take your projects to the next level, don't miss this guide — and join the maker community already transforming their workshops. Let's get into it!
What Is the Anycubic Wash and Cure — and Why Is It Essential in 2025?

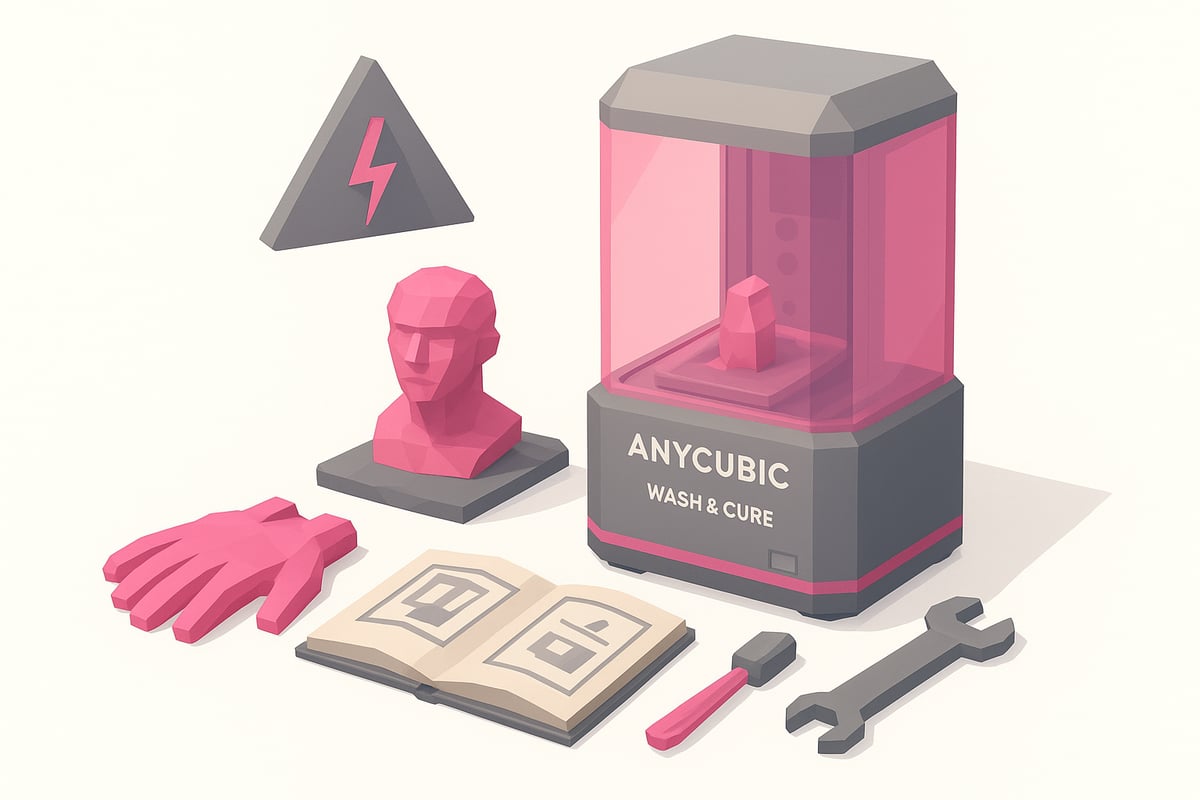
Wondering what makes the Anycubic Wash and Cure so special? 🤔 This device combines two critical post-processing steps for resin 3D prints into one: washing and curing. You can clean and harden your models in a single machine — saving time and keeping you away from direct chemical contact.
By 2025, the Anycubic Wash and Cure has become a must-have for anyone chasing professional results at home. Its automated workflow offers real safety benefits, eliminates common mistakes from manual washing, and delivers consistent, even finishes. It's also compatible with popular printers like the Anycubic Photon and Elegoo Mars, and works seamlessly with both standard and water-washable resins.
Key benefits include:
- Deep cleaning and uniform curing in minutes.
- Reduced risk of accidents and damaged parts.
- Consistent results — ideal for highly detailed prints.
According to 3D printing forums and communities, over 90% of users report a significant improvement in final print quality after switching to the Anycubic Wash and Cure. A classic example: compare a sticky, dull miniature fresh from a manual wash against the sharp detail and clean shine you get from the machine.
Recent models, like the 3.0 version, feature improved UV LEDs, better energy efficiency, and easier maintenance. If you want to get the most out of your machine, pairing it with the right resin makes all the difference — check out our Anycubic Resins for 3D Printers to maximise your results.
Give the technology a chance and take your creations to the next level! 🦾

🧽 Anycubic Wash and Cure Stations: Which One Should You Choose?
If you own a resin printer, you already know that post-processing is just as important as the print itself. Wash and cure stations make the whole process easier, faster, and a lot less messy. Anycubic offers three models in its Wash & Cure 3 lineup, each designed for different volumes and workflows. Here's a breakdown to help you figure out which one suits your projects best.
🚀 Anycubic Wash & Cure 3 (The Compact Entry-Level Model)

-
Wash and cure in one machine. Clean your prints in isopropyl alcohol and cure them without switching devices.
-
4 L wash tank and dual-layer PP basket with adjustable heights (100 mm and 165 mm) to fit different build plates and reduce IPA consumption.
-
Flexicure lighting system with a dedicated lens for more even UV distribution, delivering improved curing uniformity over the previous model.
-
Easy controls with a rotary dial and touch buttons to set wash and cure times from 1 to 30 minutes.
-
Working volumes: 3.18 L curing capacity and wash capacity of up to 165 × 100 × 180 mm (230 × 140 × 250 mm with build plate).
-
Includes: machine, wash tank and basket, Allen key, support bar, adapter, user manual, curing turntable, and flexible lamp.
Best for: users with small to mid-size resin printers (up to around 7.3″ print area) looking for a compact, affordable all-in-one solution for everyday-sized prints.
🆙 Anycubic Wash & Cure 3 Plus (larger capacity and better detail)

-
Larger capacity: the wash basket is 13.4% bigger than the previous model, holding up to 7.6 L, with a 12 L tank and a curing area of 228 × 128 × 260 mm.
-
Dual-layer platform and PP basket with adjustable heights of 150 mm and 250 mm, compatible with build plates from 7.6 to 10.6 inches, maximising IPA savings.
-
Powerful, even curing: redesigned bead layout and lens, plus the Flexicure gooseneck system that boosts light energy for thorough curing of complex geometry.
-
Quiet operation with intuitive rotary dial and touch button controls. Adjustable timer from 1 to 30 minutes and a dedicated light boost mode.
-
Specifications: 9 L curing capacity, washing up to 230 × 140 × 260 mm (165 × 100 × 165 mm with platform), 3 L basket and 4 L container.
-
Includes: machine, bucket and basket, wrench set, rod, adapter, manual, curing turntable and flexible lamp.
Ideal for: makers with 10″ or smaller printers who want deeper washing, even curing, and an alcohol-saving mode without stepping up to the larger unit.
💪 Anycubic Wash & Cure 3 Max (the beast for large-format printers)

-
Massive 15.1 L capacity with a 305 × 165 × 300 mm wash volume, compatible with printers up to 13″ and large, bulky prints.
-
Automatic "spray + immersion + cure" mode with adjustable cycles from 13 to 42.5 minutes — fully hands-free from wash to cure.
-
Fully customisable: run wash mode (10–39.5 min) and cure mode (0.5–30 min) independently to suit your workflow.
-
Dual-action cleaning system: combines IPA soaking with spray washing to cut solvent use and improve results; 20 L IPA tank included.
-
Smart monitoring: built-in sensors alert you if the lid is open, liquid isn't flowing, there's a blockage, or voltage drops.
-
Touchscreen panel and enclosed design with intuitive controls. Powered by 20 × 405 nm UV LEDs at 120 W.
-
Includes: machine, tray, detergent and waste drums, clean liquid drum, water tubes, wrench set, adapter and cable.
Ideal for: professionals and high-volume users printing large models, multiple parts, or small production runs. The most feature-complete option, with fully automatic cycles and IPA-saving technology — built for large-format resin printers.
🤔 Which one should you choose?
-
Small spaces and miniatures: the Wash & Cure 3 covers all the essentials at a budget-friendly price.
-
Mid-size printers and regular use: the Wash & Cure 3 Plus offers greater capacity, improved curing, and IPA savings without taking up too much space.
-
Large projects and heavy users: the Wash & Cure 3 Max is the ultimate solution, capable of handling large models and delivering a more thorough clean thanks to its spray rinse mode.
🎯 Extra tips
-
Adjust times based on your resin type. For washing, 5 to 10 minutes is usually enough; for curing, it depends on the paint layer and model size.
-
Fill your tank with IPA up to the recommended line and reuse it; the Max version lets you separate dirty and clean fluid so you can stretch it even further.
-
Always wear gloves and a mask when handling resin and IPA, and work in a well-ventilated area.
How to use the Anycubic Wash and Cure step by step
Ready to get the most out of your Anycubic Wash and Cure? Here's a straightforward guide to help your resin prints come out looking stunning from the very first use. Follow these steps and you'll notice the difference in shine, detail, and durability. 🛠️✨

Setup and safety
Before switching on your Anycubic Wash and Cure, make sure you have all the accessories ready: basket, rotating platform, UV lid, and a clean tank. Always wear nitrile gloves and a mask to avoid contact with resin and fumes.
Make sure you're working in a well-ventilated space. Fill the tank with isopropyl alcohol up to the indicated line (check compatible products at Alcohol and post-processing products). Confirm that your model and support fit comfortably in the basket to avoid jams.
Keep some absorbent paper nearby to wipe up any splashes, and position the machine away from heat sources or direct light. This helps prevent accidents and keeps your equipment in good shape.
Washing process: step-by-step instructions

Place your freshly printed part in the basket or, if it's especially large, use the rotating platform on the Anycubic Wash and Cure. Set the wash time based on the size and type of resin (typically between 2 and 6 minutes).
Select the wash mode and keep an eye on the process in case there's excessive foam or debris. The machine agitates the alcohol to clean evenly, saving you time and effort compared to washing by hand.
Once the cycle is done, remove the part with tongs and let it drain on absorbent paper. This prevents staining and sticky residue. You'll notice how much more consistent and hassle-free the cleaning is.
Curing Process: How to Achieve a Perfect Finish

Before curing, make sure your print is completely dry. Any remaining moisture can interfere with the curing performance of your Anycubic Wash and Cure. Place the part on the rotating platform, set your cure time (anywhere from 2 to 8 minutes depending on size), and ensure the UV light reaches the entire surface.
Always use the UV cover to block light exposure and protect your eyes. The result: a glossy, sharp-detailed finish with optimal hardness — ready to handle or paint.
Tips for Professional-Quality Results
- Adjust cure time and power based on your resin type and part size.
- Use high-quality resin for sharper details and better surface quality.
- For highly complex prints, do a mid-process rinse before curing.
- Keep your Anycubic Wash and Cure clean to prevent resin residue from affecting future prints.
Follow these tips and you'll get professional results every time — while keeping your machine running longer.
Expert Tips to Get the Most Out of Your Machine and Make It Last
Want your Anycubic Wash and Cure to keep performing like new? Here are the best tricks to maximise its lifespan and avoid common headaches. 🧼✨

Key Maintenance Tips to Keep Your Machine in Top Shape
- Clean and empty the wash tank after every session to prevent sticky residue and odour build-up.
- Regularly check that the UV LEDs are working at full power. If curing performance drops, it may be time to replace them.
- Change your isopropyl alcohol when it turns cloudy or loses effectiveness. A good rule of thumb: if parts come out with residue, your IPA needs replacing.
- Store your Anycubic Wash and Cure in a dry, dust-free space. Keep accessories organised and always use genuine replacement parts.
- Wear a mask and gloves when handling chemicals, and always work in a well-ventilated area.
Common Mistakes and How to Avoid Them
One of the most frequently reported issues is prints coming out tacky or with uneven curing. This is usually caused by dirty IPA, weak LEDs, or incorrect cure times. Here's how to fix it:
- Thoroughly clean the tank and check the condition of your alcohol.
- Adjust cure time to match the size and complexity of your print.
- Check the Anycubic Wash and Cure 3.0 instruction manual for specific maintenance and troubleshooting guidance.
Community Tips and Insights
According to user forums and community groups, 90% of issues are solved simply through regular cleaning and timely IPA changes. Users also recommend avoiding overloading the machine and running test cures on small parts before tackling larger projects.
With these tips, your Anycubic Wash and Cure will deliver pro-level results for years to come. Remember — prevention is the key to consistently perfect prints!
Common Problems and How to Fix Them
Getting tacky prints after using your Anycubic Wash and Cure? 😅 You're not alone! Here's a quick troubleshooting guide to help you identify and solve the most common issues with this machine.
Most Common Issues
- Sticky or under-cured prints: This usually happens when washing time is too short or curing time isn't long enough. Make sure you're washing your model for the recommended duration, dry it thoroughly before curing, and adjust cure times based on the resin type and part thickness.
- Leaks or poor lid seal: If you notice spills, check the lid closure and gasket. Clean them carefully and make sure there's no residue preventing a proper seal.
- Platform rotation failure: This can be caused by stuck parts or lack of lubrication. Clean the shafts and check for any hardened resin buildup.
- Weak or flickering UV light: If curing is uneven, inspect the UV LEDs. Flickering can indicate wear. Check the Anycubic Wash and Cure user manual for detailed troubleshooting and replacement instructions.
Practical Tips
For small or highly detailed prints, use supports and fine-tune your wash and cure times to avoid overexposure or sticky residue.
If the machine freezes, turn it off, wait a few seconds, and power it back on. Regular calibration helps prevent recurring issues.
Real-world example: One user kept getting sticky prints despite multiple wash cycles. After investigating, they found the IPA was saturated and the cure time was set too low. They replaced the alcohol and increased the timer — the result was clean, fully hardened parts.
Still have questions? Join the community to share your experience and get help from fellow makers. 🛠️
Quick Comparison: Anycubic Wash and Cure vs. Other Post-Processing Solutions
Thinking about investing in a wash and cure station? 🤔 Here's a quick comparison of the most popular options in 2025, so you can see the key differences at a glance and find the best fit for your workflow.
| Model | Features | Approx. Price | Results | Automation | Ease of Use |
|---|---|---|---|---|---|
| Anycubic Wash and Cure 3 | Wash & cure | €120–€150 | ⭐⭐⭐⭐⭐ | Yes | Very easy |
| Elegoo Mercury Plus | Wash & cure | €110–€140 | ⭐⭐⭐⭐ | Yes | Easy |
| Manual / DIY solution | Wash only | €30–€60 | ⭐⭐ | No | Requires practice |
The Anycubic Wash and Cure stands out for its fully automated process, professional-quality results, and straightforward operation. Users across forums consistently highlight the time savings and uniform curing. For a deeper dive, check out this Anycubic Wash & Cure review, which covers both the strengths and areas for improvement.
Ultimately, the right choice comes down to your workflow and budget. If you're after consistent results with minimal effort, the Anycubic remains the top pick in 2025.
Community and Additional Resources for Anycubic Wash and Cure Users
Being part of the Anycubic Wash and Cure community is key to improving your results and getting answers fast. There are highly active forums and groups where users share tips, compare prints, and help each other tackle everyday challenges.

Looking for resources, tutorials, and personalised support? We recommend checking out the 3D Printing Community and Resources section, where you'll find step-by-step guides, videos, and expert recommendations. Staying up to date with the latest firmware and software updates will help you always get the most out of your machine.
Don't forget to join the Mr Resin Telegram group for exclusive discounts, coupons, and direct support from fellow users. Also, subscribe to the Newsletter and be the first to hear about deals, events, and the latest news from the 3D printing world. You'll find real testimonials from experienced users who have optimised their workflow and now enjoy professional-quality finishes.
Join the community and take your Anycubic Wash and Cure experience to the next level!
Now that you know how to get the most out of your Anycubic Wash and Cure and have all the tips for flawless 3D prints, why not take your creations further? At Mr Resin, we have an extensive range of resins for every taste and project — from ultra-detailed miniatures to tough prototypes. Whether you want to experiment with different results or simply want the best quality for your machine, take a look at everything we have to offer. You're sure to find exactly what you need!
Browse all 3D printing resins