

3D resin prints are, to put it simply, a kind of controlled magic. We start with a liquid resin, which is a light-sensitive polymer, and turn it into a solid, detailed object using a UV light source. This process happens layer by layer.
The best-known technologies are stereolithography (SLA) and digital light processing (DLP), famous for one reason: they achieve a level of detail and surface smoothness that leaves other techniques, like filament (FDM), in the dust.
What are 3D resin prints and why does detail matter above all else 🤔
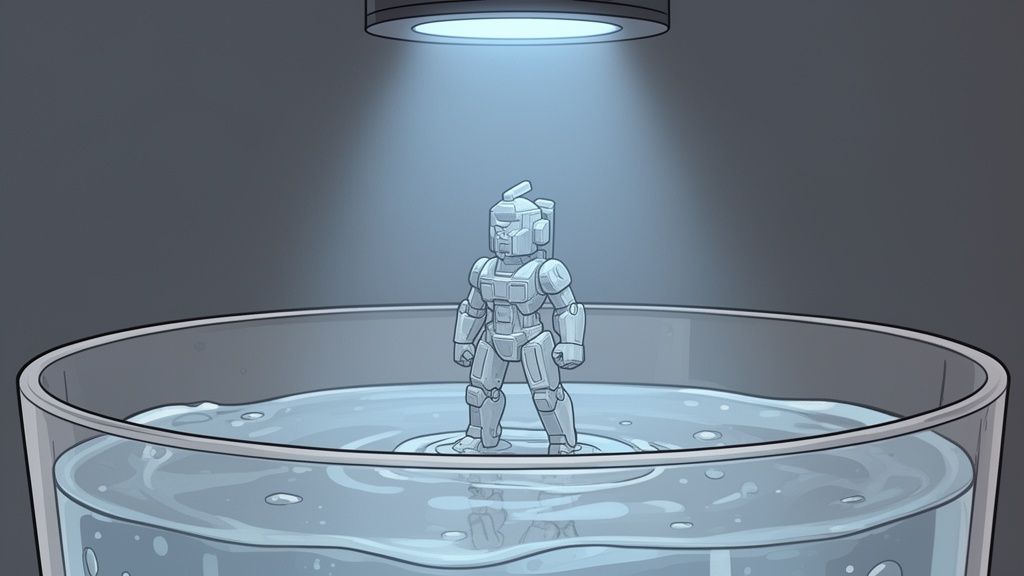
Imagine you're building something with microscopic LEGO pieces. Instead of placing them one by one, you have a kind of "magic torch" 🔦 that solidifies them instantly, creating a single piece all at once, with no joints or marks. Well, that, broadly speaking, is 3D resin printing.
The 3D printer has a vat filled with liquid resin and a platform that moves downward. From below, an LCD screen or projector emits UV light in the exact shape of each layer, hardening the resin precisely where it hits.
By building the object layer by layer with this level of precision, the results are incredible. While other technologies leave visible layer lines, here they are so subtle that you can neither see nor feel them to the touch.
The obsession with detail has a reason behind it

The great advantage of this technology is its ability to reproduce even the finest detail. That is why it is the go-to choice in sectors where precision is non-negotiable.
- Scale modelling and miniatures ♟️: Perfect for bringing wargame figures, dioramas, and characters to life with textures and facial features that look strikingly real.
- Jewellery 💍: Allows the creation of prototypes and casting moulds with filigree and detail that would be impossible to carve by hand.
- Engineering and prototyping ⚙️: Ideal for producing functional prototypes with smooth surfaces and minimal tolerances, perfect for checking fits and assemblies.
The pull of 3D resin printing is reflected in the numbers. The Spanish 3D printing market is expected to surpass €10.125 billion before 2027, and much of that growth is coming from engineering and design. For specialists like us at Mr Resin, this confirms that demand for high-quality resins in these niches continues to grow.
If your curiosity has been sparked and you want to better understand the whole process, we explain more about how 3D resin printing works in our article.
How to choose the perfect 3D resin for your project 🎯
Choosing the right resin is like selecting the secret ingredient for a recipe: the success of your 3D resin prints depends directly on it. With so many options on the market, things can seem overwhelming, but in reality each type is designed with a very clear purpose. Let's break them down so you always make the right choice! 🎯
Think of resins like a toolbox. You wouldn't use a hammer to drive a screw, right? 🔨 Well, the same applies here. Some resins are great for quick, budget-friendly prototypes, while others are formulated to withstand impacts or capture every last micropore of a miniature.
Standard resins: the ideal entry point
If you're just starting out, standard resin is your best friend. It's, by far, the most affordable and easy-to-use option, perfect for getting the hang of the process without breaking the bank. It's ideal for decorative figures, prototypes that just need to look good, and any part that won't be subjected to much mechanical stress.
Its strong point is the balance between cost and quality. While it's not the toughest option out there, it offers a very good surface finish, capturing detail with more than decent definition for most beginner projects.
Water-washable resins: easy and safe cleaning
Let's face it: one of the most tedious parts of the process is cleaning parts with isopropyl alcohol (IPA). Water-washable resins 💧 eliminate that step entirely, letting you clean your creations directly under the tap. This is not only more convenient, but also reduces odors and is a safer alternative for working at home.
They're fantastic for those looking to simplify their workflow without sacrificing too much detail. If you want to dive deeper into this world, take a look at our complete guide to resins for 3D printing, where we cover everything.
ABS-Like resins: for parts that take a beating
Do you need to print parts that must withstand drops, press-fit assemblies, or constant use? Then ABS-Like resin is your choice. As its name suggests, it mimics the mechanical properties of ABS plastic, offering toughness and impact resistance far superior to standard resins.
It's the go-to option for creating functional prototypes, electronics enclosures, replacement parts, or any object that needs durability. Imagine printing the parts of a drone 🚁 or the gears of a mechanism — this is where this resin truly shines.
High-definition resins: a paradise of detail
When every micron counts, 8K or 14K resins are the crown jewel 👑. They're formulated to get the most out of the latest-generation printers, capable of producing a level of detail that will leave you speechless. They're the number one choice for jewelry, dental models, and, of course, wargame miniatures with incredibly fine textures and details.
Quick comparison of Mr Resin 3D resins
So you can see everything at a glance, we've put together this table. Use it to choose the perfect resin based on the application, ease of use, and the final result you're looking for.
| Resin Type | Ideal For | Main Advantage | Difficulty Level |
|---|---|---|---|
| Standard | Beginners, decorative figures, visual prototypes | Affordable and easy to use | Easy ✅ |
| Water-Washable | Home projects, simplified cleaning | Cleans with water, less odor | Easy ✅ |
| ABS-Like | Functional prototypes, resistant mechanical parts | High impact resistance and toughness | Intermediate ⚠️ |
| High Definition (8K/14K) | Miniatures, jewelry, dental models | Maximum level of detail and smooth surfaces | Intermediate ⚠️ |
As you can see, choosing correctly will save you time, money, and more than a few headaches. Before buying, take a second to think about what your project needs and choose the resin that best suits those requirements. That way, success is almost guaranteed! 😉
How to set up your first resin 3D printer without losing your mind 🛠️
Opening the box of your first resin printer is a mix of excitement and a little bit of vertigo, right? Don't panic! 🛠️ Setting it up and getting it ready is much easier than it looks. The key to perfect resin 3D printing results lies in having your equipment well calibrated, and if you understand its four main parts, you'll have total control.
Think of it this way: the monochrome LCD screen is the brain, as it projects the image of each layer. Just below it, the UV light source works its magic and solidifies the resin. Between the two, at the bottom of the vat, sits the FEP film, a transparent sheet that is crucial. And finally, the print platform moves up and down, building your figure layer by layer. Understanding this process is the first step to mastering the art.
From unboxing to first power-on 📦
The printers we carry at Mr Resin, such as those from Anycubic or Elegoo, come practically pre-assembled. Getting it out of the box and up and running will take you no more than 20 minutes. Typically, all you need to do is attach the print platform and place the resin vat. And that's it!
To get off to a good start, follow these steps:
- Unpack with care: Remove the foam and plastic protectors. Make sure nothing is left inside the printer, as pieces of packaging can sometimes get stuck in there.
- Connect and power on: Plug it in and press the power button. The first thing to do is check that the touchscreen responds and that you can navigate through the menus without any issues.
- Run a screen test: In the tools menu, almost all printers have an "exposure test" or "screen test" option. This will illuminate the LCD screen with a rectangle, allowing you to confirm that the entire area is working and that there are no dead pixels.
Leveling: the step that will make or break your success
If there is one thing that separates a glorious first print from a blob of cured resin stuck to the FEP, it is platform leveling. It is, without a doubt, the number one cause of adhesion failures. The goal is simple: to get the platform perfectly flat and parallel to the LCD screen.
Leveling is not something you do once and forget about. It's worth checking every certain number of prints, or if you move the machine to a different spot. Trust me, spending two minutes on this will save you hours of frustration and wasted resin.
The process is fairly standard: you loosen the platform screws, place a sheet of paper over the LCD screen (this protects it and provides just the right gap) and use the "home" or "zero" function to lower the platform until it bottoms out. Once it's down, hold it firmly against the paper, tighten the screws again and save that position as "Z=0". You're now one step away from launching your first print and watching the magic happen! ✨
The art of post-processing for professional finishes ✨
Congratulations, your piece has finished printing! 🎉 But the journey doesn't end here. In fact, this is where one of the most important phases begins — turning your resin 3D prints from a simple object into a work of art with a professional finish. This process is called post-processing, and it's the secret to achieving clean, durable and spectacular pieces.
Post-processing is a workflow divided into three key stages: washing, support removal and curing. Although it may sound like a lot of hassle, it's a methodical procedure that, once you master it, becomes almost like a ritual.
Step 1: Washing the piece
When the print platform rises, the piece is covered in a thin layer of liquid resin that has not solidified. The first step is to clean it thoroughly to remove this excess, which would otherwise leave the surface sticky and ruin all those details you worked so hard to achieve.
To do this, you have two main options:
- Isopropyl Alcohol (IPA): This is the most common and effective method. You submerge the piece in a container with IPA and gently agitate it so the alcohol does its magic.
- Water (for washable resins): If you use water-washable resin, you can clean the piece directly with water, which greatly simplifies the process and reduces odors. An absolute pleasure.
Regardless of the liquid used, the goal is the same: to leave the piece completely free of uncured resin. If you want to master this technique, our blog has a complete guide on the use of isopropyl alcohol that will be a great help.
This diagram illustrates the basic workflow for getting your printer up and running, a process that comes before post-processing and lays the foundation for success.
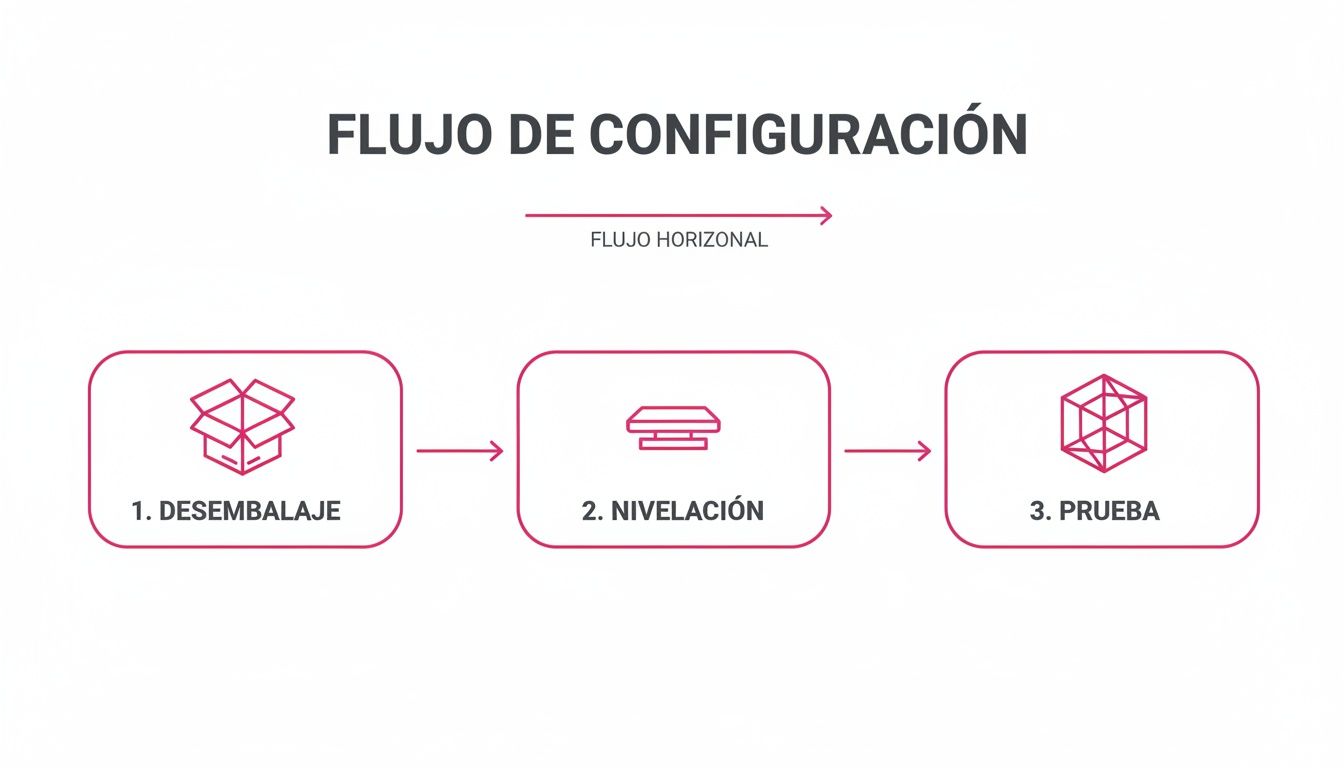
Getting the initial setup right, as shown in the infographic, is just as crucial as post-processing itself to avoid failures and ensure a good final result.
Step 2: Support removal
Once clean, it's time to remove the supports. And do it with great care! The resin at this point is in a "green" state, meaning it is quite fragile.
The ideal approach is to remove the supports before the final curing, as they are softer and easier to cut, reducing the risk of leaving unsightly marks on the piece. Use fine, precise flush cutters and take your time.
Step 3: Final curing with UV light
The last step is curing. This process involves exposing the piece to a UV light source to harden it completely and give it its maximum mechanical strength. Without proper curing, the piece will remain soft, fragile and sticky permanently.
Pro Tip: To automate and perfect these steps, Wash & Cure stations are a game-changing investment. At Mr Resin you'll find models that combine both processes in a single machine, saving time and guaranteeing consistent, safe results. ✨
Solving the most common problems in your prints 🧐
Don't be fooled: even the most seasoned maker has run into a failed print. 🧐 It's part of the journey in resin 3D printing, but what really makes the difference is knowing why errors happen so they don't occur again. The key is turning that frustration into knowledge to master your printer and get your pieces coming out perfect.
Think of this section as your emergency cheat sheet for diagnosing and fixing those failures that drive you crazy. Don't worry, almost all of them have a logical explanation and a solution that's simpler than it seems. Let's unravel the most common mysteries!
The piece won't stick to the print platform
This is, without a doubt, the number one failure and the most frustrating one when you're starting out. You hit print full of excitement and, hours later, you find a blob of cured resin at the bottom of the vat (the FEP) and nothing on the platform. The cause is almost always one of these three things:
- Incorrect leveling: We've already said it, but it really is the most CRITICAL step. If the platform isn't perfectly flat and parallel to the LCD screen, the first layer won't stick properly. It's that simple.
- Initial exposure times too low: The first layers are the foundation of your piece. They need more UV light exposure time to create a solid, well-anchored base. Increase this time in your slicing software (slicer).
- Lack of adhesion: Cleanliness is essential. Make sure the print platform is spotless. A good wipe-down with isopropyl alcohol will remove any traces of grease or resin that could sabotage adhesion.
Layer separation or delamination
Does your piece have horizontal lines or cracks, as if it's peeling apart? That's called delamination, and it happens when a layer doesn't bond properly with the previous one.
This failure can be caused by very long pauses during printing, a sudden temperature change in the room, or, most commonly, the speed at which the platform rises being too high. This creates such a strong suction effect that it tears the layers apart.
To fix it, try reducing the lift speed (lift speed) in your slicer settings. It also helps a great deal to keep the resin at a stable temperature, ideally above 20 °C.
Poorly defined or "soft" details
If your miniatures come out with details that look "melted", soft, or blurry, the culprit is almost always excess exposure time on the normal layers. When the UV light stays on longer than it should, it spreads beyond the edges of the layer, causing details to "fatten up" and merge together.
The best way to nail it is to print a calibration test. These are small models designed specifically to find the perfect exposure time for each resin. They ensure you get maximum sharpness without the piece becoming brittle. It's a small effort that makes a huge difference in the final result! 💪
Painting your creations for a spectacular result 🎨
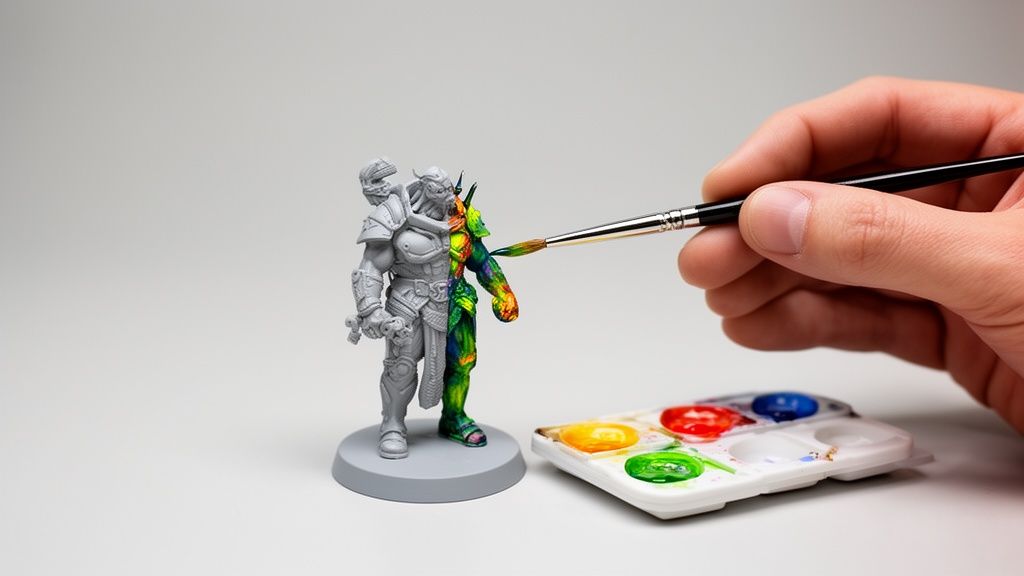
Once you have your piece printed, washed, and cured, comes the most creative and rewarding part: bringing it to life with color! 🎨 3D resin prints, with that ultra-smooth surface and incredible level of detail, are a perfect canvas, especially for modelling enthusiasts and wargames players.
Trust me, transforming a grey model into a genuine work of art is easier than it looks if you follow a few key steps.
The first thing, and this is non-negotiable, is applying a good coat of primer. Think of it as the foundation of a building: it prepares the surface so the paint adheres properly, evenly, and doesn't chip off at the first opportunity. It's the bridge between the resin and the color.
Your painting arsenal: paints and brushes
To achieve a result that blows you away, you need quality tools. At Mr Resin we have our favorite brands — the ones that are a standard in the modelling world and never let you down.
- Vallejo Paints: With ranges like Game Color or Xpress Color, Vallejo gives you an almost infinite color palette and top-tier quality. They are water-based acrylic paints, which makes them very easy to use both with a brush and an airbrush.
- Artis Opus Brushes: A good brush makes all the difference. Those from Artis Opus are designed to give you maximum control and precision, something vital for those tiny details that truly bring a miniature to life.
With the piece primed and your tools at the ready, let the magic begin.
Basic techniques for an incredible finish
You don't need to be a Sistine Chapel painter to achieve jaw-dropping results. Master these three basic techniques and your figures will make a massive leap in quality.
- Base coats: Simply put, this involves applying the main colors of your model. The trick is to apply thin, even layers so you don't lose the details. Patience and thin coats!
- Washes: This is liquid magic, I promise you. 🧙♂️ These are highly diluted inks that flow into every nook and cranny of the figure, creating natural shadows in a super quick and easy way.
- Dry Brushing: The perfect technique for highlighting textures and edges. Load the brush with a tiny amount of paint, wipe it off almost completely on a piece of paper, then lightly drag it across the raised areas. You'll see all the relief details appear out of nowhere.
And one final golden tip: when you're happy with your work, protect it. A coat of matte or satin varnish will not only prevent scratches and wear over time, but will also unify the finish of your little masterpiece. Now get painting! 🖌️
Conclusion:
At this point, you have all the cards on the table. Resin 3D printing has gone from being a distant technology to becoming an incredibly powerful tool, within reach of anyone who wants to create. We hope this guide serves as a roadmap for diving into this world with confidence. Don't get discouraged if your first print isn't perfect; with a little practice and patience, the results you can achieve are, quite simply, spectacular. 🌟
Now it's your turn. Visit our Mr Resin online store, where you'll find absolutely everything you need to get off to a great start. From resins and next-generation 3D printers to the latest accessories to make post-processing a breeze. We're here to help your projects level up.
And most importantly: you're not alone in this adventure. We want you to join our makers community. Join our Telegram group here to access exclusive community discounts and deals, as well as coupons, news and exclusive events. It's the perfect place to show off your creations and ask any questions you might have.
Don't forget to subscribe to our Newsletter! That way you can access more exclusive community discounts and deals, coupons, news and events.
✨Happy Printing! 🚀
Written with the Outrank tool