

Hey there, artists and makers! Mr Resin here again, ready to dig into one of the most important tools in our arsenal: brushes for miniatures. Because let's be honest, a good brush is what separates a cool resin figure from a true work of art. It's the extension of your hand, and getting it right is half the battle when it comes to achieving that razor-sharp precision we're after, especially when working with pieces printed in high-definition resin.
Over the years, hundreds of brushes have passed through my hands. From the typical bargain-bin ones that barely last five minutes to absolute gems you almost feel bad using. In this guide I'm going to condense all that experience so you can go in with a clear goal, pick the perfect brushes without breaking the bank, and most importantly, forget about that frustration of watching the bristles splay out like a broom right when you're painting an eye. I've got you covered!
What Brushes You Need to Start Painting Miniatures
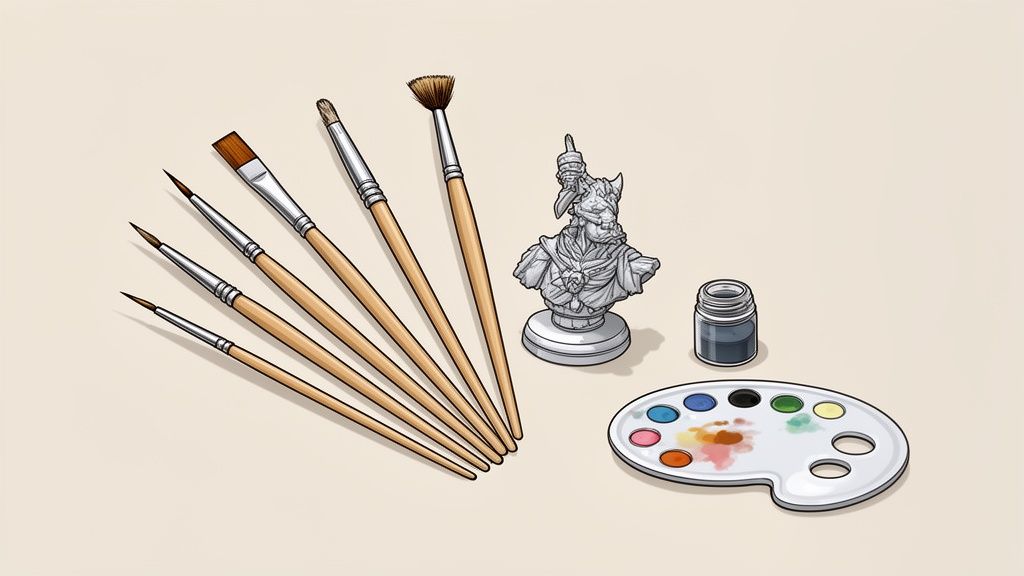
I want you to understand what makes a brush good, how to take care of it so it lasts you years, and what techniques you can start using from minute one. We're going to look at materials, sizes and shapes, because painting the power armour of a Space Marine is not the same as painting the tiny, malevolent eyes of an orc.
If right now you feel completely overwhelmed by all the options, don't worry. That's what I'm here for! This guide is designed to take you from zero to one hundred.
My golden tip for getting started: Forget about packs of 20 mediocre brushes. You're much better off focusing on buying 3 or 4 good-quality brushes. At the beginning, quality beats quantity hands down. You'll thank me later.
With the tips and tricks I'm going to share with you, your painting level is going to shoot through the roof. You'll see that choosing a brush is much easier than it seems once you know what to look for. And if you want even more, you can take a look at my other guide on the best brushes for miniatures, where I analyse specific models. Let's get into it! 🎨
Understanding the Parts of a Modelling Brush
To choose a good brush for your minis, the first step is knowing what it's made of. No, you don't need a master's degree in brush engineering, but knowing its three key components is going to save you a lot of money and frustration. Trust me!
Think of it this way: each part of the brush has a job to do, and if one fails, the whole operation falls apart.
The Handle, the Ferrule and the Belly
Let's break the brush down so you can see what each component does and why it matters so much.
- The handle: It's your direct connection to the miniature. You're going to spend hours holding it, so you'd better make sure it's comfortable and well-balanced. They come in all shapes and sizes, even ergonomic ones. There's no right answer here, it's a matter of feeling.
- The ferrule: That small metal piece that joins the handle and the bristles. Watch out, because this is CRUCIAL! A poor-quality ferrule, badly crimped or made from cheap metal, is a death sentence for the brush. It will loosen, shed bristles at the worst possible moment, and let water seep in, rotting the handle from the inside.
- The tip (or tuft): This is where the soul of the operation lives. It's the bundle of bristles that soaks up the paint and gently deposits it onto the figure. Its material, its shape, and above all, its ability to hold a sharp point, are what separates a precision tool from a simple stick with hair.
In my experience, 90% of problems with cheap brushes come from a ferrule that feels like it's made of chewing gum. There's nothing more frustrating than painting an eye and having the brush decide to drop a bristle right there.
What truly separates a good brush from a legendary one is its "snap" (the ability to return to a perfect point after each stroke) and the amount of paint it can hold in its "belly" without dripping.
That's exactly why bristle type is everything. Natural hair, such as Kolinsky sable, remains the undisputed king thanks to its elasticity and its insatiable thirst for paint. But don't be fooled — today's synthetic brushes have evolved enormously and are genuine all-rounders for the most demanding techniques.
The winning strategy? Having a good mix of both in your arsenal.
The Brush Arsenal and Its Numbering
Right, now the fun begins! We're going to break down the arsenal of miniature brushes so you know exactly which one to reach for at any given moment. Because, let's be honest, not all brushes are created equal. Each shape and size has its own superpower, and knowing them is the key.
First things first, we need to understand their anatomy. Don't worry, it's easier than assembling an IKEA cabinet. This diagram makes it crystal clear.
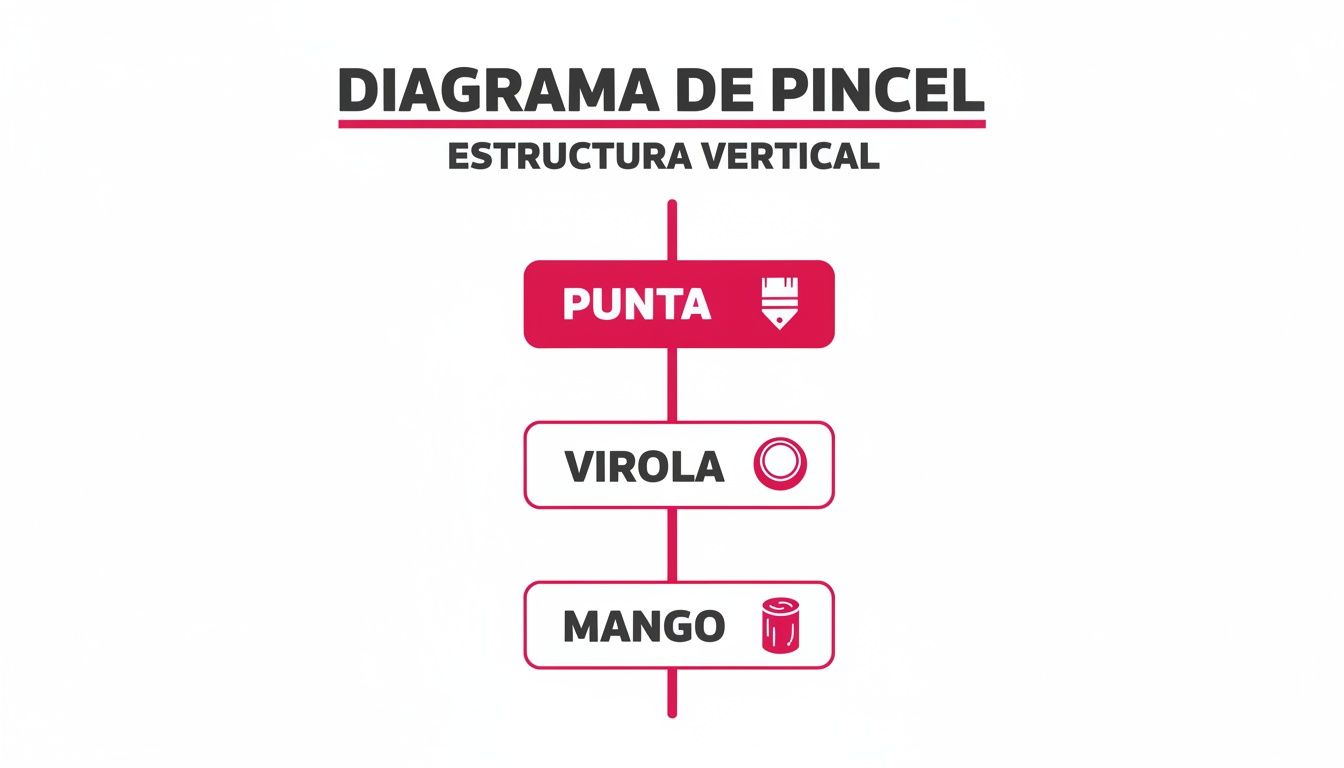
As you can see, the tip is the star of the show, the ferrule is its metal bodyguard, and the handle is your joystick, your point of control. If the ferrule breaks down and starts shedding bristles, you can start saying goodbye to that brush.
Brush types by shape
There are loads of shapes out there, but for painting our 3D printed figures, we're going to focus on what I call the "fantastic four." With these, you've got practically everything covered.
- Round brush: This is the Messi of brushes, the ultimate all-rounder. Its sharp tip lets you nail the details, while its "belly" (the widest part of the bristles) holds paint to cover larger surfaces. If you could only keep one, this would undoubtedly be it.
- Detail brush (or detail): Think of it as a round brush that has been to the gym: it has shorter bristles and an ultra-fine tip. It becomes your best friend for painting eyes, outlining scars, drawing runes and any intricate work you can think of. Pure precision.
- Flat brush: Ideal for applying base colour coats quickly and evenly. Painting armour, a tank or a castle wall? This brush will save you a ton of time and leave you with a smooth, uniform finish. It is also a marvel for lining straight edges.
- Dry brush (or drybrush): You will recognise it because it usually has stiffer, shorter bristles and often a flat or rounded tip. It is designed for a single mission: the drybrushing technique. It is the fastest and most effective way to highlight textures and add volume to your minis.
A tip from a fellow painter: Do not drive yourself crazy with the numbering (000, 0, 1, 2...). The reality is that it varies enormously between brands like Vallejo or Artis Opus. What really matters is the quality and shape of the tip. I can assure you that a good #2 brush with a perfect tip is a thousand times better and more precise than a poor-quality #000.
In fact, Spain has an incredible brush-making tradition. From our ancestors using plant fibres in the caves of Altamira, we have become a European benchmark. Manufacturers like Escoda have built that reputation throughout the 20th century. It is no coincidence that in maker community surveys, up to 65% prefer Spanish brushes for their durability. If your curiosity is piqued, you can discover the full history of the brush and see where it all began.
Essential Painting Techniques for Your Miniatures
Alright, team! You have got your miniature brushes on the table and the paints waiting. Now comes the coolest part: bringing that figure to life! I am going to be your guide on this journey through the techniques every figure painter should have in their arsenal, and I will let you know which brush is the perfect companion for each task.
Let us start with the foundations: the base coat. The goal here is simple, cover the mini with a flat, opaque colour. For this, your best friend will be a medium-sized round brush, like a #1 or a #2. It will give you good coverage without losing control over the smaller details.
Washes, highlights and other tricks of the trade
With the base coat fully dry, this is when the real magic begins. It is time to bring out volumes, create shadows and make the figure look like it is about to leap off the base.
-
Washes or shades: Think of them as an intelligent ink that flows on its own into the recesses and crevices of the figure, creating shadows almost automatically. To apply them, you need a brush that soaks up a good amount of liquid but does not release it all at once. A round brush with a good "belly" is ideal for this.
-
Drybrushing (drybrush): This is the ultimate technique for highlighting textures and edges at full speed. It's almost like cheating, but the good kind. If you want to become a master, check out my complete guide on the drybrushing technique for miniatures.
-
Highlighting (highlighting) and lining: This is where you need surgeon-level precision. A detail brush with a needle-sharp tip becomes your most valuable tool. The game is all about placing small touches of light on edges and the most exposed areas to make everything visually "pop".
-
Glazing (glazing): This is a slightly more advanced technique, perfect for creating super smooth and realistic color transitions. It can seem intimidating at first, but with well-thinned paint and the right brush, it's much easier than it looks. Pure delicacy!
As an interesting fact, some of these precision techniques have a fascinating history. In 18th-century Spain, under the reign of Charles III, miniature brushes were used to create stunning portraits on ivory. A style known as 'Stirling' or stippling became fashionable, which involved applying thick colors with tiny dots. Today, that legacy is very much alive: more than 70% of modelers in cities like Madrid and Barcelona use variations of stippling to achieve spectacular metallic finishes, as you can see in this article on the exquisiteness of miniature art.
How to Care for Your Brushes So They Last for Years
A good brush is an investment, and like any good investment, it needs to be nurtured to bear fruit for a long time. I say this from experience: caring for your miniature brushes is just as crucial as knowing how to apply a perfect glaze.
So please, do me a favor and don't be one of those people who leave their brushes head-down in the water jar. That, my friends, is an unforgivable crime in the world of modeling. An absolute sacrilege!
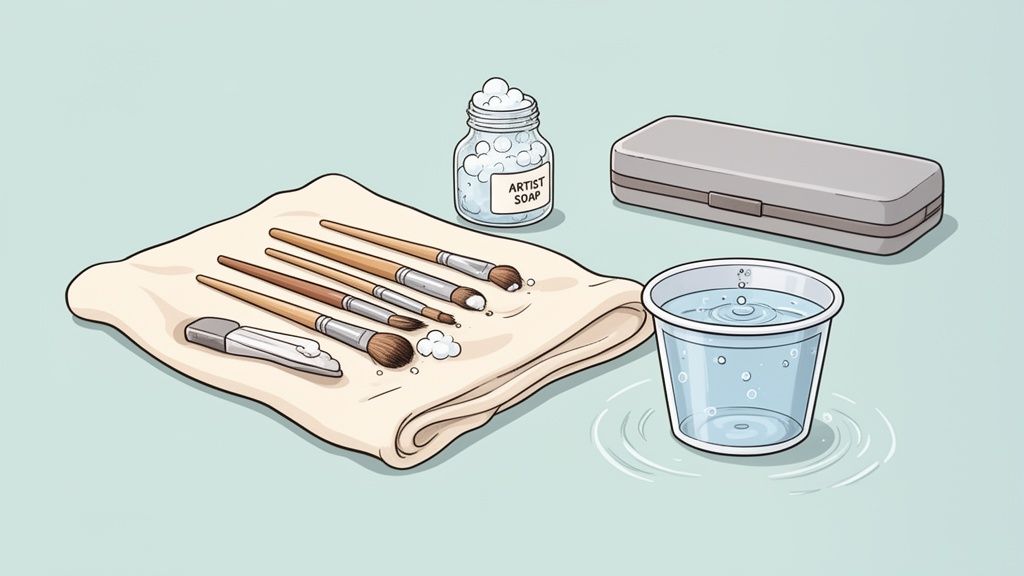
I'm going to share my maintenance ritual with you. It's the secret that has kept my Kolinsky sable brushes in impeccable condition for over five years. And trust me, they've seen a lot of action.
The number one public enemy of any brush is dried paint that builds up in the ferrule (the metal part that holds the bristles). When that happens, the bristles splay open like a wilting flower, and goodbye to that sharp tip we worked so hard to achieve.
The solution is simpler than it seems: an almost religious cleaning routine.
My cleaning and maintenance routine
At the end of each session, you just need to dedicate five minutes to your tools. It's not an indulgence — it's an investment to keep your favorite brushes bringing you joy for years to come.
- Cleaning on the go: While you paint, rinse the brush often in your pot of water. But be careful, don't scrub it against the bottom like you're scrubbing a pan. Treat it with care.
- Soap bath time: When you're done, grab a good artist's soap. Work up a lather in the palm of your hand, rubbing gently, until the lather comes out completely white. That way you make sure there isn't a single trace of pigment left.
- The finishing touch: With the brush still damp, use your fingertips to restore its original pointed shape. It's a gesture that makes all the difference between a brush and a perfect brush!
Golden tip: Create your own "death squad". Keep a handful of old or cheap brushes on hand that you don't mind sacrificing. Use them for the dirtiest tasks: mixing putties, applying textures, or getting stuck into adhesives. This way, your high-end brushes are only dedicated to what matters: painting.
If a tip has gone rogue and lost its shape, don't despair. You can try to "re-educate" it with a little brush conditioner. Last but not least: always store them horizontally or hung upside down.
And if you want to become a true maintenance master, I recommend you take a look at my specific guide on how to clean acrylic paint brushes.
FAQ: Frequently Asked Questions about Brushes for Miniatures
Let's clear up those questions you always ask me about brushes for miniatures. These are the usual suspects, the questions we've all asked when starting out (and sometimes, even afterwards). I've put together straight-to-the-point answers, so you always have a handy reference whenever you need it. Let's get into it!
Do I really need an expensive sable brush to get started?
Not at all! In fact, if you're just starting out, I'd recommend exactly the opposite. Don't get swept up in the marketing and start with a good set of synthetic brushes. Nowadays there are surprisingly high-quality options that will let you master all the basic techniques without breaking a sweat.
My golden tip: only invest in your first sable brush when you feel the synthetic brush is holding you back, when it's the tool that's limiting you, and not your own skill. A good synthetic will give you hundreds of hours of painting and let you make every mistake in the book without hurting your wallet.
How often should I deep clean my brushes?
There's no room for negotiation here: cleaning is sacred. The quick rinse with water while you paint has to be constant, almost a reflex, to prevent paint from drying in the bristles.
But the deep clean, the one with special artist's soap, I recommend doing it at the end of every session. And no, I'm not exaggerating. It's a ritual that won't take you more than five minutes and works like the best insurance policy for your brushes. This way you prevent dried paint from creeping into the ferrule, which is the number one reason tips splay open and end up looking like an old broom.
The tip of my brush has splayed, should I throw it in the bin?
Stay calm, there's no need to panic! Sometimes there's still hope. The first thing is to give it a thorough clean with soap, without holding back. Then, with the hairs still damp, apply a little brush conditioner or, if you're feeling brave, the old saliva trick (it works like a charm, trust me) and shape the tip with your fingers.
Let it dry like that, in that position, and cross your fingers. Many times, this "reset" works like magic and the tip goes back to its original shape. If it's a very cheap synthetic brush and the trick doesn't work, then yes, the time has come to retire it for dirtier tasks like mixing paints or applying textures.
Can I use the same brushes for acrylics and oils?
Technically, you can. But if you ask me, I'll tell you with every ounce of energy I have: don't even think about it! The solvents you need to clean oils or enamels are like acid to the fibres of your delicate acrylic brushes. You'll destroy them.
My golden rule, and it's unbreakable: one set of brushes is exclusively for water-based paints (acrylics) and another, completely different and separate one, for solvent-based paints (oils, enamels). Mixing them is a death sentence for your tools. Don't do it.
Conclusion
And that's a wrap, artists. I hope that after this marathon of hairs, ferrules and handles, you now have a clearer idea than ever of how to choose your arsenal of brushes for miniatures.
As we've seen, this isn't about buying the most expensive brush in the store, but about understanding what you need for each situation. It's like having a toolbox: you wouldn't use a hammer to tighten a screw, would you? It's exactly the same here.
My final piece of advice, if you're going to take one thing away from this, is: don't overcomplicate things at the start. Grab a good set of synthetic brushes, use them fearlessly, and learn how to clean and care for your materials. Once you've mastered the basics, then, and only then, treat yourself. Buy that Kolinsky sable brush that's been giving you puppy eyes and use it for those jaw-dropping details that make all the difference.
Your printed figures, the ones you've produced with such care, deserve a paint job to match. Now you have the treasure map. All that's left is to start painting and show us those works of art we know you're going to create!
Join the Mr Resin community on Telegram!
Tips, exclusive discounts and news before anyone else. The meeting point for 3D printing enthusiasts! 🤙
👉 Join the Telegram group