

The Elegoo Neptune 4 is a filament (FDM) 3D printer that has turned the market upside down. The reason? It offers a jaw-dropping printing speed, features you'd normally see in higher-end ranges (like Klipper firmware) and a user-friendliness that you'll truly appreciate, all at a price that makes you look at the tag twice. 🤑 It's the perfect machine for both beginners and experienced makers with plenty of miles under their belts who are looking for speed and quality without any hassle.
Is the Elegoo Neptune 4 the 3D printer you need? 🤔
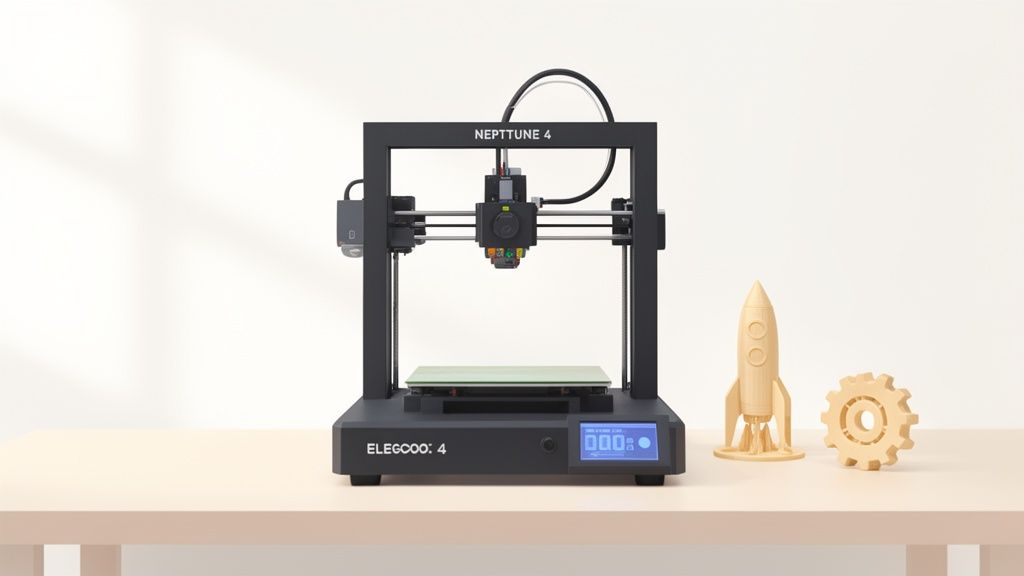
You've surely heard of it. The Elegoo Neptune 4 is on everyone's lips in the maker world, and for good reason. 🤩 This printer hasn't come to play around — it's come to change the rules of the game in FDM 3D printing in Spain.
Imagine being able to combine a speed that seems like science fiction with a print quality you wouldn't expect for the price. Well, that's exactly what the Neptune 4 delivers, no more, no less. It has found that sweet spot, that almost perfect balance that makes it an incredibly attractive option for a whole lot of people. If you're into the hobby, you'll probably also want to take a look at our selection of resin for 3D printers.
Who is this printer for 🎯
It doesn't matter whether you're taking your first steps in this hobby or you're already a veteran with a workshop that looks like a laboratory. This printer has something for you, for sure.
- If you're a beginner: Forget about those initial worries. It assembles in no time and its automatic levelling system will save you more than a few headaches. It's one of the best ways to get off to a good start. And if you want to browse more options, check out our guide to the best 3D printers for beginners.
- If you already have experience: The speed and power that Klipper gives you will allow you to take your output to the next level. You'll be able to produce prototypes much faster and tackle more technical materials without breaking the bank.
A bridge between two worlds 🌉
Many of the makers who use the Elegoo Neptune 4 for rapid prototyping also have a resin printer in their workshop. And why is that? Because each technology shines in its own way. While the Neptune 4 is a beast for creating large, functional parts at full speed, resin gives you a level of detail that FDM simply cannot achieve.
Think of the Neptune 4 as your workhorse for structures and large parts, and a resin printer for miniatures, jewellery, or anything that needs an exquisite level of definition.
It's a winning combination. That's why many of our customers complete their arsenal with a great selection of ABS-like resin to get the best of both worlds. In this article, we're going to break down every detail of the Neptune 4 so you can find out whether it's the missing piece of your creative puzzle. Let's get into it!
What does the Neptune 4 have that others don't? ✨
Sure, everyone says the Elegoo Neptune 4 is fast and a bestseller, but what's really behind that success? Let's dig into the guts of the machine to break down its key features — the ones that truly change your day-to-day life as a maker. 🛠️
It's not just about a list of technical data, but about understanding how each component and each feature translates into faster prints, better finishes, and above all, fewer headaches.
Klipper: the brain that changed everything 🧠
The crown jewel, without a doubt, is that the Neptune 4 comes with Klipper firmware installed straight from the factory. If you're new to this, think of Klipper as fitting a Formula 1 engine into a street car. Traditional 3D printers used firmware like Marlin, which works fine, but Klipper is a whole different story.
The magic of Klipper lies in how it distributes the workload. It uses the power of an external processor (in this case, built into the printer itself) to handle all the complex calculations. This frees up the mainboard to focus exclusively on what it does best: moving the motors with pinpoint precision. The result? Smoother movements and speeds that were once the stuff of science fiction.
Thanks to Klipper, the Neptune 4 can reach theoretical peak speeds of up to 500 mm/s. While that number is impressive, Elegoo itself recommends printing at around 250 mm/s to achieve the perfect balance between speed and quality. And trust me, 250 mm/s is already blazing fast compared to 3D printers from just a couple of years ago. 🚀
Direct Drive extruder to handle any filament 💪
Another one of its standout features is the dual-gear direct drive extruder, or Direct Drive. Unlike Bowden systems, where the motor pushes the filament through a long tube, here the motor sits right on top of the print head.
Having it so close gives you much more precise control over how the material flows. This is a massive advantage, especially if you enjoy experimenting with flexible filaments like TPU. With the Neptune 4, printing rubbery or elastic parts is a breeze! 🍞
Automatic bed leveling so you never have to struggle again 🙌
Who hasn't wrestled with bed leveling? Manually calibrating a 3D printer with a sheet of paper is probably one of the most frustrating things in the maker world. The Elegoo Neptune 4 spares you that ordeal with its high-precision 121-point automatic bed leveling system.
The machine, all on its own, measures the bed height across an 11x11 point grid and creates a digital map of even the tiniest imperfections. Then, while printing, it continuously compensates for those small variations so that the first layer sticks to the build plate like its life depends on it.
In fact, the Elegoo Neptune 4 has been something of a small revolution in the FDM market since its launch in 2023, and this system is one of the reasons why. Its ability to reduce first-layer failures by up to 90% has made it a favorite among hobbyists and workshops alike. If you want to find out more about its impact, you can find more information about Neptune 4 ratings at specialized stores.
Elegoo Neptune 4 vs the competition 📊
To give you a clear picture of why this 3D printer has been such a game-changer, let's put it head to head with its direct competitors and with more traditional FDM printers. That way you'll understand just how big a leap it represents.
A quick comparison of the key features that define the Neptune 4 against other popular 3D printers in its price range, showing where it truly stands out.
| Feature | Elegoo Neptune 4 | Typical Competitor (e.g. Anycubic Kobra 2) | Traditional FDM 3D Printer |
|---|---|---|---|
| Firmware | Klipper (pre-installed) | Klipper or modified Marlin | Marlin |
| Rec. Speed | 250 mm/s | 150-300 mm/s | 50-60 mm/s |
| Extruder | Direct Drive | Direct Drive | Bowden or basic Direct Drive |
| Leveling | Automatic (121 points) | Automatic (25-49 points) | Manual or semi-automatic |
| Cooling | High-performance dual fans | Standard cooling | Single layer fan |
As you can see, the Neptune 4 doesn't just compete — it sets a new standard in features that were previously reserved for much more expensive machines. It's the combination of all these improvements that makes it such a well-rounded option. 🏆
Your first print in under an hour ⏱️
Let's get to it! The best part of breaking in a new 3D printer is, without a doubt, seeing it in action as soon as possible. With the Elegoo Neptune 4, that first part is much closer than you think. Forget the idea that you need to be an engineer or wade through endless manuals to get started. This guide is here to walk you through everything, from opening the box to having your first print ready in under an hour. 🚀
Assembling the Neptune 4 is surprisingly easy, and I say that from experience. Elegoo has done a great job pre-assembling the trickiest parts, so your job is basically to attach the gantry to the base with a few screws and connect a couple of cables that, thankfully, are clearly labeled. Zero drama.
Assembly and initial setup ✅
Once you have the structure ready — which shouldn't take more than 20 minutes — it's time to finish off the prep work. These are small details, but they make all the difference.
- Check the belt tension: Touch the belts on the X and Y axes. They shouldn't be loose like chewing gum or tight as a rock. The sweet spot is when you pinch them and they produce a dry "twang," similar to a guitar string. This is vital to avoid warped prints.
- Check the eccentric nuts: Move the print head and the bed along their axes. The movement should be smooth, with no wobbling. If you notice any play, tighten the eccentric nuts slightly until everything feels firm but fluid.
- Power on and welcome to Klipper: The big moment! When you turn it on, you'll be greeted by the Klipper interface. It might seem a little intimidating at first, but trust me, it's very intuitive. The touchscreen is highly responsive and guides you through the first steps.
A golden tip: Before touching anything related to leveling, make sure the 3D printer is on a stable, level surface. It sounds obvious, but a wobbly table is the perfect recipe for disaster.
The Auto-Leveling Ritual 🙏
This is where the Elegoo Neptune 4 sets itself apart from old-school 3D printers. The leveling process is almost 100% automatic and will save you a ton of frustration and headaches.
From the screen, find the auto-leveling option. The first thing the 3D printer will do is heat the nozzle and the bed to typical PLA temperatures. It will then start probing the bed at its 121 points to create a perfect digital map of the entire surface.
The only "manual" step is adjusting the famous Z-Offset. The machine will ask you to use a sheet of paper (a classic A4 sheet works great) to calibrate the exact distance between the nozzle and the bed. Slowly lower the nozzle while sliding the paper underneath, until you feel a slight resistance. And that's it! The 3D printer will save this setting and you won't have to worry about it again.
To make it clearer, this is the workflow we follow to make everything run smoothly with the Neptune 4.
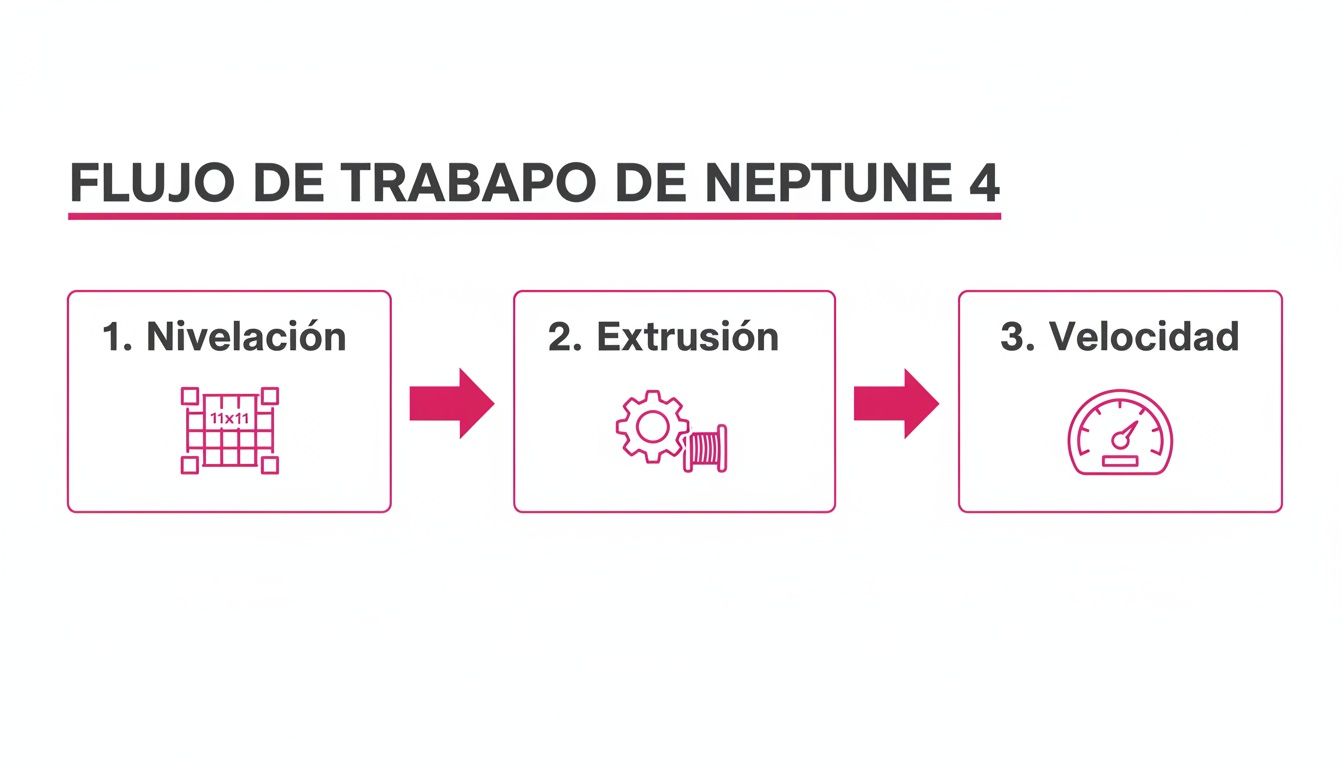
As you can see, everything centers on precise leveling and consistent extrusion. That is the foundation for getting the most out of the speeds that Klipper allows you to reach.
Load the Filament and Launch the Benchy! ⛵
You're almost there. With the 3D printer leveled, all that's left is to load the filament. From the menu, heat the nozzle to around 210 °C. Insert the end of the filament into the extruder and push gently until you see the molten plastic starting to come out of the nozzle tip.
Now you're ready for the ultimate test. On the SD card that comes with the 3D printer you'll find a file ready to print: the legendary little boat "3DBenchy". Find it, hit print, and simply enjoy the magic. This small test is the perfect tell-tale to know if you've done all the steps correctly and will give you an idea of the quality you can expect.
Want to know how to interpret the results and what to look for in your first 3D prints? Take a look at our complete guide on the subject.
Watching your first Benchy come off the bed of your Elegoo Neptune 4 flawlessly is an incredible feeling. Now you have the power to bring almost anything you can think of to life!
How to Choose the Perfect Filament for Your Projects 🎨
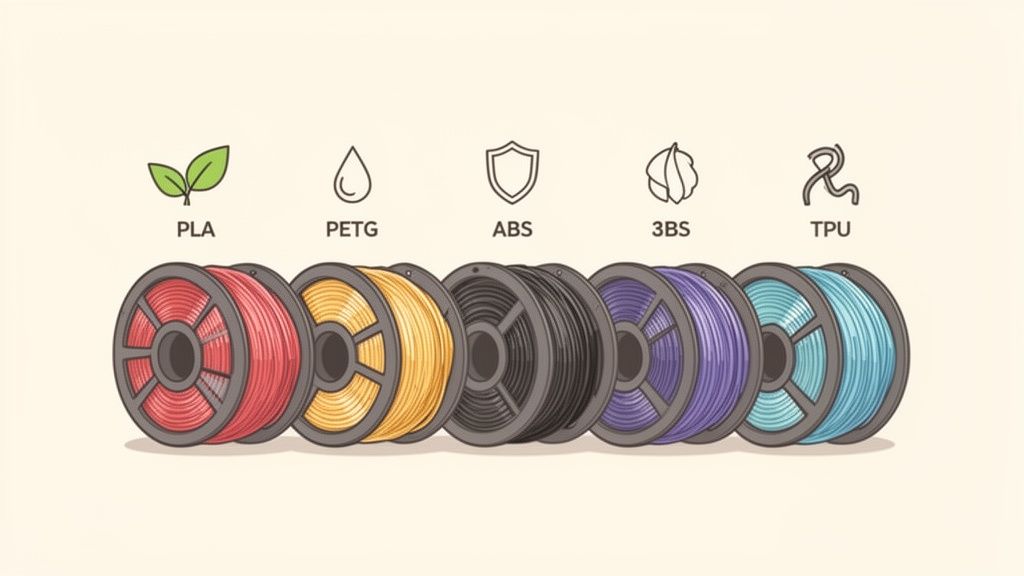
The Elegoo Neptune 4 is an incredibly capable machine, but let's be honest: the real magic of 3D printing lies in the material you choose. Filament is your 3D printer's "ink," and each type has its own personality, its quirks, and its superpowers.
Choosing the right one not only determines whether your part comes out well or ends up in the bin, but whether it fulfills the function you designed it for. Let's run through the most common materials so you know which one to load into the Neptune 4 depending on what you have in mind.
PLA: The All-Rounder Perfect for Getting Started 👍
PLA (polylactic acid) is, without a doubt, the king of filaments and the daily bread of any maker. It's very easy to print, doesn't smell bad, and comes in a range of colors that many paint brands would envy.
It's the perfect material for figures, prototypes that just need to look good, and any part that won't be subject to much stress or heat.
- Ideal for: Decorative parts, scale models, quick prototypes, and toys.
- Recommended settings on the Neptune 4: Set the nozzle to 210-220 °C and the heated bed to 60 °C. Layer cooling fan at full blast — don't forget that.
- Our recommendation: The Mr Resin PLA+ Filament is a safe bet. It flows beautifully and sticks to the bed like a dream, which is key to getting the most out of the Neptune 4's high speeds.
PETG: the balance between strength and ease of use 💪
Need your parts to handle a bit more wear and tear? PETG is your new best friend. It's tougher than PLA, handles impacts and heat better, and on top of that has a slight flexibility that makes it very durable.
Think of PETG as PLA's buff cousin. It's the material you'd choose for a phone mount that won't snap, a hinge that actually works, or an organizer for your tools.
ABS and TPU: for the most demanding projects 🔥
This is where we enter the territory of makers who have rolled up their sleeves more than once. ABS is famous for its heat resistance and toughness; to give you an idea, it's the plastic used in LEGO pieces. Its weak point is that it tends to warp (warping) if you don't keep the temperature well under control, which makes having an enclosed 3D printer almost essential.
On the other hand, TPU is a flexible material, like rubber. Thanks to the Neptune 4's Direct Drive extruder, printing with it is much easier than it used to be. It's great for phone cases, gaskets that need to seal, or even soles for printed shoes.
The Neptune 4 has proven to handle these more technical materials brilliantly. In fact, many verified reviews highlight that warping with ABS is almost non-existent even at high temperatures. This is partly thanks to its CNC aluminum chassis, which gives it the stability it needs for the intense accelerations it handles.
If you want to go deeper and get a masterclass on materials, don't miss our complete guide on how to choose filament for your 3D printer. There we break down each one in detail.
Choosing the right filament is a crucial step. Don't hold back — experiment away, every new spool is a world of creative possibilities!
How to keep your 3D printer always in top shape 🔧
A 3D printer that prints non-stop and produces perfect parts is a happy 3D printer. 💖 And to keep your Elegoo Neptune 4 running like new for a long time, you don't need to be an engineer. All it takes is a simple maintenance routine.
Think of it like caring for a plant: with a little regular attention, everything runs better. A few simple habits will save you a ton of failed prints and the frustration that every maker knows all too well.
The maintenance routine your Neptune 4 will thank you for 📝
Don't let the word "routine" put you off — it's nothing out of the ordinary. By dedicating just a few minutes every certain number of prints, you'll keep your machine going strong for a long time. Here's a handy cheat sheet so you don't miss a thing:
- Clean the nozzle: A good habit is to run a brass brush over the nozzle while it's hot right after finishing a print. This removes any filament residue that gets left behind and prevents it from staining your next piece.
- Check the belts: Every now and then, press the X and Y axis belts. They need to be firm, like a guitar string, but not overdone. If they're loose, your circles will look like eggs. If they're too tight, the motors will suffer. The trick is in the balance!
- Lubricate the axes: The rods along which the axes slide need a little care to keep movement smooth. A little lithium grease or machine oil every 50-100 hours of printing and you're good to go.
A golden tip: Good maintenance isn't about fixing things when they break, it's about preventing them from breaking in the first place. It's a minimal time investment that will save you frustration, time, and material.
How to fix the most common problems 😅
Even with the most well-maintained 3D printer, things can sometimes go wrong. Don't panic! Most typical FDM 3D printing failures have a fairly simple solution. Here's how to get yourself out of trouble.
Filament jams (the dreaded Clogging)
Public enemy number one for any maker. You'll know you're dealing with it if the 3D printer moves as normal but not a single drop of plastic comes out of the nozzle.
Quick fix: Heat the hotend to around 10-15 °C above what you normally use for that filament. Carefully push the filament through by hand to see if anything comes out. If that doesn't work, use the thin needle that comes with the 3D printer to clear the tip from below.
Threads and "angel hair" (Stringing)
Those thin strands of plastic that look like a cobweb between the parts of your piece. They're a classic, especially with materials like PETG.
Fix: This problem can almost always be solved by adjusting the retraction settings in your slicer (whether you use Cura or PrusaSlicer). Try increasing the retraction distance and speed slightly. Lowering the printing temperature a little tends to help too.
The first layer won't stick
There's nothing more frustrating than watching your piece peel off the bed halfway through a print.
Fix: First things first: cleanliness. Wipe the bed down with an isopropyl alcohol cloth to remove any trace of grease. Then check that your Z-Offset is properly calibrated. If the nozzle is too far from the bed, the filament falls into the void and won't stick. And as a last resort, a spritz of hairspray never fails.
With these tips in your arsenal, you have everything you need to make your Elegoo Neptune 4 a reliable workhorse ready for any project. Print with confidence!
Frequently asked questions about the Elegoo Neptune 4
Still got a question nagging at you? Don't worry, that's perfectly normal. Here we answer the most common queries so you have all the information you need to make a decision with complete confidence. Let's get into it. 🤔
Is it a good 3D printer for beginners?
Without a doubt. The Elegoo Neptune 4 is a fantastic option if you're taking your first steps in this world. Assembly is a breeze and the guide it comes with explains everything in a super clear way.
But the best part is that you can forget about one of the biggest headaches for beginners: leveling. Its automatic 121-point system does it for you. It's designed so you can successfully print parts from day one. It's a great way to start off on the right foot! 🦶
What software do I use to prepare my designs?
The 3D printer already comes with a version of Cura, the most popular slicer, but optimized by Elegoo themselves. It includes ready-to-use profiles, so it's the most straightforward way to get printing without overcomplicating things.
That said, you're not locked into it. The Neptune 4 works brilliantly with other powerful slicers like PrusaSlicer or OrcaSlicer. If you later feel like experimenting with finer settings, you have complete freedom to do so.
Does the 500 mm/s speed affect quality?
That figure of 500 mm/s is the theoretical maximum speed it can reach. It's impressive, yes, but in practice you won't always want to run at full throttle. Think of it like a car's speedometer: just because it reads 260 km/h doesn't mean you're always going to drive at that speed.
To find the sweet spot between blazing speed and spectacular detail, our recommendation is to print at around 250 mm/s. At that speed, the quality the Elegoo Neptune 4 delivers is incredible, and you'll still be producing parts much, much faster than with old-school 3D printers.
Do I need an enclosure to print ABS?
Yes, and we strongly recommend it. For printing with more technical materials like ABS, which is very sensitive to temperature changes and air drafts, an enclosure is practically a requirement.
An enclosure maintains a stable temperature around the part and saves you from such common problems as warping (when the corners lift and peel away from the bed). It also helps contain the fumes that ABS releases and improves the safety of the process.
Conclusion:
If you've made it this far, you already know the answer: the Elegoo Neptune 4 is not just another run-of-the-mill 3D printer. It has rightfully earned its place among the best 3D printers thanks to its blistering speed, a user-friendliness that is truly appreciated, and a price-to-quality ratio that puts the competition in a tough spot. ⚡ It is, without a doubt, the perfect tool to bring your ideas to life, whether you're taking your first steps or you've already logged plenty of miles in the world of 3D printing.
Now that you know what this machine is capable of, the next step is feeding it with the best material. We invite you to visit the Mr Resin store and browse our complete catalogue of filaments for 3D printing. We've handpicked them one by one so you can get the most out of your 3D printer.
And if you'd like to surround yourself with other makers just as passionate as you, don't miss out! Join our Telegram group. There we share discounts, coupons, news and exclusive events you won't find anywhere else. It's the perfect spot to learn and share tips. 👨🚀
And don't forget to subscribe to our Newsletter to access exclusive discounts, coupons and offers delivered straight to your inbox. It's the best way to never miss a thing!
✨Happy Printing! 🚀