

Hey, what's up, makers! I'm Mr. Resin. If you move around in the wargaming world, you've surely been amazed, like me, by the genuine plague of skeleton armies that has invaded gaming tables lately.
In this guide I'm going to break down why these minis are the new obsession in Warhammer and, most importantly, how to build your own undead legion. We'll cover everything from where to find the best designs (the official ones and the alternatives that are seriously cool) to how to 3D print them with jaw-dropping quality.
And a little preview: with the resins for 3D printers we have in the store, you'll be able to raise armies with an insane level of detail without your wallet breaking a sweat. Come on, let's bring those bones to life!
Why skeleton armies are absolutely crushing it
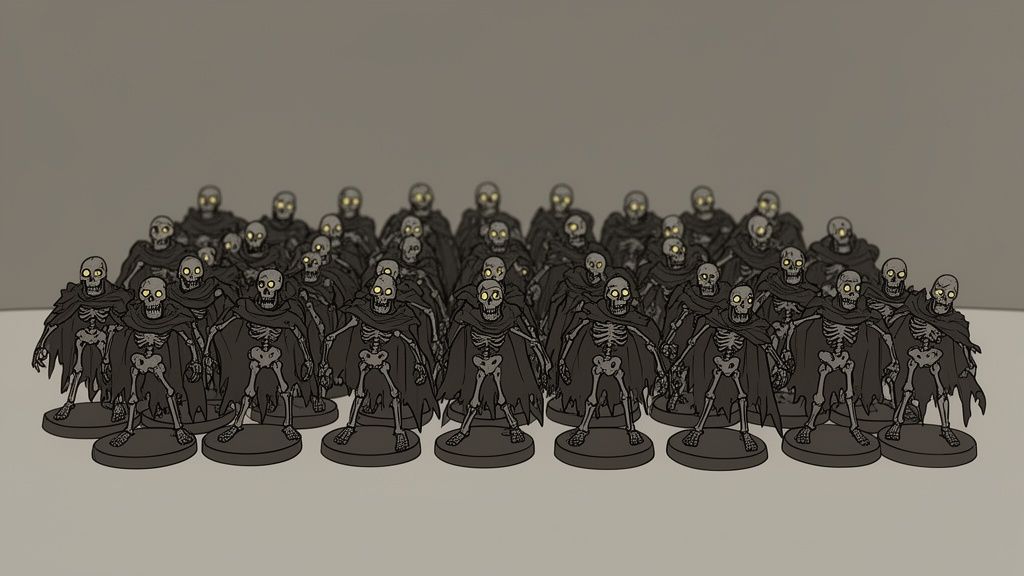
If you've stepped into a wargaming store or been to a tournament lately, you've seen it: Warhammer skeletons are absolutely everywhere. It looks like a plague of undead has conquered the tables, and it's no coincidence. From what I've seen, this "bone fever" is the perfect storm of three factors: they're a beast on the tabletop, an absolute joy to customize, and thanks to 3D printing, building a massive army comes out dirt cheap.
Before, if you wanted a skeleton horde, you had to mortgage your house buying box after box of official minis. It was insane. Now, with a decent resin printer and the right STL files, you can raise an entire legion for next to nothing. This has been a game-changer that has opened the door for way more players to enjoy that feeling of deploying a tide of bone across the table.
The golden age of the undead
Let it be known that the resurgence of skeletons is no passing trend. In my experience, this has a very solid foundation in the current game meta. With the latest rule tweaks, these units have become super efficient thanks to their low point cost. The most competitive players know it and are getting incredible mileage out of them, something that really shows at tournaments.
This competitive boom has sent the community's creativity through the roof. The run-of-the-mill skeleton just won't cut it anymore; now we want skeletal warriors, lich mages, bone abominations... The possibilities are insane! And this is exactly where 3D printing flexes its muscles. If you're into the topic, you can check out my guide on Warhammer 40K miniatures, where I go much deeper into this universe.
Buy or print your skeletons? The great dilemma
Here's the crux of the matter, the question we've all asked ourselves at some point in our lives as hobbyists: do I open my wallet and buy the official boxes, or do I go all in and start printing my own legion of Warhammer skeletons?
From personal experience, I'll tell you there's no right answer. Each path has its own magic. On one hand, there's that almost ritual feeling of opening a Games Workshop box, that smell of fresh plastic and knowing the quality is going to be top-notch. But on the other, there's total freedom and the thrill of creating an entire army with your own hands.
For me, the decision comes down to three things: the cash, the desire to customize, and above all, what kind of hobby you want to live. This isn't about good and bad, it's about choosing your own adventure.
Let's break it all down so you can see which option suits you best based on your budget, your playstyle, and how much you enjoy tinkering.
The harsh reality of costs
Let's be clear: building an army of skeletons that strike fear into your opponents across the gaming table can get seriously expensive if you only use official minis. The cost per figure is considerably higher and, if your plan is to deploy a horde of 100 or more warriors, the calculator starts to smoke.
And this is where 3D printing enters through the front door. Once you have the printer, the cost of making a miniature is, honestly, laughable. We're talking cents per skeleton, depending on the size and the resin you use.
This gives you incredible freedom to experiment without the fear of ruining a mini that cost you an arm and a leg. And most importantly: it lets you build massive armies for a fraction of the price.
To give you an idea, the initial investment of a 4K resin printer (which already delivers brutal quality) pays for itself with what you'd spend on just a few boxes from a large army. If you want to see the numbers in detail, I recommend taking a look at my article on whether 3D printing your own miniatures is worth it, where we break it all down.
Customization and quality: let the party begin
The second major point in favor of 3D printing is infinite customization. On sites like MyMiniFactory or Cults3D there is an incredible community of artists creating alternative STL files for skeletons that will blow your mind. You can find everything:
- Unique styles: From Egyptian-inspired skeletons to cyber-undead, all the way to warriors in Viking armor. Whatever you can think of!
- Dynamic poses: No more having your army look like a regiment of clones. You can print the same unit in dozens of different poses to make it look like a living (or undead, you know what I mean) entity.
- Custom weaponry: Want an entire regiment carrying halberds? Or do you prefer longbows? With the right STL files, you make the rules.
And when it comes to quality, today's resin printers have reached a point where, for me, they compete head to head with injection-molded plastic, especially when we're talking about horde armies. With a good setup, the details are incredibly fine and, once painted, I can assure you that on the gaming table it's almost impossible to tell a printed skeleton from an official one.
How to choose the perfect 3D resin for your miniatures
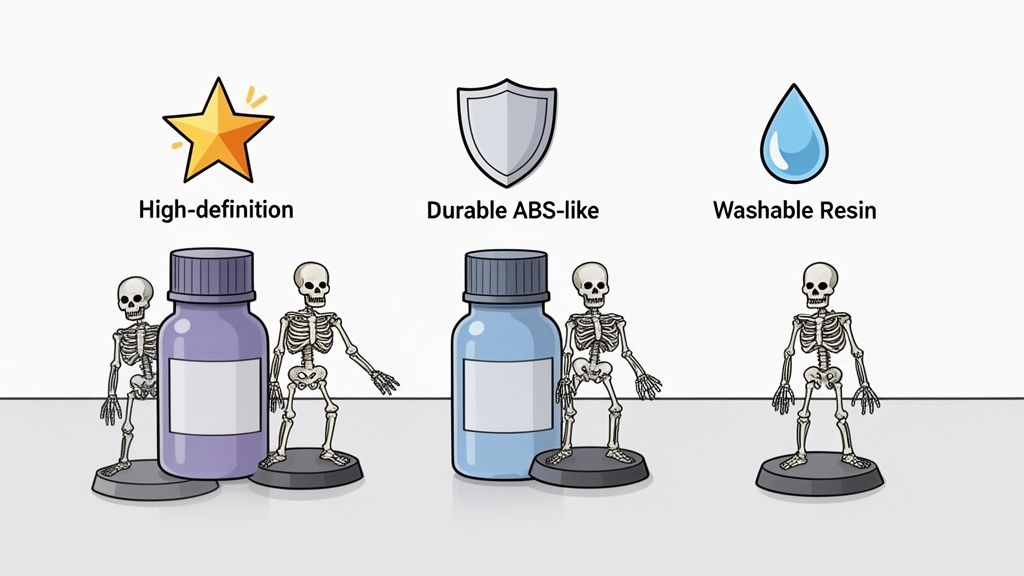
Alright! If you've already taken the plunge into 3D printing, congratulations! Now comes one of the decisions that generates the most doubt: choosing the ideal resin so your Warhammer skeletons don't end up looking like a pile of melted bones. And I'm not joking, the resin you choose is just as crucial as the printer itself.
Believe me, I've tried everything, and I can assure you that each type of resin has its moment of glory in the workshop. For miniatures as fine and full of nooks and crannies as a skeleton, just anything won't do. You need a material that can capture every last crack in the skull, every rib, and those tiny little finger bones.
That's why, in this section, I'm going to walk you through my favorite resins for this type of mini. Don't worry, I've got you covered! By the time you finish reading, you'll know exactly which bottle to grab off the shelf.
8K High-Definition Resin: the queen of detail
If what you're after is a level of detail that leaves your mates speechless, high-definition resin is your best pick. This is, without a doubt, my first choice when I want a character or a skeletal champion to shine in the display case.
What I love about these resins is their ultra-low viscosity and incredible pigmentation. In plain English, this means the UV light from your 3D printer cures ultra-thin layers with surgical precision. The result? The smallest details — like teeth, engravings on a shield, or cracks in a tibia — come out perfect.
- Main advantage: Incredible precision for capturing the tiniest details.
- Ideal for: Skeletal heroes, lich wizards, and any mini you want for display.
- Worth noting: They tend to be a little more brittle than others. Treat these minis with the care they deserve!
ABS-like Resin: the durable all-rounder
Now, if your plan is to print a horde of 50 warrior skeletons that are going to see a lot of action on the gaming table, you need something more robust. This is where ABS-like resin steps in and steals the show. These resins mimic the properties of ABS plastic, giving them a resistance and flexibility that standard resin can only dream of.
From experience, I can tell you this is essential for skeleton armies. Spears, swords, and thin arms are weak points that snap if you just look at them the wrong way when using a very brittle resin. With an ABS-like resin, your minis will hold up to transport, drops, and handling during the game like absolute champions.
When it comes to durability, Anycubic resins of this type are outstanding. I've seen lab tests showing them to be far more resistant than other 3D printing materials for miniatures.
Water-washable resin: the convenient option
And finally, the option that has become super popular for how convenient it is: water-washable resin. If the idea of handling isopropyl alcohol (IPA) feels like too much hassle, or you simply want a cleaner and faster washing process, this is your resin.
As you might expect, you can clean freshly printed pieces with tap water. But watch out! This does not make it less toxic. Always wear gloves and a mask, and don't forget to cure the dirty water in sunlight before disposing of it.
The great advantage is how easy it makes post-processing. For large skeleton armies, where you have to clean dozens of minis, the time you save and not having to buy alcohol is a major plus that's well worth keeping in mind.
To give you a clearer overview, here's a quick table to help you make up your mind.
Resin comparison for printing Warhammer skeletons
A table to help you choose the ideal resin based on your priorities: detail, durability, or ease of washing.
| Resin Type | Ideal for... | Main Advantage | Mr Resin's Recommendation |
|---|---|---|---|
| High Definition (8K) | Heroes, champions and display minis. | Maximum possible detail, super sharp finishes. | For when every micron counts. The crown jewel! |
| ABS-Like | Troop units and armies for gaming. | High resistance to impacts and drops. | My choice for troops that are going to see real battle. |
| Water-Washable | Large projects or if you're looking for convenience. | Quick and easy washing, no alcohol needed. | If you're going to print an entire army, save yourself some time! |
I hope this table serves as a quick cheat sheet so you don't get lost. In the end, the best thing is to try them out and see which one adapts best to your way of working and how you're going to use your minis.
If you're taking your first steps and want to fully understand the differences between all the materials, I highly recommend taking a look at my article with the complete guide to resin for 3D printers. It'll clear up a ton of doubts for you!
Configuring your printer for perfect skeletons
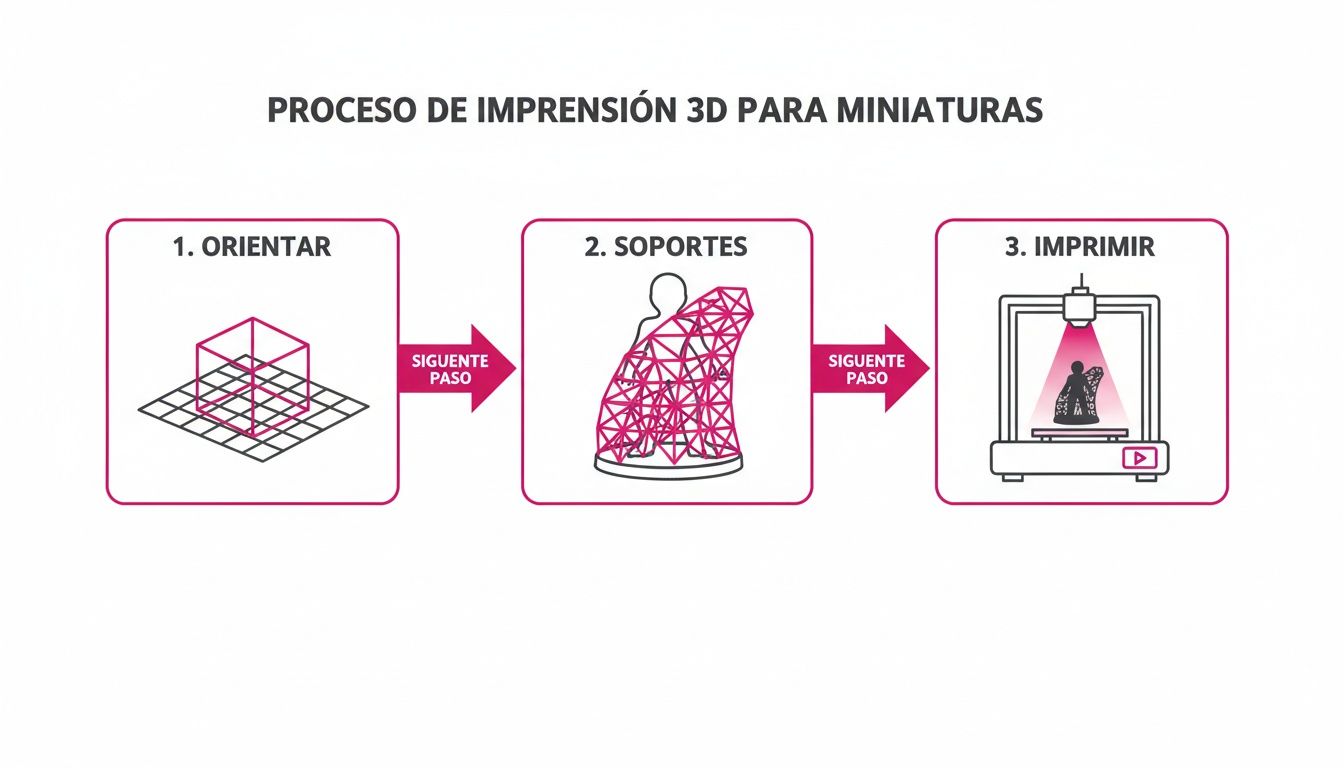
Right, we've reached the fun part. You've got your resin ready, so now it's time to roll up your sleeves and tell the printer how we want it to work to bring those Warhammer skeletons to life. And I'm telling you from experience, a skeleton is one of the trickiest minis you can print. They're all super thin parts, gaps and bones that a bad configuration turns into a blob of plastic.
Poorly placed supports and it's game over. You'll end up with horrible marks on the skull or the ribs, and post-processing turns into a nightmare of sandpaper and filler. But don't panic, that's what I'm here for. I'm going to share my tricks so your skeletons come out perfectly from the print bed, with supports that pop off with a simple "click".
Orientation: 90% of your skeleton's success
First things first, before you go crazy with supports, you need to think about how you're going to position the miniature in your slicer (whether that's Lychee, Chitubox or whichever one you use). I promise you, orientation is 90% of the success when printing such delicate figures.
My golden rule is to tilt the mini between 30 and 45 degrees backwards. Why? This allows you to hide most of the supports on the back, the bottom and under the arms. These are areas that, once the mini is on its base, nobody is ever going to see.
My top tip: I try to make sure the most visible and impressive parts (the skull, the chest, the shield details) always face upwards. This way I avoid supports touching those "prime areas" and save myself a ton of cleanup work afterwards.
Supports: thin as a pin, strong as an oak
Once the figure is oriented, the moment of truth arrives: supports. The game here is finding the perfect balance. You need them to be strong enough that the piece doesn't fall mid-print, but thin enough to remove without taking a chunk of detail with them.
These are the base settings I use for 28-32 mm skeletons:
- Support type: I almost always go with "Light" or "Slim" supports. Don't overcomplicate it.
- Tip Diameter: I work between 0.20 and 0.30 mm. If you go too thin, you risk them failing. If you go too thick, you'll leave a crater.
- Tip Penetration: 0.15 mm is usually more than enough. This grips the piece well without fusing to it.
- Density: Less is more. You don't need to cover the mini in supports like a porcupine. Place them strategically on "islands" (those points that start printing in mid-air) and in key areas that need to bear weight, like the base of the spine or under the weapons.
You'll know you've done a good job when, after curing the piece, you can remove the supports with your fingers or a fine pair of tweezers and hear that satisfying "click" without a single tiny bone snapping off. That's the goal!
And one final tip: don't be afraid to add a couple of medium or heavy supports at the base of the miniature or on the base itself. These don't touch any detail areas and make sure everything stays well anchored to the build plate. Better safe than sorry!
Quick painting techniques for your undead legion
Right, it's time to get your hands dirty! You now have your Warhammer skeletons fresh off the printer, clean as a whistle and ready for action. But of course, you look at that mountain of pale bone and a cold sweat hits you: "How am I supposed to paint a hundred of these without losing my mind?" Don't panic! That's exactly what I'm here for.
Painting a horde army is not the same as spending three months locked away. Forget about detailing every single rib one by one. With a couple of tricks up your sleeve, you can have an undead legion ready for battle in record time with results that will leave you speechless. Let's get into it!
Priming: the first step toward bony glory
Before the first drop of paint touches your minis, there is one sacred, non-negotiable step: priming. And no, it's not optional, mate. Priming is what prepares the surface so that the paint adheres properly and doesn't flake off at the first opportunity.
But it doesn't stop there. The color you choose for priming will completely set the tone for your skeletons.
- Black primer: This is the perfect option if you're going for a dark and gloomy finish. The shadows come built-in, so all you need to worry about is highlighting the raised areas. A proper shortcut!
- White or bone primer: Ideal if you want a brighter, cleaner result. Any colours you apply on top will pop much more. Personally, it's my favourite for skeletons, because it already gives you a killer base for bone.
- Zenithal priming: This is the star technique, my absolute favourite. The idea is to prime the entire miniature in black and then apply a very light coat of white or light grey primer from above only, as if sunlight were hitting it. The result is instant natural shading that does 80% of the work for you. Pure wizardry.
Contrast and Xpress Color: your new best friends
And here comes the big secret for painting horde armies at lightning speed: next-generation paints. I'm talking about Citadel's Contrast paints or Vallejo's Xpress Color. These wonders are designed to do the work of three layers (base, shade and first highlight) in a single pass.
The concept is brutally simple: you apply a generous coat over a light primer, and the paint finds its own way into the recesses to create shadows, while leaving a translucent base colour on the flat areas. It's brilliant! For painting bone, a shade like Dwarf Skin or Skeleton Horde from the Xpress Color range is, quite simply, perfect.
For those of us tackling massive armies, these paints are a game changer. They let you achieve spectacular bone finishes in very little time per miniature. If you want to stay up to date on how these tools are changing the hobby, check out this article on the latest news from the scene.
A pro tip! Don't be afraid to thin your Xpress Color paint slightly with its specific medium if you're going for a more subtle finish. Controlling the intensity is the key to mastering this technique like a pro.
Drybrushing: the finishing touch that changes everything
Once the Xpress Color layer is completely dry, it's time to make those bones creak with realism. And for that, nothing beats the drybrushing technique, a classic that never fails.
Grab an old brush with stiff bristles, load it with a small amount of a light bone-coloured paint (such as Vallejo Bone White) and wipe off almost all the paint on a piece of kitchen paper until the brush barely leaves a mark. Now, sweep it quickly and lightly across the entire miniature. The tiny amount of paint that remains will deposit itself only on the edges and raised areas: skulls, ribs, knuckles…
With this simple step, the level of detail skyrockets and your skeletons go from looking "decent" to looking "absolutely stunning!" To finish things off, add a few colour details: paint the shields in rusted metal, the leather straps and a spot of bright colour in the eyes. And that's it! You've got a skeleton ready for battle in no time at all. Now, multiply that by a hundred!
Creating themed bases for an unforgettable army
I'll tell you from experience: a stunning miniature with hours of paintwork can be completely let down by a dull, lifeless base. Don't make that mistake! The base isn't just a piece of plastic to keep the model from falling over; it's part of the story, it's the glue that unifies your army and elevates it from "cool" to "absolutely legendary".
Let's give our Warhammer skeletons the scenery they deserve. Forget the typical black or the same old green grass. Here we're going to create small scenes that shout where these undead come from and why you should fear them. And trust me, it's much easier and more fun than you think.
Simple ideas for themed bases
First things first: what story do you want to tell? Did your skeletons just crawl out of their graves in a forgotten graveyard? Do they patrol the ruins of a dusty dungeon? Or maybe they're advancing across a cursed desert? Every idea is a whole world of materials and colors.
To get you off to a good start, here are my three favorite themes for skeleton armies. They're a classic and, best of all, super easy to pull off:
- The classic graveyard: The foolproof option. A little dirt, a tombstone 3D printed (or made from a piece of foam board, no shame in that) and voilà! Add some dry static grass and a few pigments for a dusty touch, and the result is a solid ten out of ten.
- Dungeon floor: Perfect for D&D armies, Warhammer Quest, or if you're just into the underground vibe. Grab a thin sheet of cork, break it into irregular pieces and glue them down. It'll look like cracked stone flooring. Paint it in grey tones, give the cracks a good dark wash and you'll be blown away by how great it looks.
- Bony desert: How about a horde of skeletons rising from the sands of time? A little texture paste with fine sand, a skull from some spare mini you had lying around, a few tufts of dry grass and you've already got a scene worthy of a movie.
A little secret: the base should complement the mini, not steal the show. Play with contrasts. If your skeleton is light bone-colored, a nice dark base will make it stand out enormously.
Materials and techniques to bring them to life
You don't need to spend a fortune on modelling materials. You'd be surprised what you can achieve with a handful of things you almost certainly have at home or that are super cheap. My basing box is basically a junk drawer full of "just in cases" that have saved my neck more times than I can count.
To start with, here's what I use in 90% of my projects:
- Acrylic texture paste: This is the foundation of everything, literally. Brands like Vallejo have earth, sand, and mud pastes that are an absolute joy to work with. Apply it with an old spatula, let it dry and you've already got a textured surface ready to paint.
- Cork and slate: Cork from a noticeboard, broken off in pinches, is perfect for simulating rocks or flagstones. And aquarium slate, if you break it up carefully, gives you incredibly realistic rock chips with a weight that adds stability to the miniature.
- Sand and small stones: A classic that never fails. A bit of white glue, sprinkle some beach sand (nice and clean and dry!) or hobby sand, and you're done.
- 3D printed goodies: This is where our 3D printer becomes the star of the show. Small tombstones, skulls, broken bones, chunks of wall... you can print little details that catapult your bases into a whole different league.
Once you have the texture ready, painting is a piece of cake. Primer, a base color, a generous wash to define all the shadows (an Agrax Earthshade or similar is liquid gold for this) and to finish, a very light drybrush with a pale color to highlight the edges. Done! An incredible base in under 15 minutes.
Frequently asked questions about Warhammer skeletons and 3D printing
To wrap up this guide, let's tackle those questions that always come in through the community. If you still have something on your mind after this, you know I'm just a message away! 🤙
Is it legal to print Warhammer skeletons?
Let's get straight to the million-dollar question. The quick answer is a resounding "it depends."
Let's be clear: copying and distributing designs that are direct replicas of Games Workshop's work is illegal. Full stop. Their artists put in an enormous amount of work and that deserves to be respected. Don't go down that road — not only will it cause you problems, it's just not cool.
Now, the world of proxies (alternative models) is a different story. This is where the 3D printing community truly shines. We're talking about original designs, created from scratch by independent artists. If you use them for your private games without selling them, you're operating in a fairly safe grey area. Support these creators and give your army a unique touch!
Which resin 3D printer do you recommend for beginners?
Rather than telling you "buy this one" — technology moves fast and today's top pick is tomorrow's old news — I'd rather give you the key things to look for so you can choose wisely. For printing skeletons with jaw-dropping detail, my advice is to go with nothing less than a 4K resolution 3D printer.
Right now, 8K 3D printers are getting more and more affordable and will give you a massive quality jump on the smallest details. Also look for a good print volume so you can batch several minis at once, and a brand with a strong community behind it, like Anycubic or Elegoo. Having a community behind you will save you more than once when it comes to profiles and troubleshooting.
How do I keep skeleton weapons from breaking?
Ah, the eternal drama of spears and swords that snap just from looking at them! The secret, my friend, lies in the resin. For those super thin and delicate pieces, you need a material that can hold its own.
That's why my recommendation is to go all in on an ABS-like resin. Its impact resistance is infinitely superior to that of standard resins. It's the difference between a warrior and a pile of tiny bones!
Another veteran tip: keep an eye on your curing. If you overdo the light exposure, the piece becomes super hard but also super brittle. It's better to cure just enough so it's solid, while still keeping that slight bit of flexibility that will protect it from a silly tumble off the table.
Can I use a filament printer for skeletons?
You can. But if you're asking me, for 28–32 mm miniatures, my honest answer is: don't even think about it.
A filament printer (FDM) is like drawing with a thick marker. No matter how fine you set the nozzle, you will never achieve the level of detail of a resin 3D printer (SLA/DLP), which is like drawing with a fine-tipped mechanical pencil.
All those details that make a skeleton look amazing — the thin bones, the teeth, the cracks in the skull — will be lost or come out as a blur. For the definition your undead legion deserves, resin is, without a doubt, the queen of the dance.
Conclusion:
There you have it, maker! You now have everything you need to know to raise your own legion of Warhammer skeletons from scratch. We've covered why they're so awesome, how to choose the perfect resin so they can take a beating, and even my tricks for painting them at lightning speed.
My final advice is to go for it, experiment! Try resins, play with supports and, above all, have fun painting. 3D printing has given us incredible freedom, so take advantage of it to create a unique army that is 100% yours.
Now, what are you waiting for to bring those bones to life? Head over to the store to get your arsenal of photopolymer resins and let's get printing! 🔥
Join the Mr Resin community on Telegram!
Tips, exclusive discounts and news before anyone else. The meeting point for 3D printing enthusiasts! 🤙
👉 Join the Telegram group