

The X-Wing miniatures are much more than simple plastic pieces; they are the gateway to a universe of tactical combat that brings the most epic space battles from Star Wars directly to your table. This is not just a board game. It is a hobby that blends pure strategy, customization, and the pleasure of collecting and painting ships as iconic as the X-Wing, the TIE Fighter, or the legendary Millennium Falcon. 🚀
A universe of strategy on your table
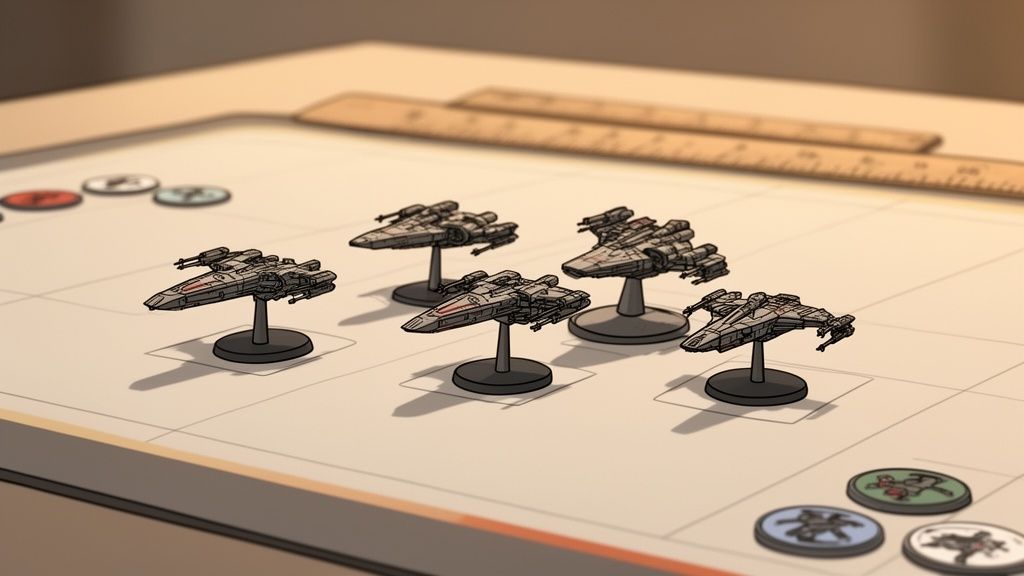
Star Wars: X-Wing is a game where two or more players face off in breathtaking space duels. Each player builds their squadron, choosing ships, pilots, and upgrades, then launches into battle using a rules system that is easy to learn but incredibly deep.
The heart of the game is its innovative movement planning system. Each player secretly chooses a maneuver for each of their ships, creating brutal tension. You have to anticipate, read your opponent, and think several turns ahead. Will they charge head-on or try to flank you? Is that asteroid field good cover or a deadly trap? Every decision counts. 💥
Scale and detail matter
The official X-Wing miniatures come pre-painted with a jaw-dropping level of detail, all at an approximate scale of 1/270. This not only makes them look spectacular on the table, but also turns them into genuine collector's pieces for any fan of the saga.
What truly hooks you about X-Wing is the community. 🫂 It is not just about moving ships across a mat; it is about sharing strategies, marveling at other players' paints, and feeling the adrenaline of a tournament surrounded by people who share your same passion.
A community that keeps growing in Spain
In Spain, the game has created a super active and dedicated community. Since its release, players have organized themselves into leagues, tournaments, and local groups to share the hobby. A key meeting point is the Escuadrón Pícaro forum, which has become the epicenter of the Spanish-speaking community.
This forum has already accumulated more than 148,000 messages, and its events section, with more than 2,000 threads, is living proof of the incredible competitive scene we have in the country. If you want to dive straight in, head over to their official forum.
For many, customization is the key. They are not satisfied with the miniatures that come in the box; they want their fleet to be unique. And this is where resin 3D printing comes into play, opening up a world of possibilities for creating custom ships or models that do not even officially exist. ✨
Official miniatures or 3D printing? The great dilemma
Every X-Wing miniatures commander faces this crossroads sooner or later: do I keep buying official expansions or do I dive into the world of 3D printing? 🤔 And trust me, this is not a decision that only affects your wallet; it is a step that can completely change the way you experience this hobby.
The official route is straightforward and direct. You get a pre-painted ship with top-tier quality and ready for battle. It is the ideal option if you just want to play without any fuss and you enjoy the feel of collecting the original boxes and components.
But of course, costs escalate quickly. Building a powerful collection requires a serious investment, and that is before even mentioning those discontinued ships that fetch crazy prices on the second-hand market. That is precisely where 3D printing comes into play as an incredibly powerful alternative. 💪
The real cost of your fleet
The initial investment for a resin 3D printer can be a little daunting, but it pays for itself much faster than it seems. It's like buying your own miniature spaceship factory.
- Official expansions: Each ship or pack has a fixed price. If you feel like testing a list with a swarm of TIEs, get your wallet ready 💸, because the costs multiply fast.
- 3D printing: Once you have the machine, the cost of each miniature is basically just the resin, which is minimal. You can print a full squadron for less than the price of a single official expansion.
The Spanish X-Wing market makes this very clear. The base game is affordable, around €40, but expansions range between €9 and over €100. This has led to almost 50% of wargame enthusiasts in Spain already using resin 3D printing to create proxies and dioramas, saving up to 70% compared to original models. If you want to dig deeper into this topic, you can take a look at this hobby price analysis.
The creative freedom of 3D printing
Beyond the money, the real magic of 3D printing is freedom. 🎨 Suddenly, a universe of possibilities opens up that the official collection simply cannot give you.
3D printing isn't just about saving money; it's about making the galaxy truly yours. It lets you try new things, customize your ships, and create a fleet that nobody else has — one that truly reflects your playing style.
You'll find ship designs from the Expanded Universe (Legends), tuned-up versions of iconic fighters, or you can even create your own models. That out-of-print ship that's impossible to find? Now you can print it. Want to test a list before spending money on the minis? Print some proxies and bring it to the table with no commitment. If you're curious about how this technology compares to others, we recommend reading our article on the differences between resin and filament printers.
This ability to customize and experiment is what has hooked so many players. It's not about completely replacing the official collection, but about taking it to the next level.
Your arsenal for high-definition 3D printing
For your X-Wing miniatures to go from a file on your computer to the stars of the gaming table, you need the right equipment. But don't worry, you don't need to set up an Imperial shipyard at home; with the right tools and materials, you'll be ready to build a fleet that will be the envy of the galaxy. 🛠️
The centerpiece of this whole operation is, without a doubt, a resin 3D printer. Unlike typical filament (FDM) printers, these machines use UV light to cure liquid resin layer by layer, achieving a level of detail that borders on the microscopic. It's the only way to capture every panel, every turret, and every little astromech droid that makes these ships so iconic.
Printers: resolution is the key
When you start looking for a printer, the spec that matters most is the LCD screen resolution. Models with 4K, 8K or even higher screens are your best allies on this mission. Think of it this way: higher resolution means smaller pixels, and smaller pixels translate into finer details and smoother surfaces. The result is that those pesky layer lines almost disappear entirely.
To start, a printer with a 4K screen will already give you spectacular results at X-Wing scale. Now, if you're a perfectionist and want maximum fidelity, or you have in mind printing larger ships with complex geometries, making the jump to 8K or beyond will make a difference that's noticeable to the naked eye. If you want to dive deeper into this topic, take a look at our guide on how to choose resin 3D printers, where we break down the best options on the market.
The resin: your galactic building material
Choosing the right resin is just as important as the printer itself. Not all resins are equal, and each type has its strengths for your X-Wing miniatures projects.
Here's a quick cheat sheet with the most common ones:
- Standard Resin: Ideal for your first tests and for getting the hang of the process. It's the most affordable and easiest to use, perfect for experimenting without breaking the bank.
- ABS-Like Resin: This is going to be your best friend for game ships! It's formulated to better withstand impacts and has a slight flexibility that makes it much more durable. Your ships will survive transport and the most intense battles on the table.
- Water-Washable Resin: It simplifies your life enormously when it comes to washing. Instead of using isopropyl alcohol (IPA), you can wash the pieces directly with tap water. Safer, cheaper, and less odour.
- High Definition Resin (8K/14K): Created to squeeze out every last drop of detail from high-resolution printers. Its low viscosity and fast reaction capture even the finest engraving on the 3D model.
Investing in a good quality resin, such as an ABS-Like or a high definition one, is the best way to ensure that your hours of printing and painting don't go to waste with a fragile ship that breaks at the first knock.
Consumables you can't do without
Finally, to keep your personal shipyard running at full capacity, you'll need some key consumables. Proper maintenance will save you a lot of headaches and money in the long run.
The FEP or ACF film is that transparent sheet that sits at the bottom of the resin vat. With use it wears down and can become cloudy, which directly affects print quality. Always keep a spare on hand. 🛡️ Similarly, a screen protector for your printer's LCD is a minimal investment that protects the most expensive component of the machine against resin spills. It is, literally, a life insurance policy for your equipment.
The step-by-step printing process for perfect miniatures
Right, you're now clear on the materials and equipment. Now it's time to get your hands dirty. Turning a simple digital file into one of your physical X-Wing miniatures is almost a ritual, but one that with a couple of attempts you'll master completely. Here I break it down step by step, from finding the model of your dreams to having the ship ready to enter combat. 🧼
To give you a quick idea, the basic workflow is this:
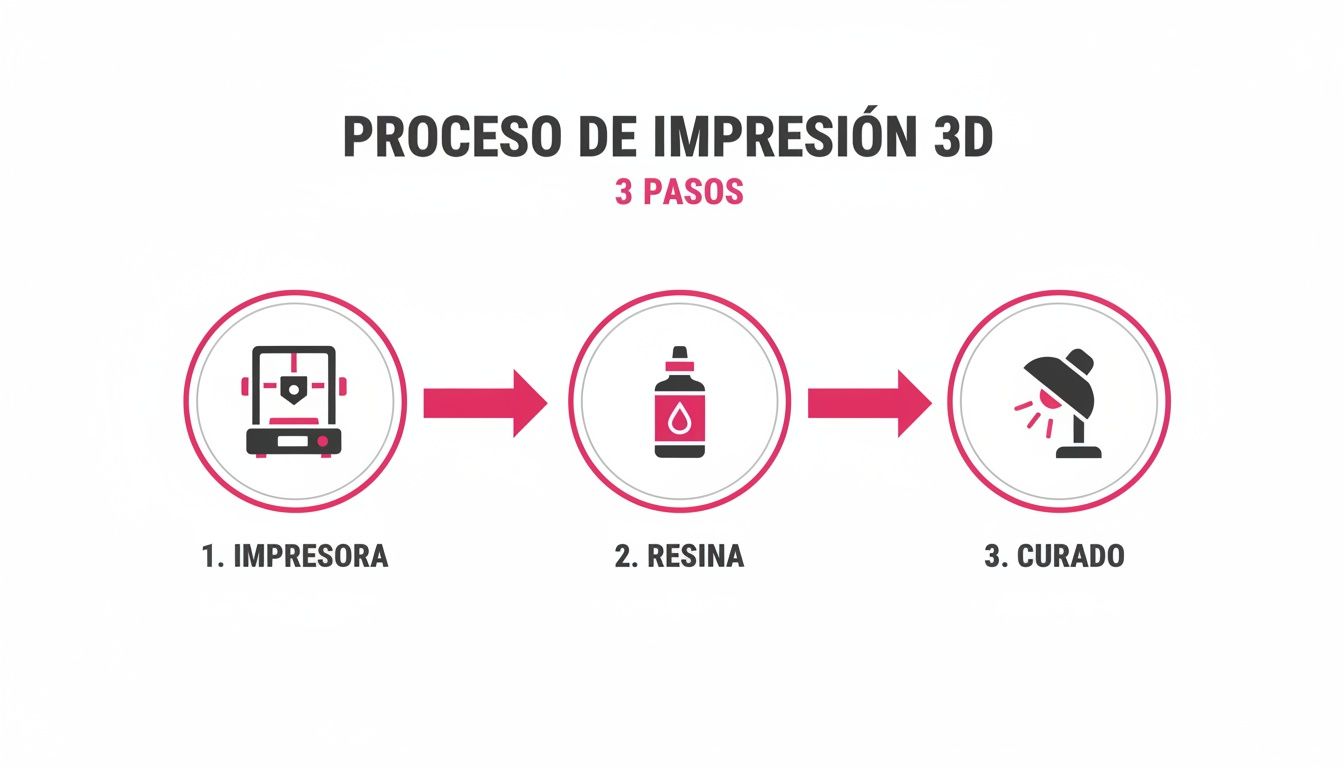
It all comes down to three key phases: the printing itself, the choice of resin (very important!) and post-processing with UV light. If you nail these three pillars, the quality of your miniature is guaranteed.
Phase 1: Where to Find the Best 3D Models
First things first: you need the STL file of the ship you want to bring into the real world. Luckily, the maker community is incredibly generous and there are genuine goldmines online packed with awesome models, a huge number of them free.
Platforms like Thingiverse, Cults3D or MyMiniFactory are essential stops. It's as simple as using the search bar with terms like "X-Wing" or "TIE Fighter" and getting ready to spend hours drooling over the results. 🤤
A veteran's tip: always pay attention to the photos of real prints that other users have uploaded. They'll give you a massive heads-up about the actual quality of the model and whether it's well designed for resin printing without any nasty surprises.
Phase 2: Preparing the File in Your Slicer
With the STL in your hands, the next step is "translating" it so your printer understands it. For that we use slicer software like Lychee Slicer or Chitubox. This program takes your 3D model and slices it into hundreds of ultra-thin layers, generating the instructions the machine will follow. Trust me, this is where the battle is won or lost.
Model orientation is crucial. If you print it flat, suction forces can ruin your piece. The general rule is to tilt the miniature, usually at around 45 degrees. This not only reduces stress, but helps keep support marks in less visible areas.
Supports are those small structures generated to stop the parts that "float" from collapsing. Think of them as temporary scaffolding. Place them intelligently, always in areas that won't be seen much, like the underside of the fuselage or the edges of the wings. That way, when you remove them, the marks will be almost invisible.
Phase 3: Washing and Cleaning the Piece
Beep, beep, beep! 🤖 The print is done. The miniature comes out of the printer sticky, covered in liquid resin that hasn't been cured. Time to give it a good bath. The traditional method is to use isopropyl alcohol (IPA), but water-washable resins have changed the game.
As the name suggests, you skip the hassle of alcohol. You can clean the piece directly under the tap or by submerging it in a container of water. It's safer, cheaper and less harsh on the environment. 💧
Take some time to thoroughly clean all the nooks and crannies with an old toothbrush or a soft brush. A good washing is the key to making details look crystal clear and ensuring primer and paints adhere properly.
Phase 4: Support Removal and Final UV Curing
With the ship clean and dry, the most delicate moment arrives: removing the supports. You'll need fine, sharp flush cutters to be precise.
Here's a trick that will save your life: submerge the piece in hot water (not boiling, be careful!) for one minute. The heat will soften the supports slightly and they'll come off with surprising ease, reducing to zero the risk of taking a chunk of your ship with them.
The final step is UV curing. This process fully hardens the resin, giving it its final strength. You can use a dedicated curing station (highly recommended) or, if the weather is good, leave it in the sun for a few hours. ☀️
And that's it! You now have in your hands a solid, detailed X-Wing miniature ready to receive its first coat of primer. ✨
Painting techniques for a professional squadron
A well-printed X-Wing miniature is just the canvas; the real magic begins with the brushes. 🎨 This is the moment to transform a piece of resin into a combat ship that looks like it just came out of a galactic battle. With the right techniques, your squadron won't just look awesome on the gaming table — it'll become a genuine display piece.
The first step, and I'd say the most important of all, is priming. Never, and I mean never ever, skip this process. Primer is a special coat that prepares the surface of the resin, creating a uniform and slightly porous base so that acrylic paint grips like there's no tomorrow. Without it, the paint would slide right off and chip with alarming ease.
For your X-Wing miniatures, a spray primer in black, grey, or white works perfectly. Black creates natural, deep shadows almost effortlessly, white makes whatever colours you apply on top really pop, and grey is a fantastic middle ground. You choose the effect you're going for!
Building the base colours
Once the primer is completely dry to the touch, it's time to apply the base colours. This is the main coat that will define your ship. Think light grey for an X-Wing, or that distinctive bluish-grey so characteristic of a TIE Fighter.
The key here is patience and technique. Thin your paints slightly with water so they flow better, and apply two or three thin coats instead of one thick one. This way you avoid covering up the fine details of the model and achieve a smooth, professional finish.
For this stage, paint ranges like Vallejo Game Color are fantastic for their high pigmentation and matte finish. If you're looking for even more control and speed, consider using an airbrush to apply base colours evenly across your entire fleet. If you want to learn how to get the most out of them, we invite you to read our guide on how to use Vallejo Game Color to paint your prints.
Bringing it to life with shading and highlights
With the base colours down, it's normal for your ship to look a little flat. Now it's time to add volume! To do that, we're going to lean on two fundamental techniques: washes (shades) and highlights.
- Washes to create depth: Washes are highly thinned paints, almost like an ink, that seep into every nook and panel line. By applying a dark wash (black or brown work great) over your ship, the shadows will define themselves naturally, creating an incredible depth effect. 😮
- Highlights to bring out volume: Next, using a fine brush and a colour just slightly lighter than your base colour, gently paint the edges and most exposed surfaces. This technique, known as "drybrushing" or "edge highlighting", simulates how light hits the ship, making all the details pop and bringing the miniature to life.
The art of ageing or weathering
Star Wars is a "used" universe, full of ships scarred by a thousand battles. Weathering is the set of techniques we use to simulate that wear and tear, and it's essential for making your X-Wing miniatures look truly authentic.
This is where your creativity can run wild. You can simulate chipped paint by applying small touches of metallic color with a small sponge, create smoke and burn effects near the engines with black pigments, or add laser impact marks with the tip of a fine brush.
Weathering not only adds realism, it tells a story. Every scratch and every oil stain speaks of the battles your ship has fought, turning each miniature into a unique piece with its own legend. 📜
Customization is key for many players. Official expansions like "Most Wanted" include generic ships such as the Z-95s, and it is known that in tournaments, up to 55% of lists use clone ships, which pushes players to want to stand out. This is where quality materials make the difference: you can use transparent resins for the cockpits and fine brushes like those from Artis Opus with metallic paints for those details that will make your fleet unmistakable. To find out more about these expansions, discover the details and complexity that inspire modelers. With these techniques, your ships will not only be tools for winning, but genuine works of art. ✨
Creating bases and dioramas for total immersion
A brilliantly painted X-Wing miniature is a joy, but a spectacular base is what turns it into a genuine work of art. The base of your miniature is not just a chunk of plastic to hold it in place; it is your opportunity to tell a story and create an atmosphere that pulls you straight into the Star Wars universe. 🪐
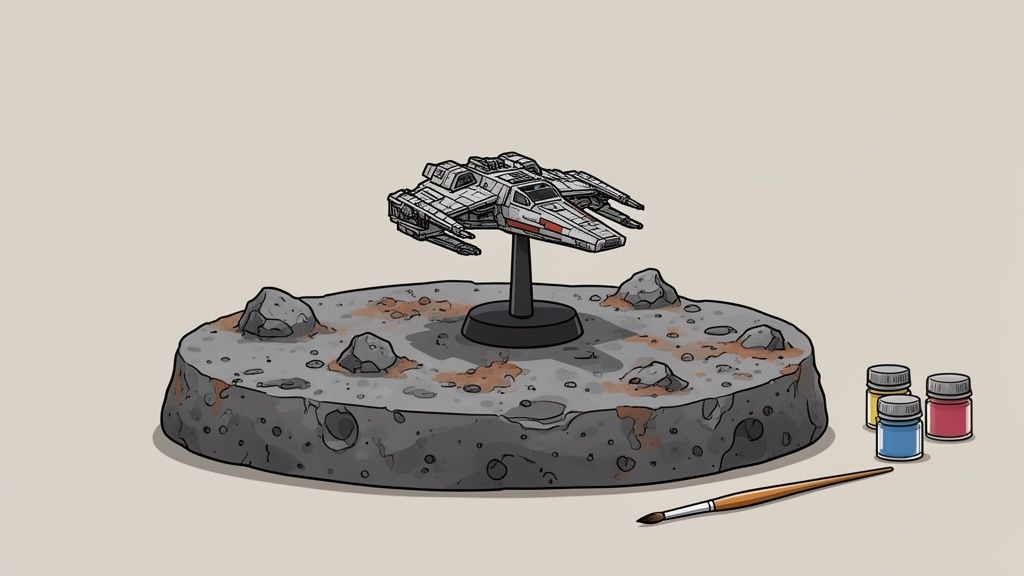
Move past those dull black plastic bases that come in the box. With a bit of skill and the right materials, you can transform every base into a small diorama that captures an epic moment. Can you imagine your X-Wing dodging an asteroid? Or your TIE Fighter patrolling over the metallic surface of the Death Star? The possibilities are, literally, endless.
Materials and techniques for out-of-this-galaxy basing
The art of decorating bases, which in the hobby world we call "basing", is a universe in itself. To start bringing your ideas to life you do not need an arsenal of expensive products. With a few well-chosen materials, the difference can be remarkable.
Here are some key materials to start experimenting with:
- Acrylic texture pastes: These are perfect for simulating terrain such as sand, mud, or the surface of a rocky planet. Apply them with a spatula, let them dry, and done! You already have a solid, textured base.
- Pigments: These fine powders are great for creating effects of dust, rust, or the dirt that accumulates in the recesses of a ship. Apply them dry with a brush for a subtle touch, or mix them with a fixative to create mud effects.
- Natural elements: Small stones, modeling sand, or cork pieces are incredibly convincing for simulating rocks and rubble.
- Electrostatic grass and tufts: If you want to represent planets with vegetation, like the jungles of Yavin 4, this is essential.
Creating a themed base not only improves the appearance of your X-Wing miniatures, it also helps you visually unify your entire squadron. It gives them a unique and cohesive identity on the gaming table.
Print your own scenic elements
But wait, resin 3D printing isn't just for ships. It's an incredible tool for creating your own scenography elements and taking your bases to the next level. Why settle for a generic rock when you can print a highly detailed asteroid field or the wreckage of a downed Star Destroyer? 💥
Platforms like Thingiverse or Cults3D are packed with free STL files you can use to fill your dioramas. From ship fragments and laser turrets to Imperial cargo containers, the details you can add are insane.
By combining traditional modelling techniques with 3D printing, you take customisation to another level. You're no longer just playing a game of X-Wing; you're recreating a movie scene right on your table, adding incredible dynamism to both your games and the way you showcase your fleet in the display case. ✨
Conclusion:
We've covered the entire process, from choosing your equipment to the most advanced painting techniques for your X-Wing miniatures. Resin 3D printing opens up a universe of customisation, allowing you to create a unique fleet that reflects your style as a commander. 🚀
Now it's your turn to take the controls. We encourage you to visit our online store at Mr Resin to find the best 3D printers, resins and paints to start your project. Turn your digital ideas into a real squadron and dominate the galaxy!
And remember, community is key!
- Subscribe to our Newsletter 📧 to access exclusive community discounts and offers, as well as coupons, news and exclusive events.
- Join our Telegram group here https://t.me/MrResin3D 👾 to access exclusive community discounts and offers, as well as coupons, news and exclusive events.
✨Happy Printing! 🚀