
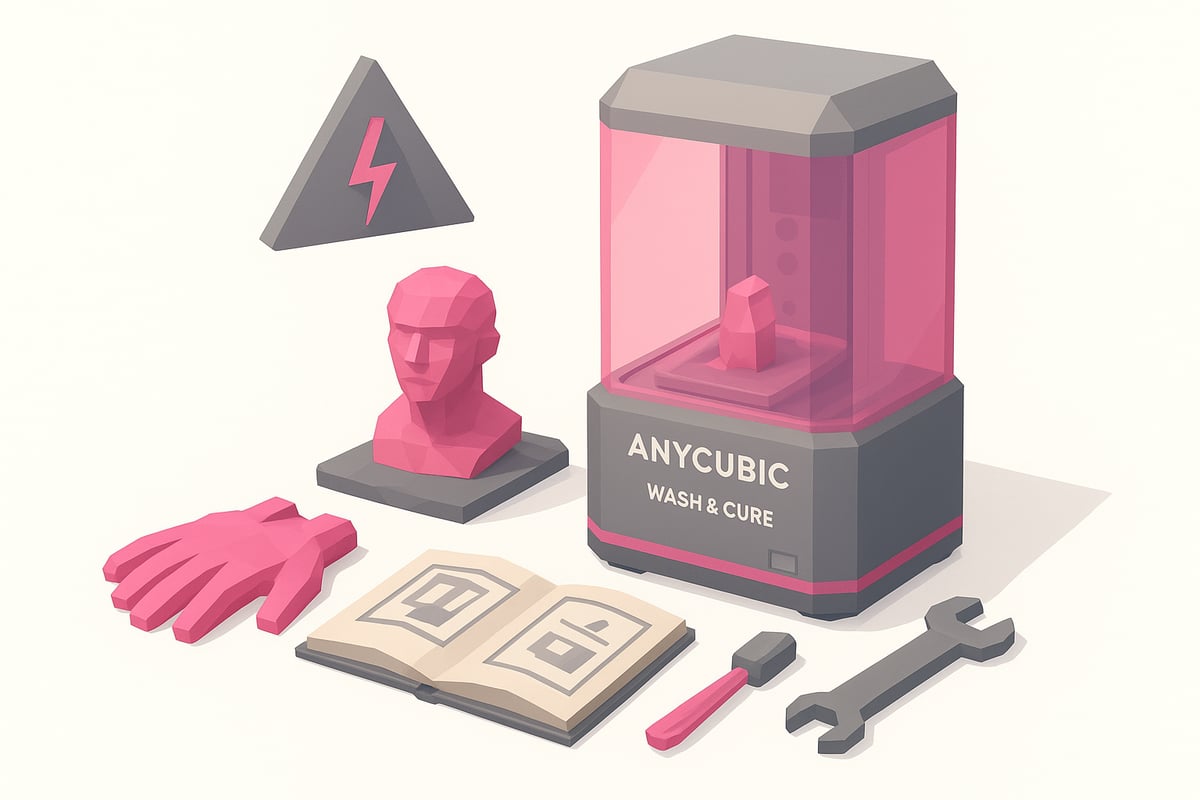
Can you imagine achieving resin prints so clean and shiny they look like they were made by a professional? With the Anycubic Wash and Cure, this dream is closer than ever! 🧲
In this complete 2025 guide you will discover how to master every detail of post-processing, from washing to curing, so your models look perfect at home. We will show you how the machine works, step by step, with expert tips, maintenance tricks, common mistakes and product recommendations.
Get ready for flawless prints and professional-level results. If you want to take your projects to the next level, don't miss this guide and join the community of makers who are already revolutionizing their workshop. Let's go!
What is Anycubic Wash and Cure and why is it essential in 2025?

Wondering what makes the Anycubic Wash and Cure so special? 🤔 This device combines two crucial post-processing steps for resin 3D printing: washing and curing. This way, you can clean and harden your models in a single machine, saving time and avoiding direct contact with chemicals.
In 2025, the Anycubic Wash and Cure has become essential for those seeking professional results at home. Its automated operation offers safety, eliminates common mistakes from manual washing and guarantees uniform finishes. In addition, its design is compatible with popular 3D printers such as the Anycubic Photon and Elegoo Mars, and works perfectly with standard resin and water-washable resin.
The main advantages include:
- Deep cleaning and homogeneous curing in minutes.
- Lower risk of accidents and damaged parts.
- Consistent results, ideal for detailed pieces.
According to 3D printing forums and communities, more than 90% of users report a significant improvement in final quality when using the Anycubic Wash and Cure. A classic visual example is comparing a dull and sticky miniature after manual washing, versus the shine and detail after using the machine.
In the latest models, such as the 3.0 version, the UV LEDs, energy efficiency and ease of cleaning have all been improved. If you are looking to optimise your prints by choosing compatible, quality resins, we recommend checking out the Anycubic Resins for 3D printers to get the most out of your machine.
Give the technology a chance and take your creations to the next level! 🦾

🧽 Anycubic Wash and Cure stations: Which one should you choose?
If you have a resin 3D printer, you know that post-processing is just as important as printing. Wash and cure stations make this task easier, save time and reduce mess. Anycubic offers three models in its Wash & Cure 3 range, designed for different volumes and needs. Here we present them to help you decide which one best suits your projects.
🚀 Anycubic Wash & Cure 3 (the basic and compact model)

-
Washing and curing in a single unit. Allows you to wash the piece in alcohol and then cure it without switching devices.
-
4 L cleaning bucket and double-layer PP basket, with adjustable heights (100 mm and 165 mm) to accommodate different platforms and save IPA.
-
Flexicure light system with a special lens that distributes ultraviolet light more evenly and improves curing uniformity compared to the previous model.
-
Simple controls with a rotary dial and touch buttons to adjust times between 1 and 30 minutes.
-
Working volumes: 3.18 L curing capacity and washing capacity of up to 165 × 100 × 180 mm (230 × 140 × 250 mm with platform).
-
Includes: machine, bucket and basket, Allen key, support bar, adapter, manual, curing turntable and flexible lamp.
Ideal for: users with small or medium 3D printers (up to around 7.3″ print area) looking for a compact, affordable unit with everything needed for standard-sized pieces.
🆙 Anycubic Wash & Cure 3 Plus (more volume and better detail)

-
Greater capacity: its washing basket increases by 13.4% compared to the previous model, up to 7.6 L, with a 12 L bucket and a curing area of 228 × 128 × 260 mm.
-
Double-layer platform and PP basket with adjustable heights of 150 mm and 250 mm to accommodate platforms from 7.6 to 10.6 inches, maximising IPA savings.
-
Uniform and powerful curing: light with a new bead arrangement and lens, plus the swan-neck Flexicure system that increases energy for better curing of complex areas.
-
Silent operation and intuitive controls with a knob and touch buttons. Time adjustment from 1 to 30 minutes and light boost mode.
-
Specifications: 9 L curing capacity, washing up to 230 × 140 × 260 mm (165 × 100 × 165 mm with platform), 3 L basket and 4 L container.
-
Includes: machine, bucket and basket, wrench set, bar, adapter, manual, curing plate and flexible lamp.
Ideal for: makers with 3D printers of 10″ or smaller who want deeper washing, uniform curing and an alcohol-saving mode without investing in the larger version.
💪 Anycubic Wash & Cure 3 Max (the beast for large printers)

-
Ultra-large 15.1 L capacity and washing volume of 305 × 165 × 300 mm, compatible with 3D printers up to 13″ and bulky parts.
-
Automatic "spray + immersion + cure" mode that adjusts between 13 and 42.5 minutes and completes the entire cycle without intervention.
-
Customizable: allows you to choose between washing mode (10–39.5 minutes) and curing mode (0.5–30 minutes) separately.
-
New dual cleaning system: combines alcohol soaking with spraying, reducing consumption and improving cleaning; the IPA tank holds 20 L.
-
Smart monitoring: sensors that alert you if the lid is open, if no liquid is entering, if there is a blockage or if voltage drops.
-
Touch panel and closed design, with intuitive controls. Equipped with 20 UV LEDs at 405 nm and 120 W of power.
-
Includes: machine, tray, detergent and waste drums, clean liquid drum, water tubes, wrench set, adapter and cable.
Ideal for: professionals or users who print large models, multiple parts or small batches. It is the most complete unit, with automatic functions and IPA savings, perfect for large-format 3D printers.
🤔 Which one should you choose?
-
Small spaces and miniatures: the Wash & Cure 3 covers all basic needs at an affordable price.
-
Medium 3D printers and regular volume: the Wash & Cure 3 Plus offers more capacity, improved curing and alcohol savings without taking up too much space.
-
Large projects and heavy users: the Wash & Cure 3 Max is the ultimate solution, capable of handling large models and cleaning more effectively thanks to the spray rinse mode.
🎯 Additional tips
-
Adjust times according to the type of resin. For washing, between 5 and 10 minutes is usually enough; for curing, it depends on the paint layer and size.
-
Fill your bucket with IPA up to the recommended mark and reuse it; the Max version lets you separate dirty and clean liquid to save even more.
-
Use gloves and a mask when handling resin and IPA, and work in a well-ventilated space.
How to use the Anycubic Wash and Cure step by step
Ready to get the most out of your Anycubic Wash and Cure? Here is a simple guide to make your resin prints look spectacular from the very first use. Follow these steps and you will see the difference in shine, detail and durability. 🛠️✨

Preparation and safety
Before turning on your Anycubic Wash and Cure, check that you have all the accessories: basket, rotating support, UV lid and the clean tank. Always wear nitrile gloves and a mask to avoid contact with resin and fumes.
Make sure you work in a well-ventilated space. Fill the tank with isopropyl alcohol up to the indicated mark (check compatible products at Alcohol and post-processing products). Verify that the model and the support fit properly in the basket to avoid jams.
Place absorbent paper nearby to clean up splashes and keep the machine away from heat sources or direct light. This helps you avoid accidents and take care of your equipment.
Washing process: step-by-step instructions

Place the freshly printed part in the basket or, if it is very large, use the rotating support of the Anycubic Wash and Cure. Choose the washing time according to the size and type of resin (usually between 2 and 6 minutes).
Select the washing mode and monitor the process in case there is a lot of foam or residue. The machine agitates the alcohol to clean evenly, saving time and effort compared to manual washing.
When finished, remove the part with tweezers and leave it to drain on absorbent paper. This prevents stains and sticky residue. You will notice how much more uniform and safe the cleaning is.
Curing process: how to achieve a perfect finish

Before curing, dry the piece completely. If any moisture remains, it can affect the curing of your Anycubic Wash and Cure. Place the piece on the rotating platform, adjust the curing time (2 to 8 minutes depending on the size), and make sure the UV light covers the entire surface.
Always use the UV cover to avoid light exposure and protect your eyes. The result: a piece with a glossy finish, defined details, and optimal hardness for handling or painting.
Tips for professional results
- Adjust the time and power according to the resin and the size of the piece.
- Use high-quality resins for better details.
- If the piece is very complex, perform an intermediate washing before curing.
- Keep your Anycubic Wash and Cure clean to avoid resin residue in future prints.
With these tips, you will achieve professional finishes and your machine will last much longer.
Expert tips to optimize use and extend service life
Want your Anycubic Wash and Cure to keep performing like it did on day one? Here are the best tricks to get the most out of it and avoid unpleasant surprises. 🧼✨

Key tips to keep your equipment like new
- Clean and empty the washing tank after each use to avoid sticky residue and odors.
- Regularly check that the UV LEDs are working correctly. If you notice curing power dropping, it may be time to replace them.
- Change the isopropyl alcohol when you see it turning cloudy or losing effectiveness. A useful tip: if pieces come out with residue, that is a sign you need to replace it.
- Store the Anycubic Wash and Cure in a dry place away from dust. Keep accessories organized and always use original replacement parts.
- Wear a mask and gloves to avoid contact with chemicals, and protect the environment by ventilating your work area.
Common mistakes and how to avoid them
One of the most frequently reported issues is pieces coming out sticky or with uneven curing. This usually happens from using dirty alcohol, weak LEDs, or incorrect curing times. To fix it:
- Thoroughly clean the tank and check the condition of the alcohol.
- Adjust the curing time according to the size of the piece.
- Consult the Anycubic Wash and Cure 3.0 instruction manual for specific maintenance and troubleshooting tips.
Community data and tricks
According to forums and user groups, 90% of problems are solved with regular cleaning and alcohol replacement. They also recommend not overloading the machine and running curing tests with small pieces before tackling larger jobs.
With these tips, your Anycubic Wash and Cure will deliver pro results for a long time. Remember, prevention is the key to always perfect prints!
Frequent mistakes and how to fix them
Have you ended up with sticky pieces after using the Anycubic Wash and Cure? 😅 You are not alone! Here is a quick guide to identifying and solving the most common problems that can arise with this equipment.
Most common errors
- Sticky or poorly cured parts: This happens if washing is insufficient or curing is too short. Make sure to wash the model for the recommended time and, before curing, dry the part thoroughly. Adjust the curing time according to the thickness or type of resin.
- Leaks or poor lid seal: If you notice spills, check the lid closure and gasket. Clean it and make sure there are no residues preventing a good seal.
- Platform rotation failure: This may be due to stuck parts or lack of lubrication. Clean the axes and check that there are no hardened resin remnants.
- Insufficient UV light or flickering: If curing is uneven, check the UV LEDs. If they flicker, it may be a sign of wear. Consult the Anycubic Wash and Cure User Manual for detailed instructions on replacement or diagnosis.
Practical tips
For small or highly detailed parts, use support and adjust washing and curing times to avoid overexposure or sticky residues.
If the machine gets stuck, turn it off, wait a few seconds and turn it back on. Periodic calibration helps prevent recurring errors.
Real example: A user reported sticky parts after several washes. Upon inspection, they discovered the alcohol was saturated and the curing time was too low. They replaced the alcohol and adjusted the timer, achieving clean and hard parts.
Have more questions? Join the community to share experiences and get help from other makers. 🛠️
Quick comparison: Anycubic Wash and Cure vs. other market solutions
Thinking about investing in a post-processing machine? 🤔 Here is a quick comparison between the most popular options in 2025. This way you can see the differences at a glance and decide which one best suits your needs.
| Model | Features | Approx. price | Results | Automation | Ease of use |
|---|---|---|---|---|---|
| Anycubic Wash and Cure 3 | Washes and cures | €120-€150 | ⭐⭐⭐⭐⭐ | Yes | Very easy |
| Elegoo Mercury Plus | Washes and cures | €110-€140 | ⭐⭐⭐⭐ | Yes | Easy |
| Manual solution (DIY) | Washing only | €30-€60 | ⭐⭐ | No | Requires practice |
The Anycubic Wash and Cure stands out for its full automation, professional finishes and ease of use. Users on forums particularly value the time savings and uniformity of curing. If you want more detailed information, I recommend reading this Anycubic Wash&Cure Review, which goes in depth on advantages and possible improvements.
Ultimately, the choice depends on your workflow and budget. If you are looking for consistent results and ease of use, the Anycubic option is the top pick in 2025.
Community and additional resources for Anycubic Wash and Cure users
Being part of the Anycubic Wash and Cure community is key to improving your results and resolving questions quickly. There are very active forums and groups where users share tips, compare prints and help each other overcome daily challenges.

Looking for resources, tutorials and personalised support? We recommend visiting the 3D printing community and resources section, where you will find step-by-step guides, videos and expert recommendations. Staying up to date with the latest firmware and software will always allow you to get the most out of your machine.
Don't forget to join the Mr Resin Telegram group to receive exclusive discounts, coupons and direct support from other users. Also, subscribe to the Newsletter and be the first to find out about offers, events and news from the 3D world. You will see real testimonials from advanced users who have optimised their process and now enjoy professional-quality finishes.
Join the community and take your Anycubic Wash and Cure experience to the next level!
Now that you know how to get the most out of your Anycubic Wash and Cure and have all the tips for flawless 3D printing, why not take your creations to the next level? At Mr Resin we have an enormous collection of resins for all tastes and projects, from super detailed miniatures to durable prototypes. If you want to experiment with different results, or are simply looking for the best quality for your machine, I invite you to take a look at all the options we have. You are sure to find exactly what you need!
View all 3D printing resins